Instant Pot Yogurt – Pot in Pot method (Homemade Dahi or Curd)
on Dec 02, 2020
This post may contain affiliate links. Please read our disclosure policy.
Instant Pot Yogurt? Why not! The Instant Pot already comes with a function specifically for yogurt. We gave it a shot, and after many many batches of testing, we figured it out – How to make super creamy and thick yogurt in the Instant Pot! Trust me, making yogurt in the Instant Pot is the most satisfying feeling in the world. It’s also so much cheaper than buying store bought yogurt and the possibilities are endless!
P.S. Yogurt is referred to as dahi or curds in India and we’ll be using these terms interchangeably in the article
When you do a quick search for Instant Pot Yogurt, you’ll mostly see yogurt being made in the inner pot. While that works, our issue with this method is that you make an enormous amount of yogurt that you may not be able to consume in 2-3 days (yogurt starts getting tart after this), and that you have to place the entire inner pot in the refrigerator for the yogurt to set properly. We do have a large fridge, but I don’t want to lose so much shelf space.
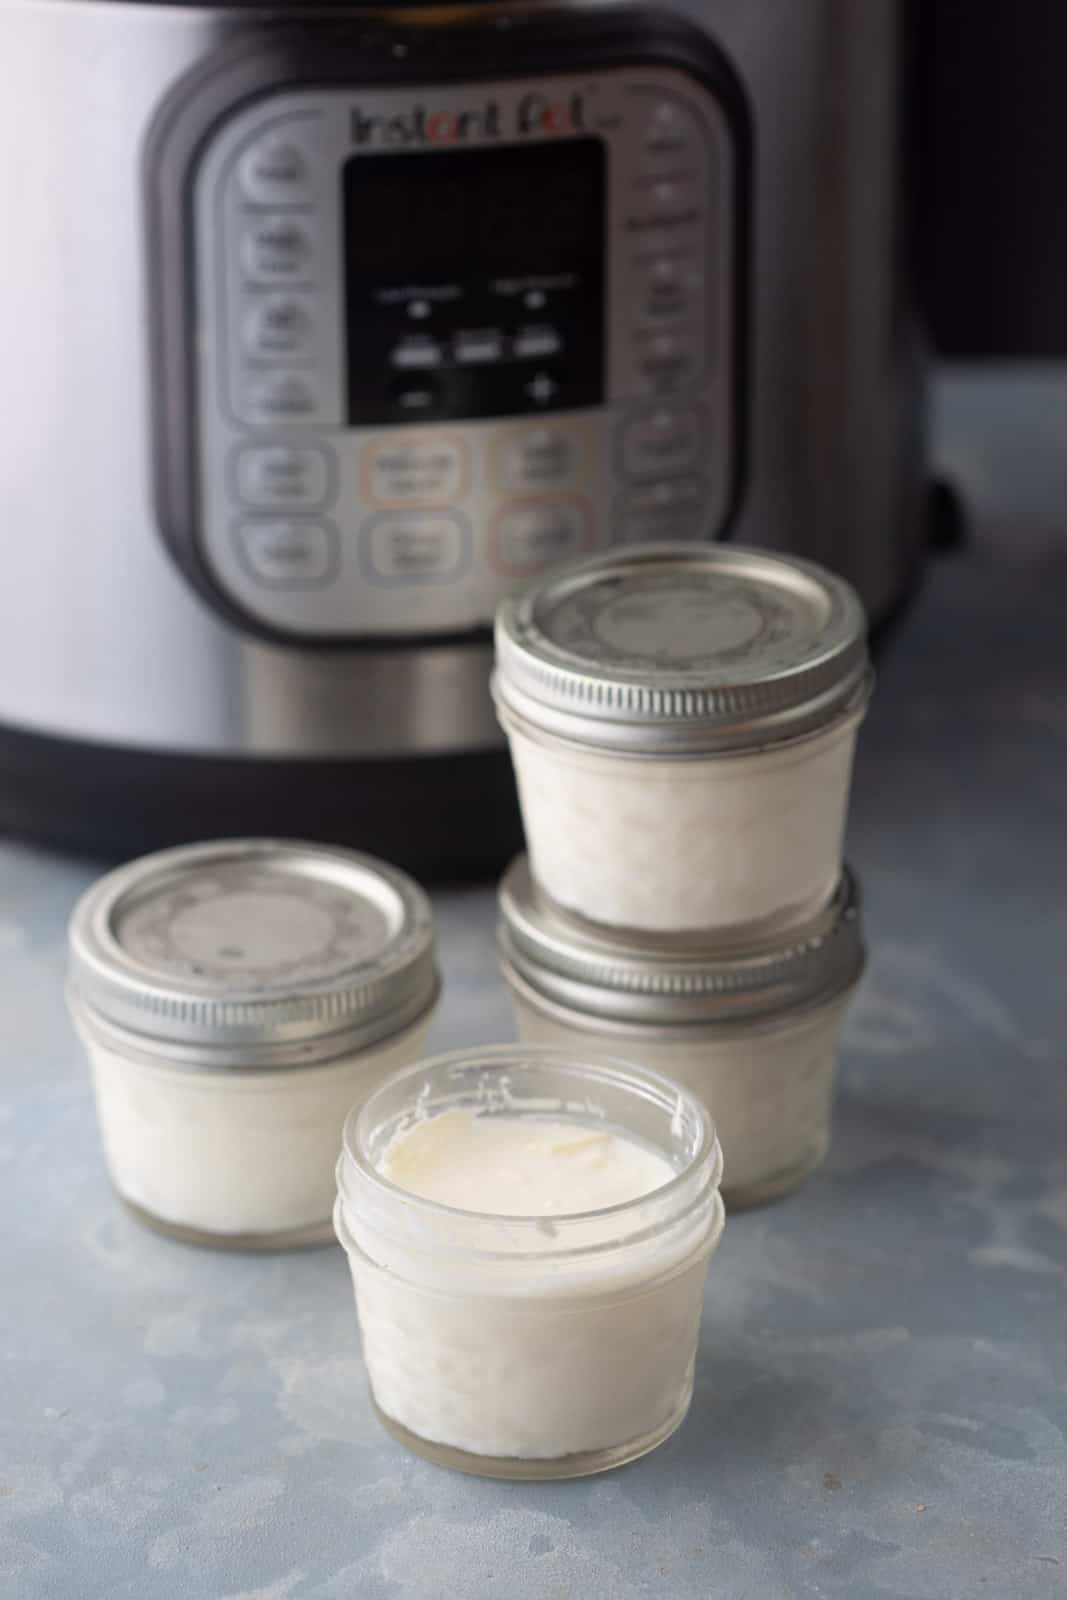
That’s why we prefer the pot-in-pot method to make Instant Pot Yogurt.
Table of Contents
- Advantages of Pot in Pot Method to make Yogurt in the Instant Pot
- Ingredients to make yogurt in your Instant Pot or any other electric pressure cooker:
- Perfect Condition to set Yogurt or Dahi
- How to set Instant Pot Yogurt
- How to store homemade yogurt?
- Amazing Ways to use your Instant Pot
- How to make Yogurt in the Instant Pot Recipe
- Dahi, curd or yogurt, what’s the difference?
- What is a starter culture?
- Why do we need a starter culture to set Yogurt?
Advantages of Pot in Pot Method to make Yogurt in the Instant Pot
- You can choose the quantity of yogurt based on the size of your family
- Easily make individual servings of yogurt if you like
- Cleaning is much easier compared to cleaning the inner pot
- It’s easier to refrigerate smaller bowls as compared to the large inner pot of the Instant Pot
All in all, we believe this is the best way to go while making yogurt in your Instant Pot.
Ingredients to make yogurt in your Instant Pot or any other electric pressure cooker:
- Milk: We tested this recipe with many varieties of milk – whole, 2%, non fat etc etc. but whole milk always gave us the best results. Buy full fat milk to make thick, creamy yogurt or dahi at home.
- Starter: Starter culture for milk is basically a milk product that is essentially rich in active lactic acid bacteria. This culture aids in souring of milk. The bacteria present in the culture changes lactose (milk sugar) into lactic acid which causes the milk to sour, in other words, ferment.
The theory behind why we need a starter culture is very simple. While preparing milk for making yogurt or dahi, the first step is to pasteurize the milk. That means, to heat milk to a certain temperature in order to kill pathogens and bacteria that is not good for consumption, However, in this process, we also end up killing active bacterias that are responsible for fermenting the milk. Hence, we need to externally introduce active bacterial cultures to the milk to help with the fermentation process.
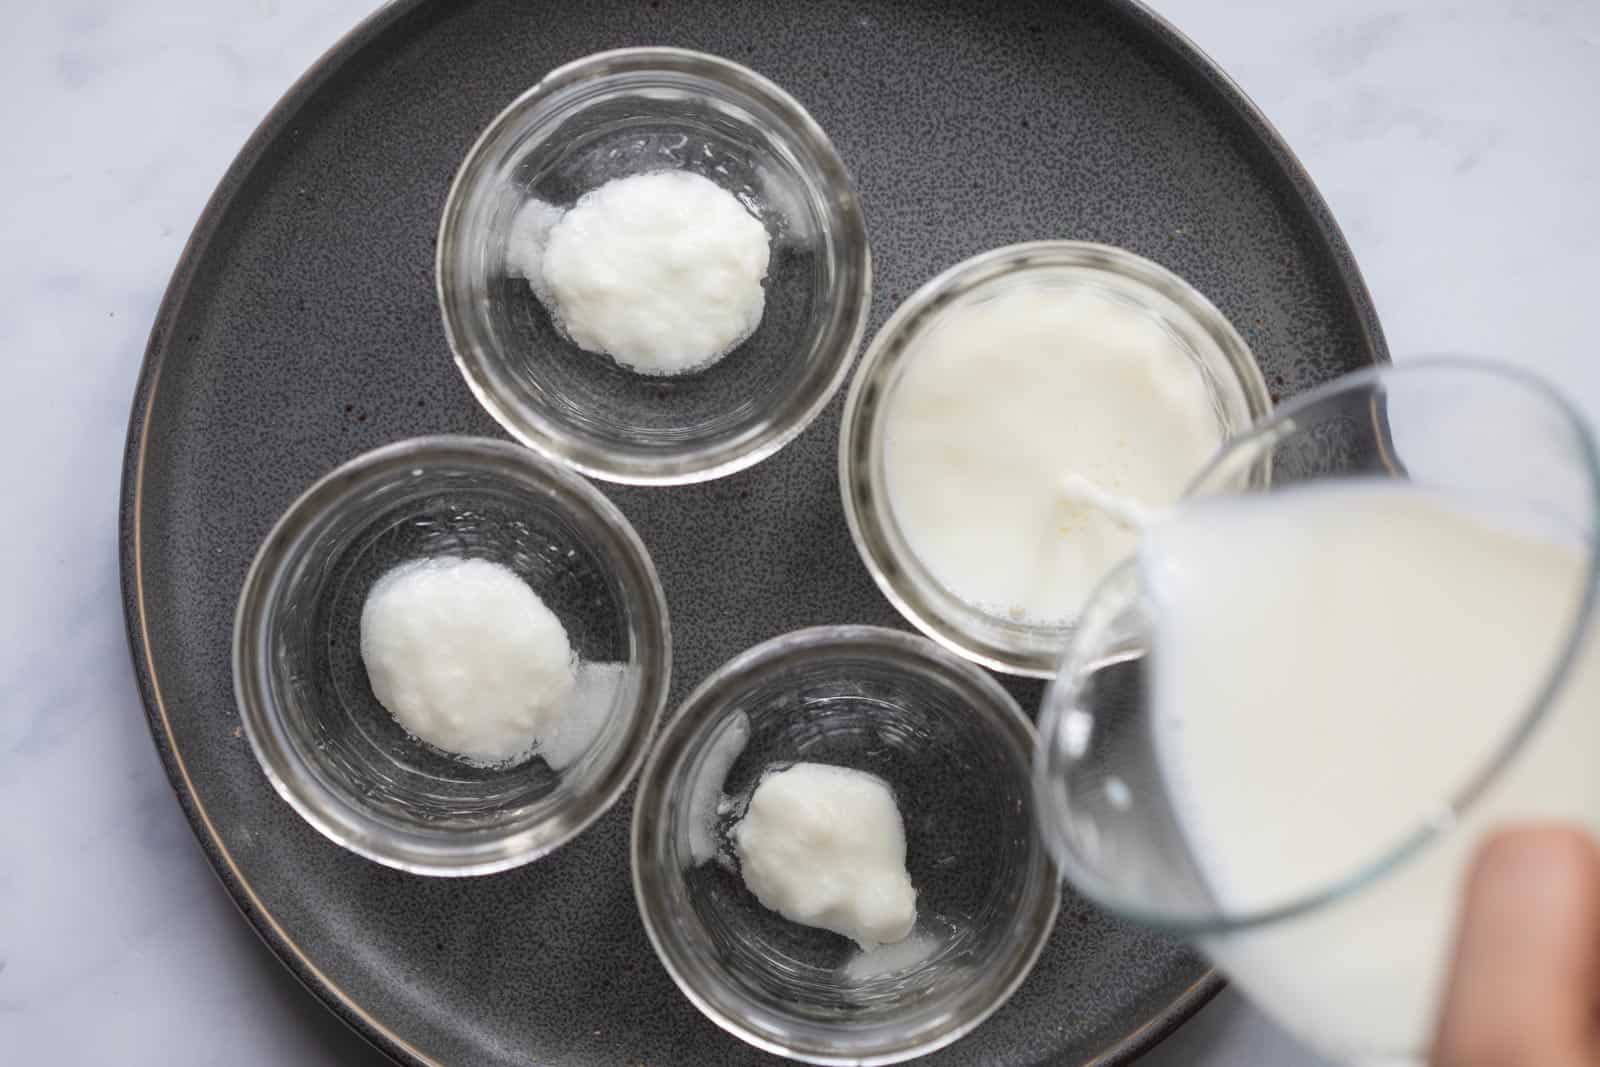
You can either use a small of amount of yogurt that has been set at home (we borrow from friends and family sometimes), buy culture off the internet (not easily available in India and many other countries), or use packaged yogurt or dahi (make sure to look for a packet that says ‘active live cultures)
P.S. If using store bought dahi in India for use as a starter, buy one that comes in a plastic packet vs. the plastic jars.
Add Ins: You can use various add ins while setting yogurt or dahi at home in your instant pot. Some favourites are condensed milk (for a sweeter yogurt), vanilla extract (for vanilla flavoured yogurt), heavy cream or malai (for creamier yogurt) etc. These can be added along with milk
Perfect Condition to set Yogurt or Dahi
The whole science behind the fermentation process sounds quite simple; however, to ensure that it works just right, you need to be able to control the entire process. You need to be able to control the:
- Time
- Temperature
- Quantity and quality of ingredients
Lucky for us, the Instant Pot takes care of both the time and temperature for setting the dahi. The Instant Pot acts as an enclosed controlled environment, with just the right temperature and an option to track time, making it much easier to control the fermentation process.
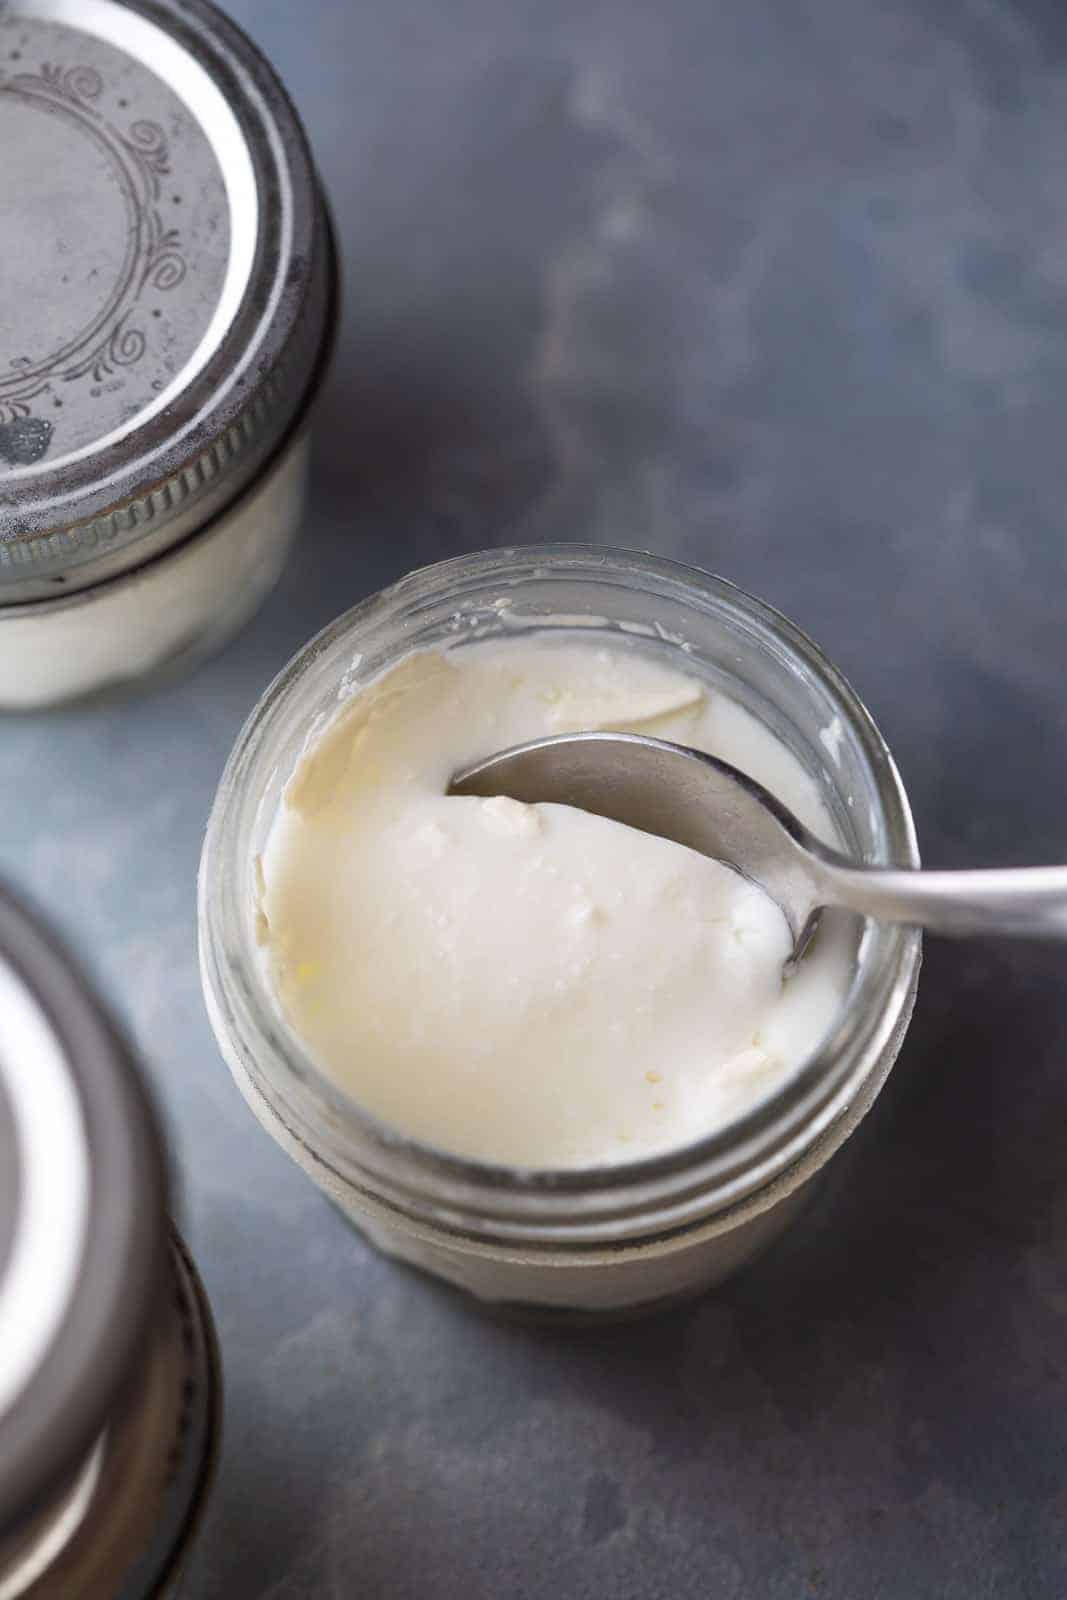
How to set Instant Pot Yogurt
- Step 1: Pasteurize the milk – Bring milk to a boil and turn off the heat. This process allows to get rid of the harmful bacteria and pathogens present in the milk. You can skip this step if your milk is already pasteurized, but we recommend it.

- Step 2: Cool down the milk – The pasteurized milk needs to cool down to 44C – 45C (110F – 115F) before it can start to ferment, as a high temperature would kill the bacteria instead of allowing it to do it’s thing. You can use a thermometer to check the temperature or do the finger test. When you dip your index finger in the milk, it should feel lukewarm.
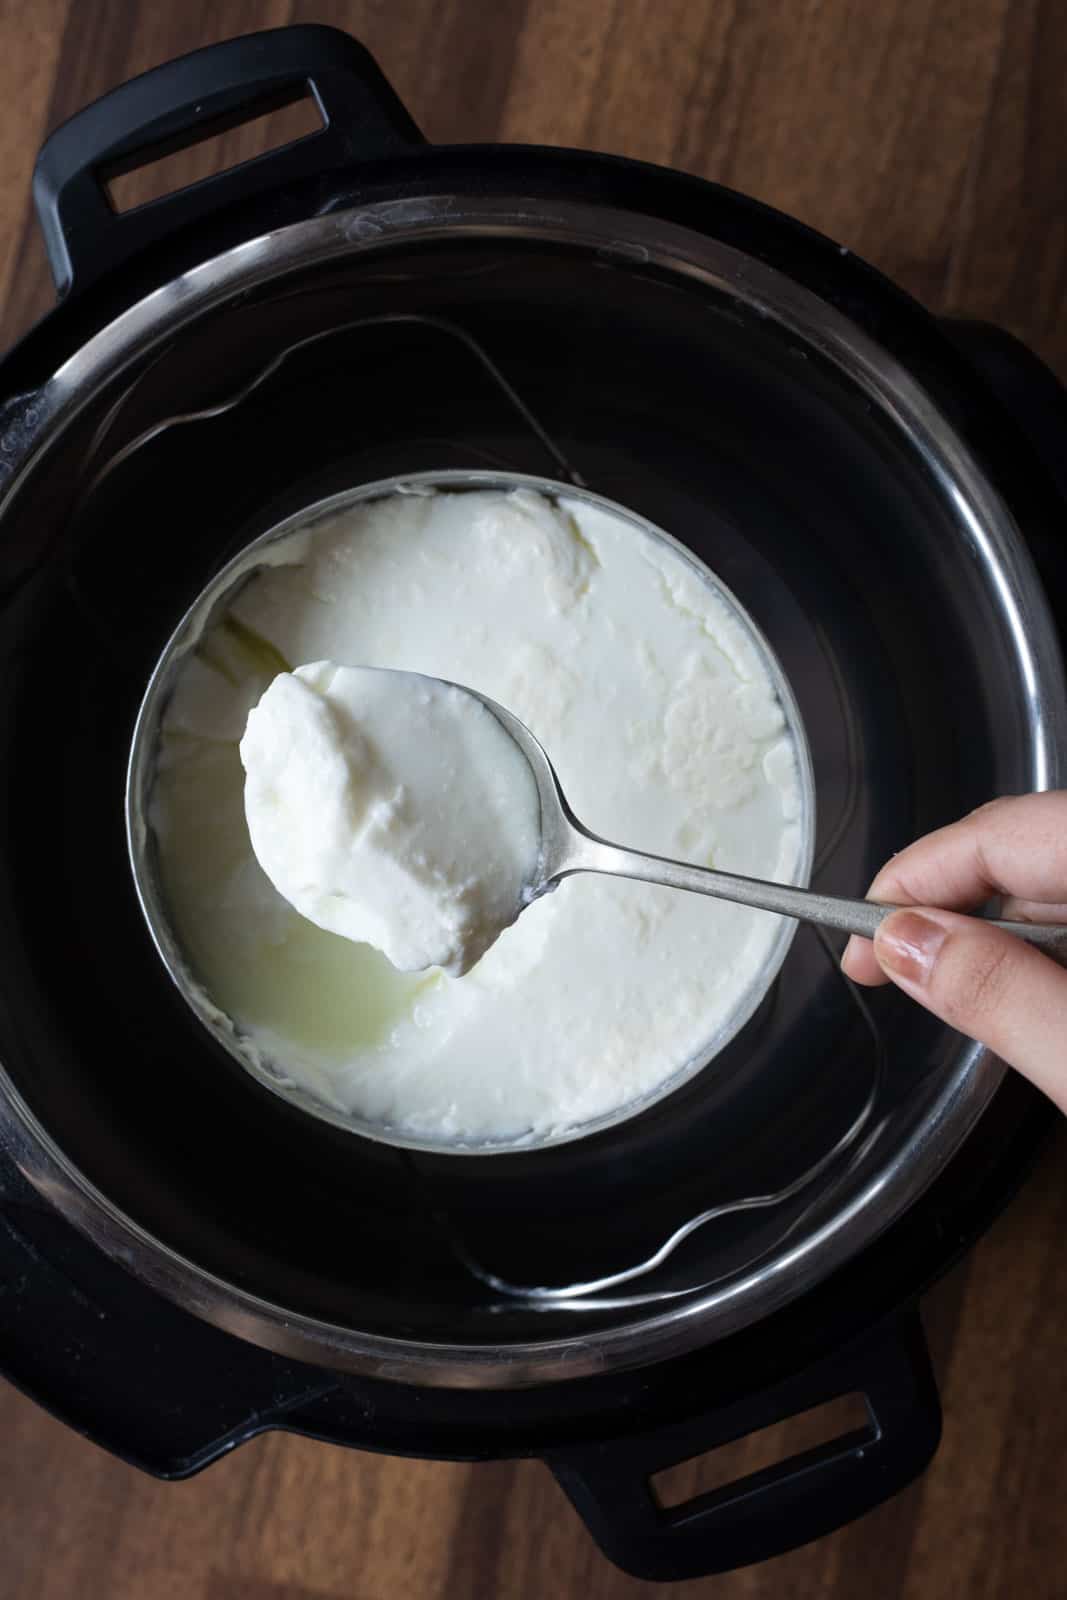
- Step 3: Whisk the milk and starter culture in an Instant Pot proof bowl with a lid.
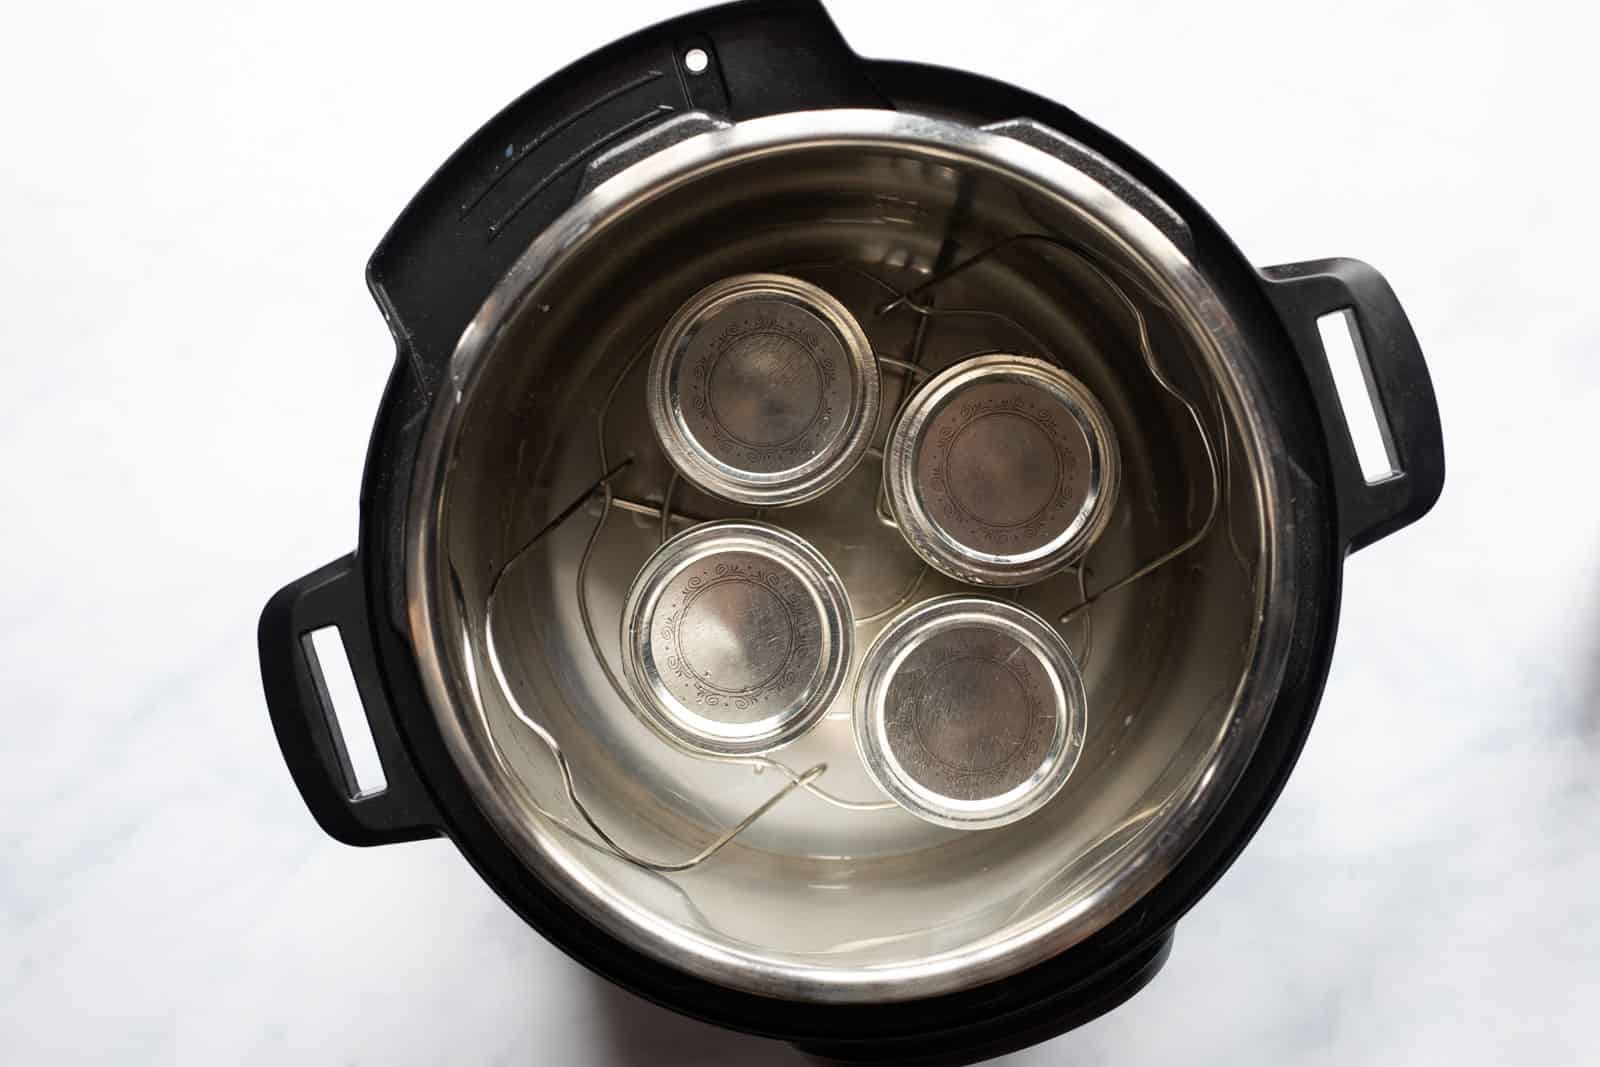
- Step 4: Pour 1 cup of water into the Instant Pot inner bowl and place a trivet over it. Place the milk container over the Trivet. Close the lid.
- Step 5: Choose the YOGURT function and set the timer to 6 hours. Some people let the yogurt set for up to 8 hours, but we find 6 hours is the sweet spot.
- Step 6: Your dahi is ready. Turn off the Instant Pot and remove the container. Store in the fridge and use as desired!
How to store homemade yogurt?
Yogurt is best stored in the refrigerator and must be refrigerated immediately to halt the fermentation process. In fact, prepared yogurt tastes best after resting for a couple hours in the refrigerator. It must be consumed in 2-3 days. It is still safe for consumption after two days but the yogurt tends to become more and more sour with time. You can use terracotta, steel, Tupperware, and ceramic containers to store yogurt. You do not need to cover the container, however, it is always safe to do in order to avoid cross contamination.
And there it is, our latest Instant Pot adventure! Stay tuned here for the many more that’s sure to come our way.
Also read: Why we recommend the Instant Pot over traditional pressure cookers
Amazing Ways to use your Instant Pot
- Proofing Bread Dough in the Instant Pot
- Zero Minute Cooking in the Instant Pot – we just busted this myth!

How to make Yogurt in the Instant Pot
Ingredients
- 500 ml Milk, whole milk
- 1 ½ teaspoons Packaged Yogurt or Dahi, as a Yogurt starter (with active bacteria)
Instructions
- Bring milk to a boil over a medium flame. Try and use an Instant Pot safe container to heat the milk. If not transfer to an Instant Pot safe container once the milk is boiled.
- Allow it to cool down till it reaches a temperature between 43 – 45°C. The milk should be slightly warmer than lukewarm.
- Remove the skin formed on top (malai). Add the yogurt starter and mix well.
- Add 1 cup water to the inner pot of Instant Pot and place a trivet. Place the milk vessel over the trivet and cover it with a lid. You can use aluminium foil if you don't have a lid. Close the lid of the Instant Pot.
- Turn ON the Instant Pot and choose the YOGURT function and set it to LOW. Set the timer on for 6 hours. Turn the pressure knob to SEALING.
- Remember to check at 5.5 hours to see if it is done.
- Once done, remove from the Instant Pot and transfer to the refrigerator. Dahi or yogurt tastes best after 1-2 hours of refrigeration.
Notes
- Yogurt Starter: If you are using store bought yogurt as a starter, look for one that says active culture on the packaging.
- Yogurt Starter in India: If buying yogurt in India to use as a starter, buy curd/dahi/yogurt that comes in a packet rather than plastic tubs
- Milk: Whole milk is best for setting yogurt. Low fat or toned milk can also be used but the yogurt won’t be as creamy or thick
- Greek Yogurt: It is normal to see some liquid or whey in yogurt. This is nutritious liquid. If you want to remove it and make thicker greek yogurt, place a muslin cloth over a strainer and strain the yogurt for 3-4 hours in the refrigerator for thicker, creamier greek yogurt
Nutrition
If you are anything like us and love geeking out, here’s some more about setting yogurt or dahi:
Dahi, curd or yogurt, what’s the difference?
Curds, in western countries, often refers to the curdled milk solids that are obtained in the process of curdling/splitting of the milk, while making cheese. In India however, curd and dahi are the same thing.
Curd or dahi in most parts of India refers to the product obtained by fermenting warm milk by introducing live strains of bacteria. These live strains of bacteria are obtained from a starter culture (traditionally known as jaman). This starter culture is a small portion of dahi/curd that is used to make the next big batch of dahi. In India, curd is prepared from scratch everyday in most households and therefore, the bacterial strength may differ from one home to another. Commercially made dahi is more standardised as compared to homemade dahi, which people have been making here for years.
Yogurt on the other hand is extremely similar to dahi. It is made in the same technique as well, with just one difference. For the fermentation process, two very specific strains of bacteria, namely lactobacillus bulgaris and streptococcus thermophilus are introduced to the warm milk. The only difference this makes to the final product is that it is more standardised and homogeneous as compared to Indian dahi, which does not use very specific strains of bacteria for fermentation. This standard product is obtained usually in commercial production, or by manually introducing store bought packaged culture kits. Another variant of yogurt is Greek yogurt, which is basically yogurt that has been strained in order to remove the excess whey and get a more protein rich, thick and creamy result.
What is a starter culture?
A starter culture for milk is basically a milk product that is essentially rich in active lactic acid bacteria. This culture aids in souring of milk. The bacteria present in the culture changes lactose (milk sugar) into lactic acid which causes the milk to sour, in other words, ferment.
We’ve noticed that starter cultures are not easily available here in India, so we decided to experiment with packaged dahi itself. We’re so pleased with the results and we just had to share it with you.
If you already set dahi at home for everyday use, you have a head start! Because you already have a starter culture to work with. We on the other hand, weren’t so lucky. Hence, we ventured out on a journey to figure out the best starter for our yogurt.
Why do we need a starter culture to set Yogurt?
The theory behind why we need a starter culture is very simple. While preparing milk for making yogurt or dahi, the first step is to pasteurize the milk. That means, to heat milk to a certain temperature in order to kill pathogens and bacteria that is not good for consumption, However, in this process, we also end up killing active bacterias that are responsible for fermenting the milk. Hence, we need to externally introduce active bacterial cultures to the milk to help with the fermentation process.


I made this epic instant pot dahi recipe and I’m loving it. My husband and my son also approves. I have made it in little jars but ultimately I decided a glass container would work best for us. I do have a question.If I set the dahi for longer like 7 or 8 hours, Will that increase the tanginess?
So glad it worked for you! And yes, a longer time in the IP would increase the tanginess
Indian food in Calgary