Medu Vada
on Sep 21, 2022, Updated Feb 16, 2023
This post may contain affiliate links. Please read our disclosure policy.
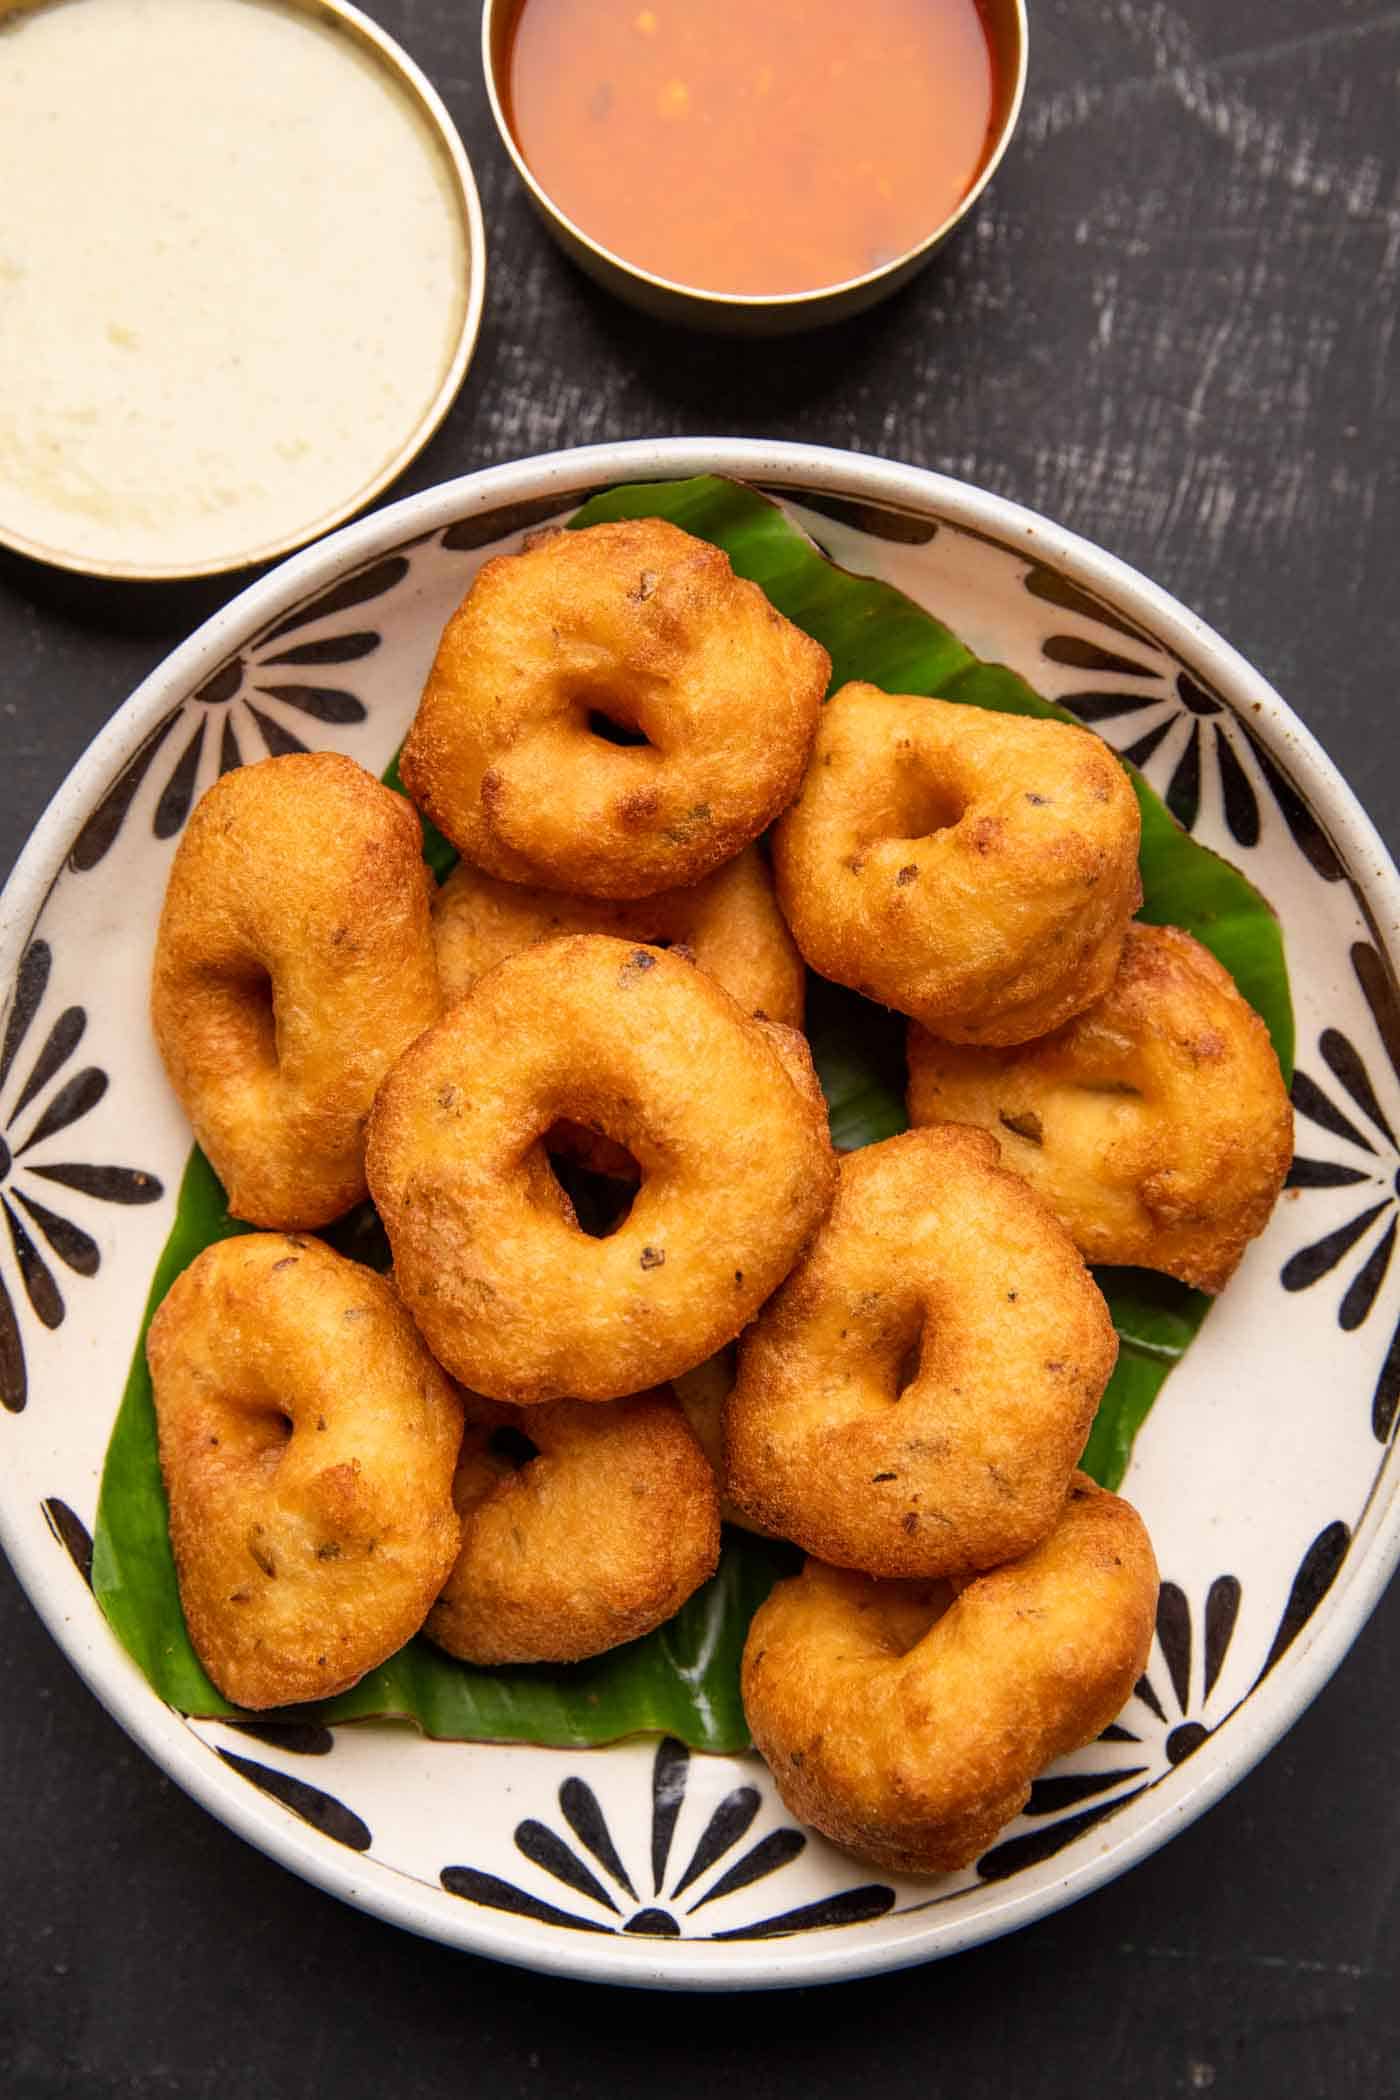
This is my foolproof medu vada recipe: a good medu vada is light, fluffy inside with a bready texture and crispy, golden-brown outside. Dunked in piping hot sambar and served with a side of coconut chutney, these vadas are the best way to get your morning started.
If you’ve made a trip to South India or live here like I do, then you know that feeling of wanting to wake up extra early just to have some freshly made vada sambar. You have to go early because they sell out so fast!
Love South Indian food? Try Nee Idli Dosa Batter, Millet Mysore Masala Dosa, Chutney Recipes, Tomato Chutney – 2 Ways, Jesse’s Rasam Recipe | Tomato Rasam and South Indian Style Egg Curry
The worst feeling is when you get to the stalls and find out that they’re already sold out for the day. Talk about disappointment! From that disappointment though, came my enthusiasm for attempting to make medu vadas right here at home. I say attempting because it took me 5 tries to get this recipe right. Lots of trial and error until I realized how easy making these vadas actually is.
I’ve detailed the entire process for you all, with all of my tips and techniques so that you don’t make the same mistakes I did. There’s only one main ingredient in this recipe – urad dal – so it’s not fussy at all and is really about how well you follow the steps.
This recipe also requires no fermentation so you can whip these up pretty fast.
The word medu means soft and vada means fritters in Kannada, and that’s what these are: soft fried dough balls of perfection. They’re known by many different names: urad dal vada, garelu, uzhunnu vada, uddina vada, ulundu vadai – and are loved across many regions of India.
Ingredients You’ll Need

- Urad dal – also known as husked black gram, this is the star ingredient of this recipe
- Water – to blend the dal and form the batter
- Spices and Aromatics – curry leaves, chopped green chillies, chopped coriander, black pepper, hing (asafoetida), jeera (cumin seeds) make these vadas really flavourful
Step by Step Medu Vada Recipe
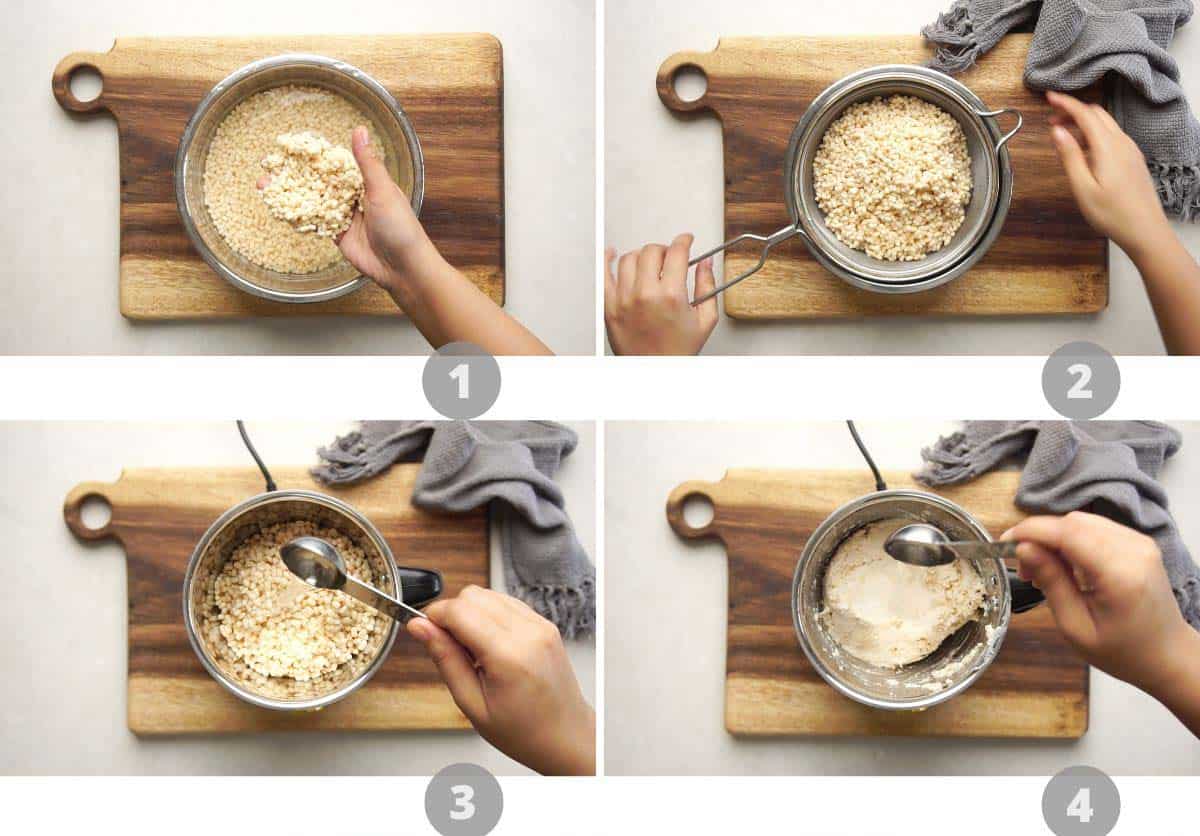
1. Wash and soak urad dal overnight.
2. Once soaked, place the urad dal in a sieve to drain all the water
3. Add it to a mixer grinder, add a tablespoon of water at a time, and grind it to a smooth paste. I needed approx 4-6 tablespoons of water.
4. You may need a little less or a little more water, but try to use as little water as possible. This entire process can take up to 6-8 minutes. It’s important to keep mixing it with a spatula and grinding.
5. Ensure the mixture is smooth and not grainy. Rub a little bit of the batter between your fingers to judge the consistency.
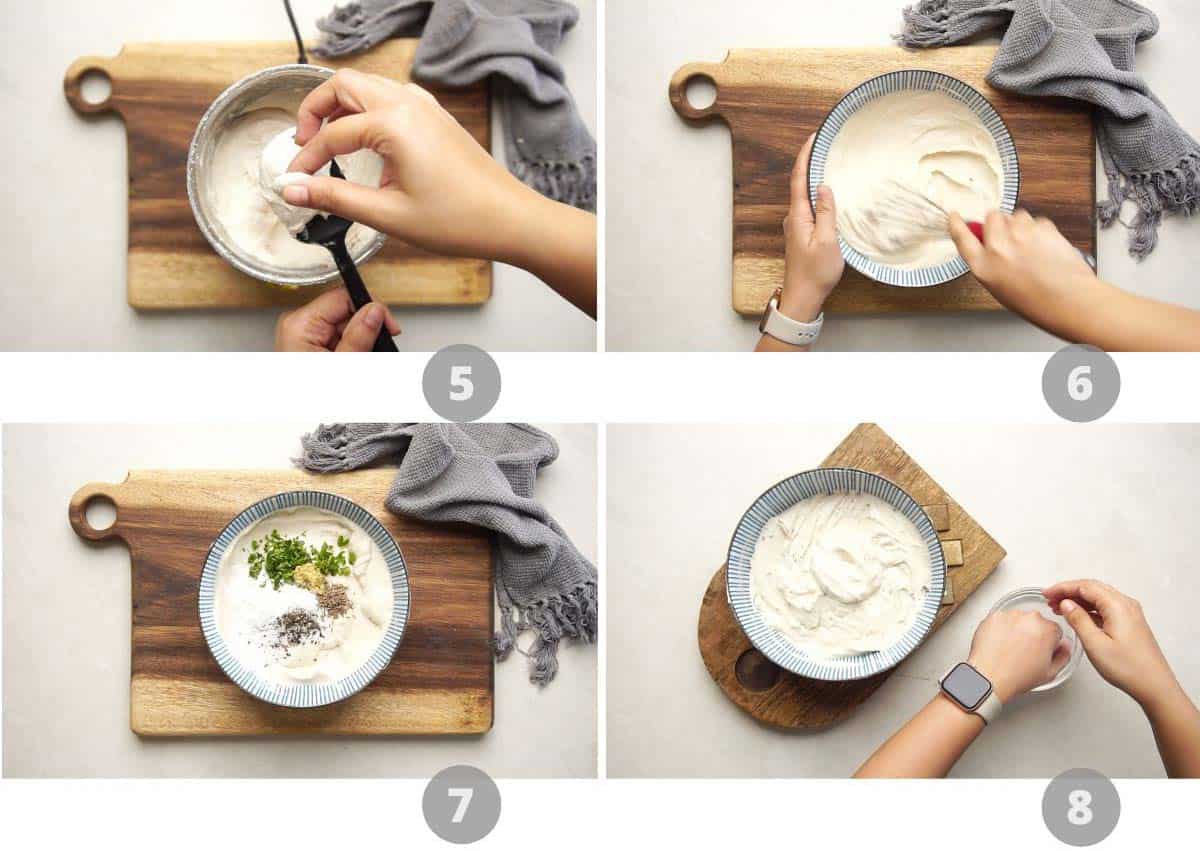
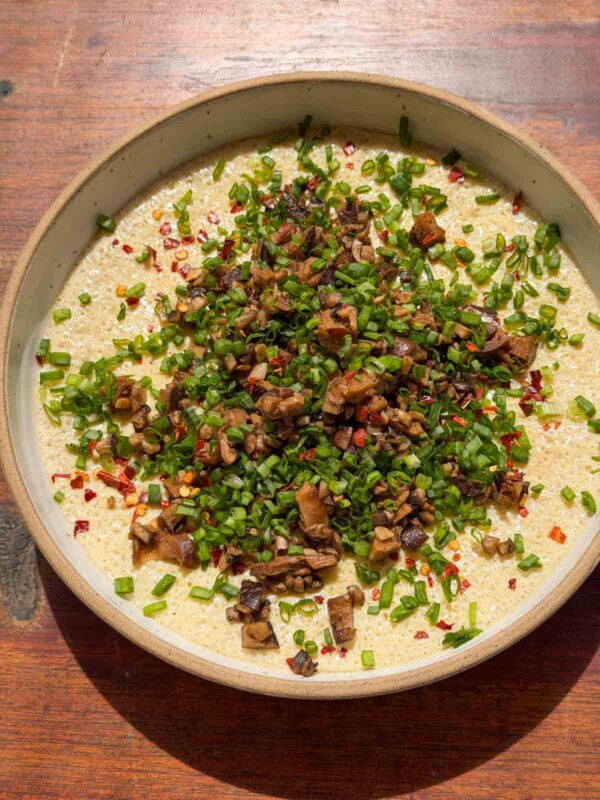
6. Mix salt and hing in the ground urad dal and set it aside for ten minutes. The hing acts as baking soda and helps make the batter lighter. Then start whisking the batter with a hand whisk. Place the oil in a kadhai for heating while you whisk the batter. Whisk the ground urad dal until it’s light and fluffy – approximately 5 minutes. You’ll feel the batter becoming airy and fluffier and also getting lighter in colour from a yellow to pale white.
7. Once the batter is whisked, mix in rice flour, jeers, crushed peppercorns and coriander. Add another teaspoon of water if required. Whisk again for a minute or two.
8. To make vadas, dip both your hands in water.
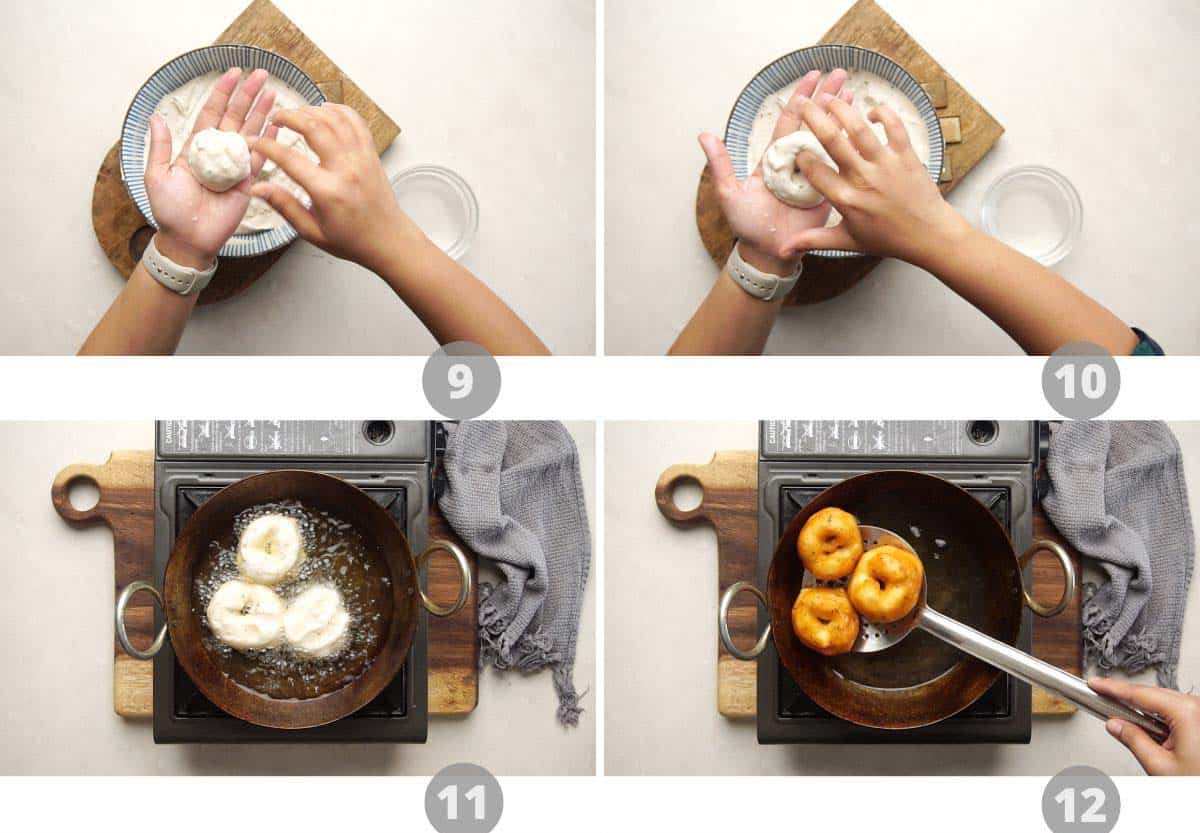
9. Take a large lime-sized amount of batter in your dominant hand (in my case, my right hand) and place it on the palm of the subservient hand (in my case, my left hand).
10. Using the fingers of the dominant hand, form it into a circle and then make a hole in the centre. Dip the dominant hand in the water again, and place the formed vada on the fingertips of the dominant hand.
11. Gently drop the vada in hot oil by turning the hand over the kadhai (close to the oil so the vada doesn’t splash into it) and moving the fingers slightly so the vada slides into the oil.
12. You should see it start to puff up slightly. Cook it on a medium flame for 2-3 minutes till golden brown on both sides. Repeat till all the vadas are fried. Serve hot!
Frequently Asked Questions
- How do I know when my batter is ready? To check the consistency of your batter, you can take a small amount of your batter and drop it in a bowl of water. A light, fluffy batter will float in the water, whereas a thick batter will not. We want our batter to float.
- What if my batter is too runny? If your batter has become too thin, add 1-2 tbsp of rice flour and beat the batter again to aerate it.
- Why are my vadas greasy? There are two reasons why your vadas are too greasy – the batter is too thin, or your oil is not hot enough. If your oil is not hot enough, the vadas can absorb a lot of oil. Make sure to test your oil temperature before frying. Do this by adding a small drop of the vada in the oil – it should rise to the top, without browning.
- Don’t soak the urad dal for more than 8 hours as this will result in a thin batter that absorbs lots of oil!
- Why are the vadas hard and not soft and fluffy? The trick is to soak your lentils for the perfect amount of time – 6 hours – for the ultimate light and fluffy batter. Over-soaked lentils = greasy vadas. Under-soaked lentils = hard vadas. Also make sure you aerate the batter well!
- Why are my vadas flat? If your batter is too thin, your vadas will turn out flat. I recommend adding 1-2 tbsp rice flour to the batter and beating well to aerate.
- Can the batter be made ahead of time? Yes, up to one day ahead of time – but make sure you keep the batter refrigerated. When you are ready to fry, let the batter come to room temperature first and whip it well to aerate it. You can also keep leftover vadas refrigerated for up to a day and reheat them by crisping them in an oven or airfryer.
- Which oil should I use for frying the vadas? Any neutral oil with a high smoke point will work well for frying vadas. You could use sunflower, groundnut, vegetable, or peanut oil here.
If you’ve made it to this part of the recipe card, you would be able to understand just how easy making medu vada actually is once you have the technique down. One main ingredient, no fermentation, quick shaping and frying – it’s actually one of the more fuss-free breakfast preparations and great to serve during the festive season as well.
Serve this with some piping hot sambar and my three fave chutneys.
Watch the Recipe Video
LOVE THIS RECIPE? Subscribe to my newsletter and be the first to receive all new recipes!

Medu Vada
Ingredients
- 1 Cup Urad Dal, dehusked urad dal
- 5-6 Tablespoons Water
- ¾ Teaspoon Salt
- ½ Teaspoon Hing, asafoetida
- 2 Tablespoons Rice Flour
- 1 Teaspoon Jeera, cumin seeds
- 1 Teaspoon crushed Black Pepper
- 1 Tablespoon chopped Coriander
Instructions
- Wash and soak urad dal overnight.
- Place the urad dal in a sieve to drain all the water
- Add it to a mixer grinder, add a tablespoon of water at a time (I used between 4-6 tbsp water), and grind it to a smooth paste. You may need a little less or a little more water, but try to use as little water as possible. This entire process can take up to 6-8 minutes. It's important to keep mixing it with a spatula and grinding.
- Mix salt and hing in the ground urad dal and set it aside for ten minutes. The hing acts as baking soda and helps make the batter lighter.
- Place the oil in a kadhai for heating while you whisk the batter
- Use a hand whisk to whisk the ground urad dal until it’s light and fluffy – approximately 5 minutes. You’ll feel the batter becoming airy and fluffier and also getting lighter in colour from a yellow to pale white.
- Once the batter is whisked, mix in rice flour, jeers, crushed peppercorns and coriander. Add another teaspoon of water if required. Whisk again for a minute or two
- To make vadas, dip both your hands in water. Take a lime-sized amount of batter in your dominant hand (in my case, my right hand) and place it on the palm of the subservient hand (in my case, my left hand). Using the fingers of the dominant hand, form it into a circle and then make a hole in the centre. Dip the dominant hand in the water again, and place the formed vada on the fingertips of the dominant hand.
- Gently drop the vada in hot oil by turning the hand over the kadhai (close to the oil so the vada doesn’t splash into it) and moving the fingers slightly so the vada slides into the oil.
- You should see it start to puff up slightly. Cook it on a medium flame for 2-3 minutes till golden brown on both sides.
- Repeat till all the vadas are fried. Serve hot with piping hot sambar and chutney.
Video
Notes
- Soak and drain the urad dal for at least 6 hours or overnight before grinding.
- Add only a few tbsps of water while grinding. Too much water while grinding will make the batter too runny, making it difficult to form the vadas later because urad dal has a silky consistency so it slips from your hand. The batter should be more like thick cake batter
- Mix hing (asafoetida) and salt and set it aside for 10-15 minutes to help aerate the dough. (Hing acts a little like baking soda in this recipe!)
- The most important step in this recipe is to whip the batter in a unidirectional circular motion either by hand or with a whisk for 5-6 minutes to aerate the mixture. You will see the batter become lighter in colour and become fluffier as you whisk. It’ll also increase in size and volume. That’s when you know the batter is ready.
- Avoid using a hand blender for whipping the batter as the high speed ends up deflating the batter. I tried this and wasn’t happy with the results compared to whisking by hand
- I like to add some rice flour (a trick I learnt from a cook in Bangalore) to the batter for an extra crispy outer layer.
- To form the vadas, both hands should be dipped in water so that the urad dal batter doesn’t stick and slides off easily.
- To shape, take some batter into your wet hand and move it in a circular position to create the base. Use your thumb to create a hole in the center. Transfer it to the other hand and gently slide it into hot oil
- If you are making these for the first time and having trouble shaping them, don’t worry too much and just drop lime sized rounds of batter into hot oil. They won’t look like a donut shaped vada but will definitely taste amazing!
- Fry the vadas on a medium low flame to give them a chance to cook well from the inside.
- Do not overcrowd the pan when frying – fry in small batches for the best result.


Thanks for the detailed explanation. Was very helpful and vadais came out well
Yaaay! that sounds awesome, so so happy you liked the recipe, Subhashini
It’s called the Udin Vade, after Urad Dal. There is no such thing as medu vada.
There is actually. Thats what its called up north
mouth watering recipe. I tried this recipe today. Came out very well. The Way of explaining is good. thank you so much for sharing the recipe.
Vadaaa!! my all-time fav! I swear it is the best indian snack you get :))) yummy! Love your content 🙂
Hi!
So I have made vadas in the past.. However, I referred to your tips and tricks and they were so helpful! I think I made my best batch yet! Super crispy and fluffy 🙂 loved it!
Wohoooo!! Sooo good to hear that
Hi!
So I have made vadas in the past.. However, I referred to your tips and tricks and they were so helpful! I think I made my best batch yet! Super crispy and fluffy 🙂 loved it!
Yummy!. Love this recipe very much. Thanks for posting.