Mocha Lava Cake | Molten Coffee Cake
on Feb 14, 2022
This post may contain affiliate links. Please read our disclosure policy.
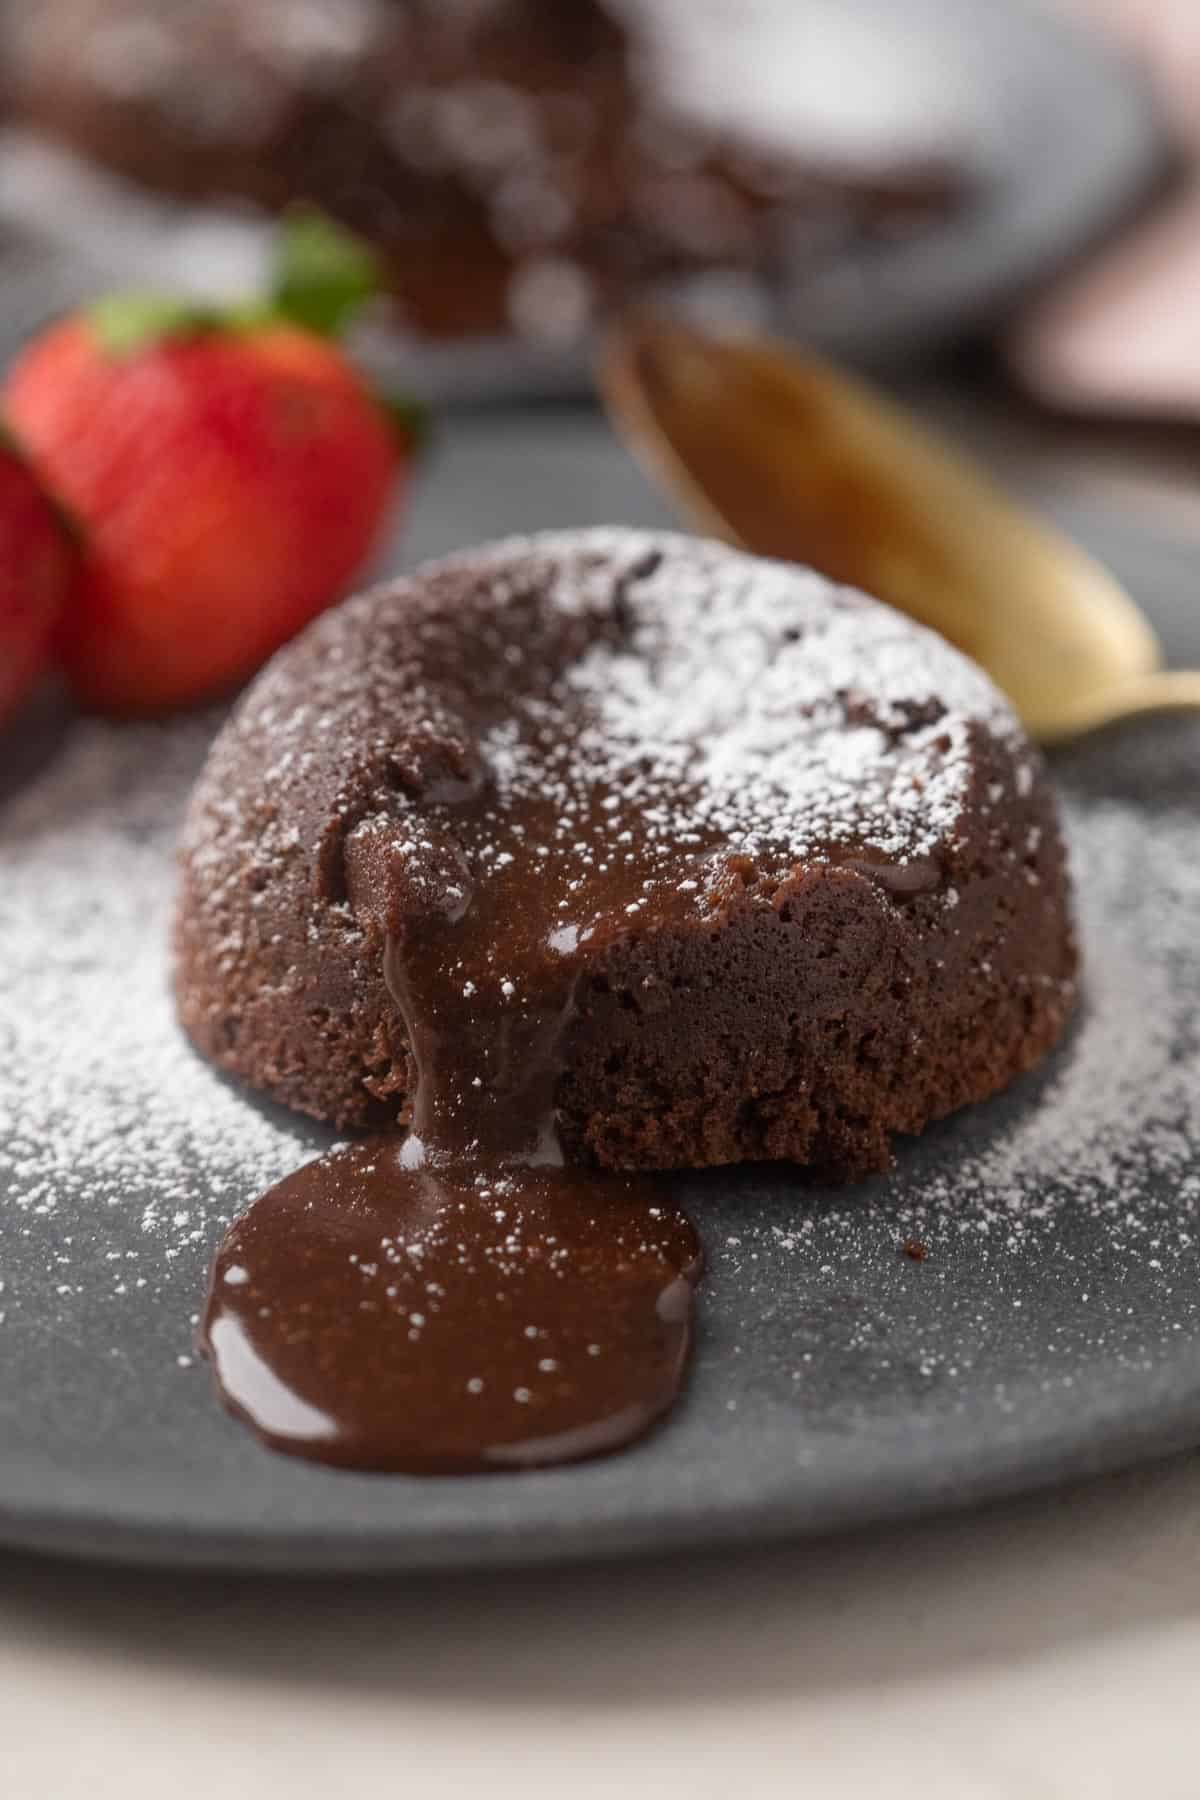
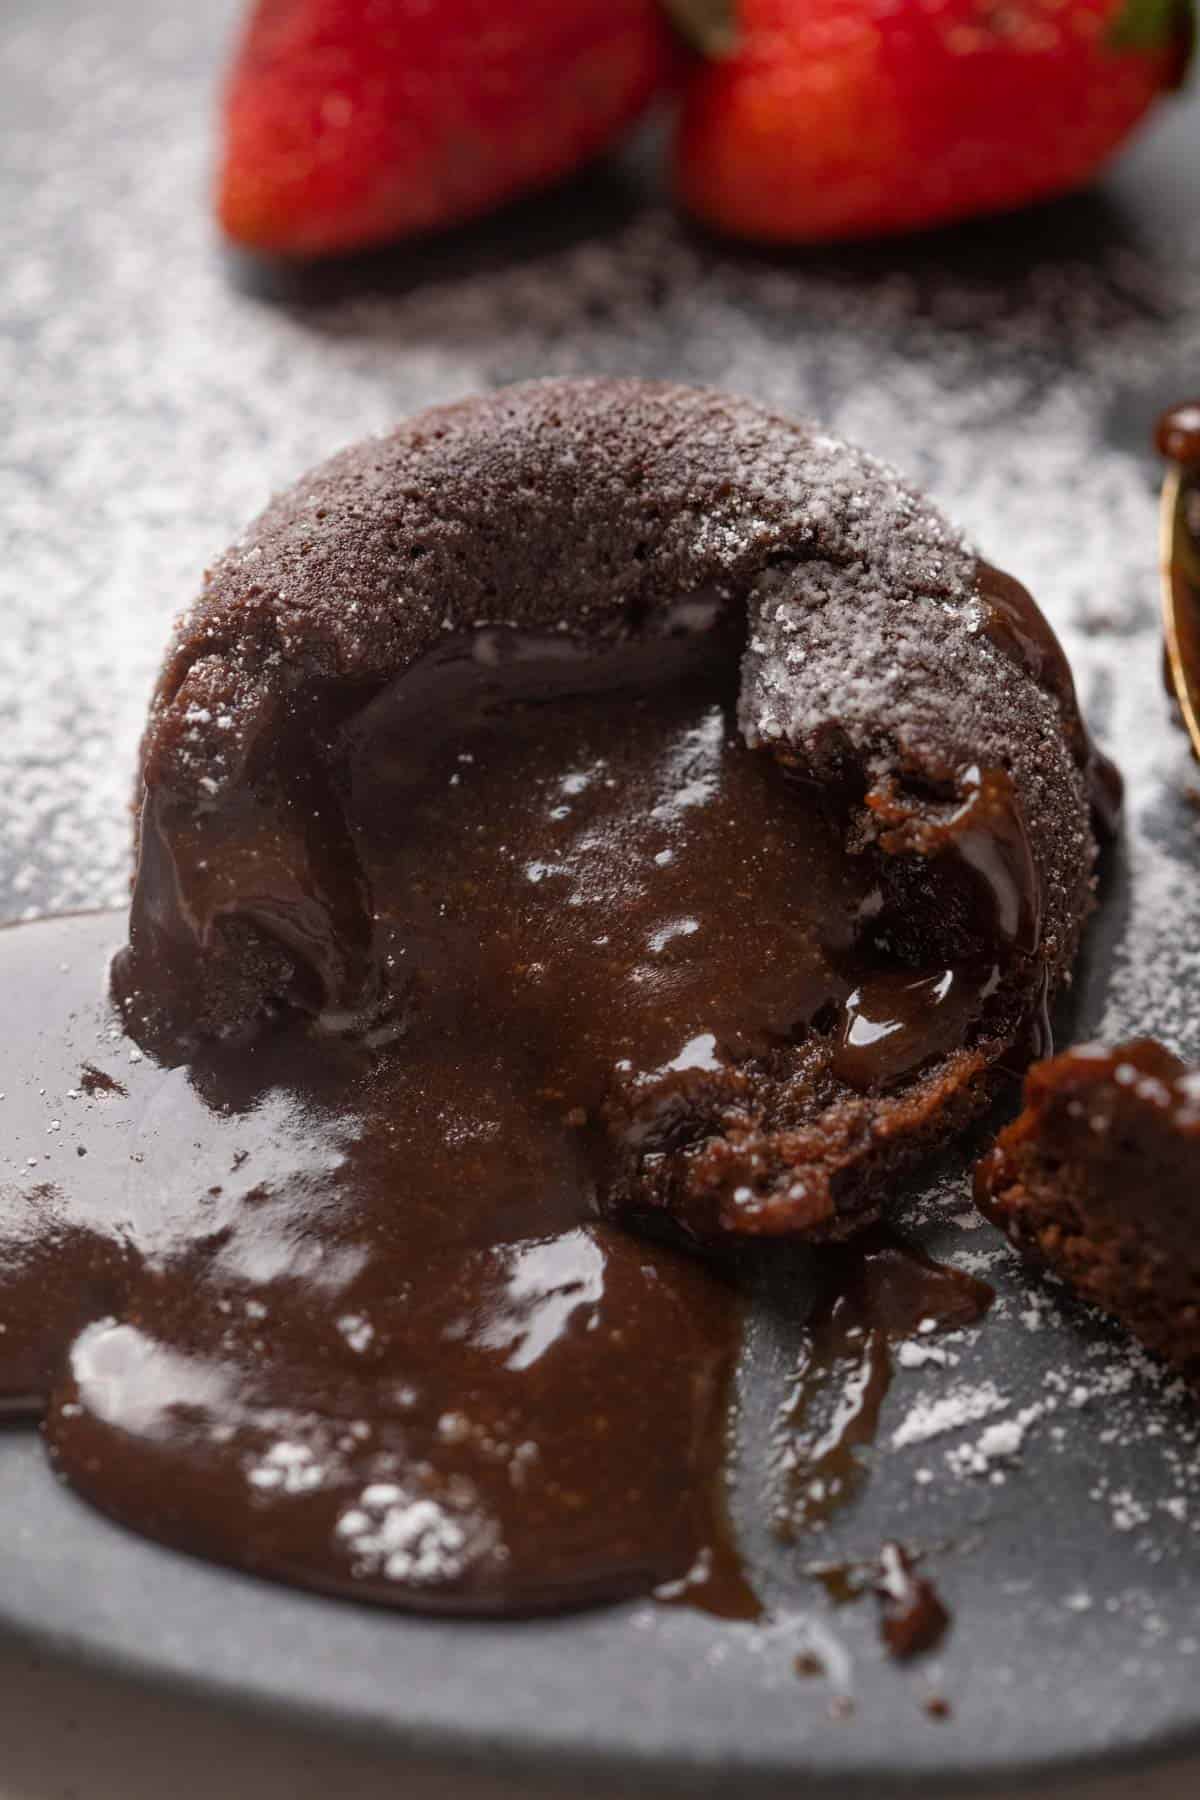
This Mocha Lava Cake is the perfect way to surprise your partner and make this V-day a tad more special. Soft, indulgent, gooey and sinfully chocolatey, this cake is the perfect way to celebrate love. The best part? It’s super easy to make and comes together in less than 30 minutes.
If you would like to make your partner a little something for this V-day, then mocha lava cake might just be perfect! Don’t worry if you aren’t an expert at baking, because even though this this soft and spongy lava cake looks complicated, it is surprisingly easy. The addition of coffee really brings out the flavour of chocolate and the mousse-like texture totally melts in your mouth. In case you aren’t quite convinced yet, here are some more reasons why you should try this recipe:
Quick Walk Through: Mocha Lava Cake
Reasons You’ll Love This Recipe
- Super quick and easy. Comes together in as little as 30 minutes.
- No expertise required and is easy enough even for a complete baking newbie.
- Makes for a fun date night activity to try with your partner.
- Requires just a few basic ingredients. Nothing fancy needed here.
- Tastes delicious as is. No extra icing or other accompaniments needed.
Ingredients you need
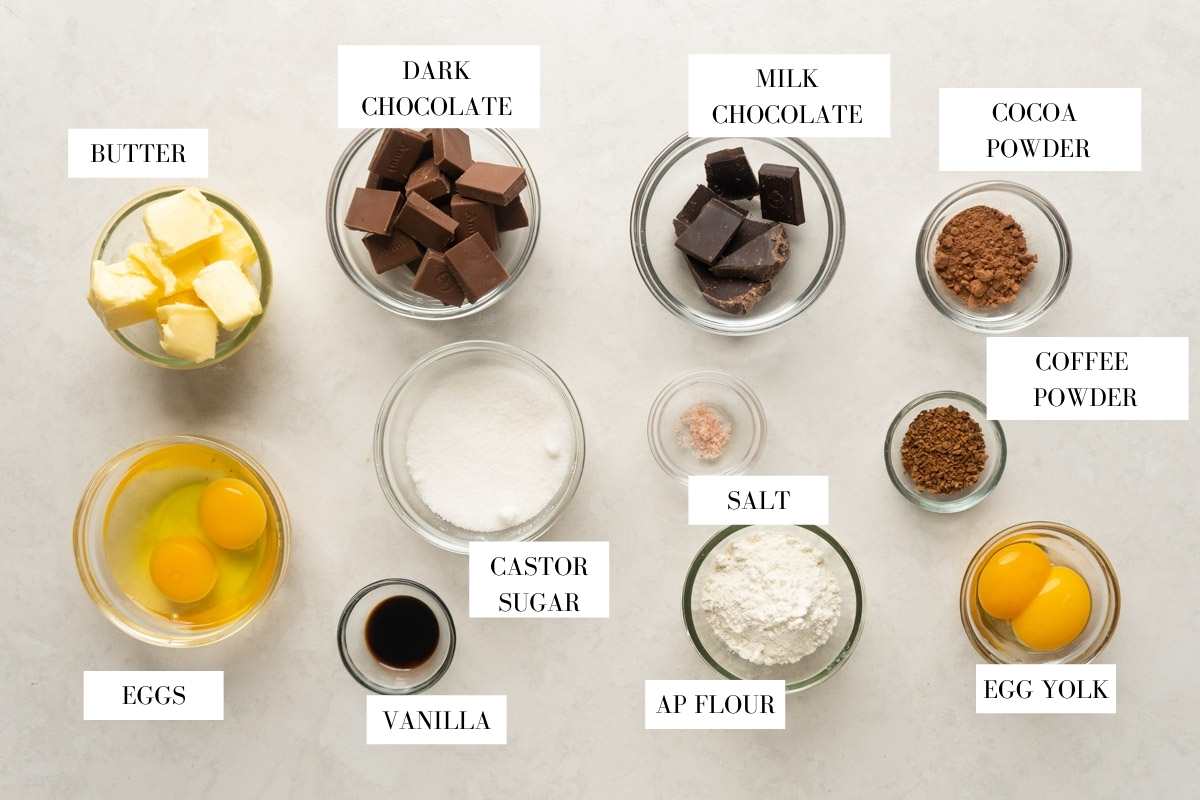
- Chocolate: This recipe uses both dark chocolate and milk chocolate for an intense, rich chocolate flavour
- Butter: Gives a light and airy texture to the cake. I generally use salted butter
- Caster sugar: The fine powdered texture of caster sugar dissolves easily and mixes beautifully into the cake batter
- Instant coffee powder: Also called Espresso powder in some countries. Creates that magical mocha flavour in this cake
- Flour: All-purpose flour works best with this recipe. I don’t recommend making this recipe with any other type of flour. It uses very little flour and besides guys, it’s Valentine’s Day – you can allow yourself to indulge
- Eggs and egg yolks: The eggs and egg yolks create the light, fluffy texture for this recipe without any baking powder or soda. Save the remaining egg whites in the fridge and use them for another recipe
- Cocoa powder: Used to dust the ramekin bowls. Prevents the cake from sticking and helps demould it easily
How to make Mocha Lava Cake
Before you start, preheat the oven to 200C.
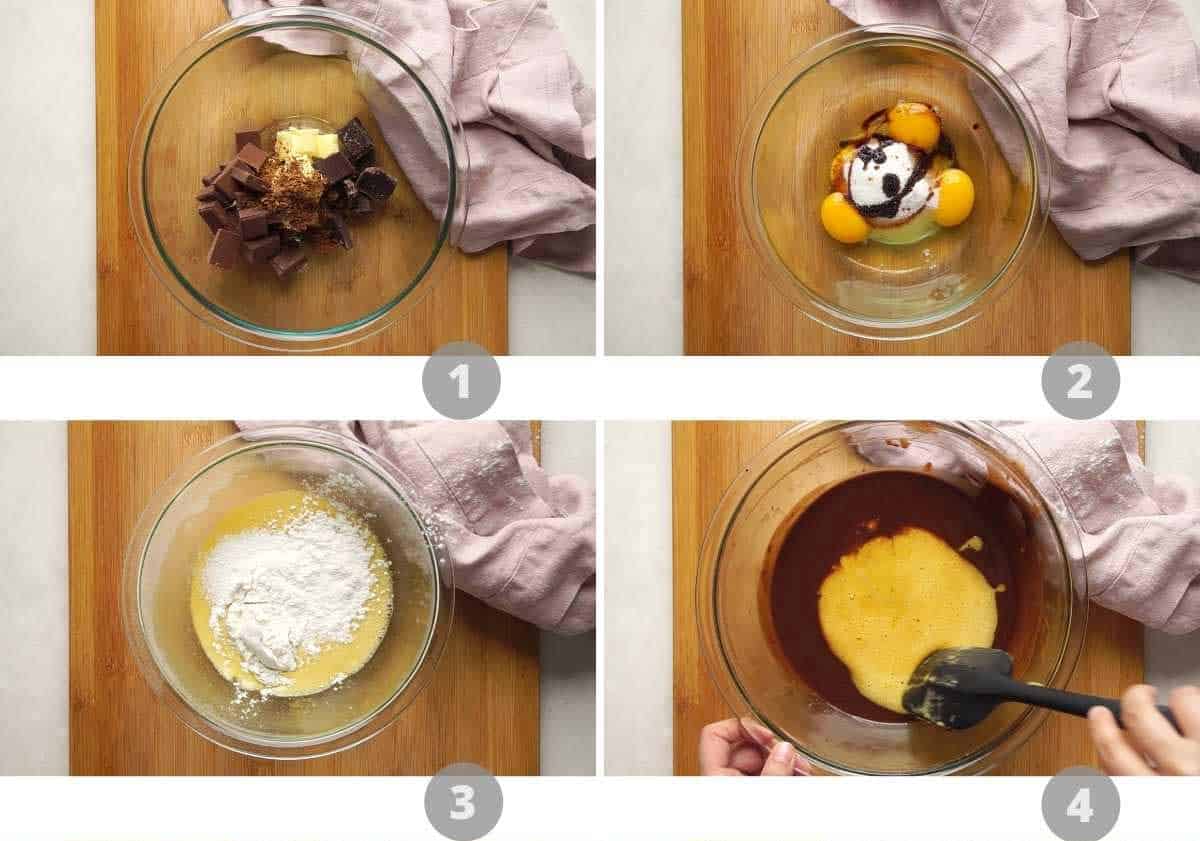
1. Add milk chocolate, dark chocolate, butter and coffee to a microwave safe bowl. Microwave at 30 second intervals, stirring frequently in between, for 2-3 minutes or until fully melted. Set aside.
2. Whisk together eggs, egg yolk, sugar and vanilla extract until light and frothy, about 2 minutes.
3. Sieve all purpose flour and salt into the egg mixture. Fold it in gently till all the flour is combined
4. Add the egg mixture to the chocolate mixture and use a rubber spatula to fold and mix thoroughly.
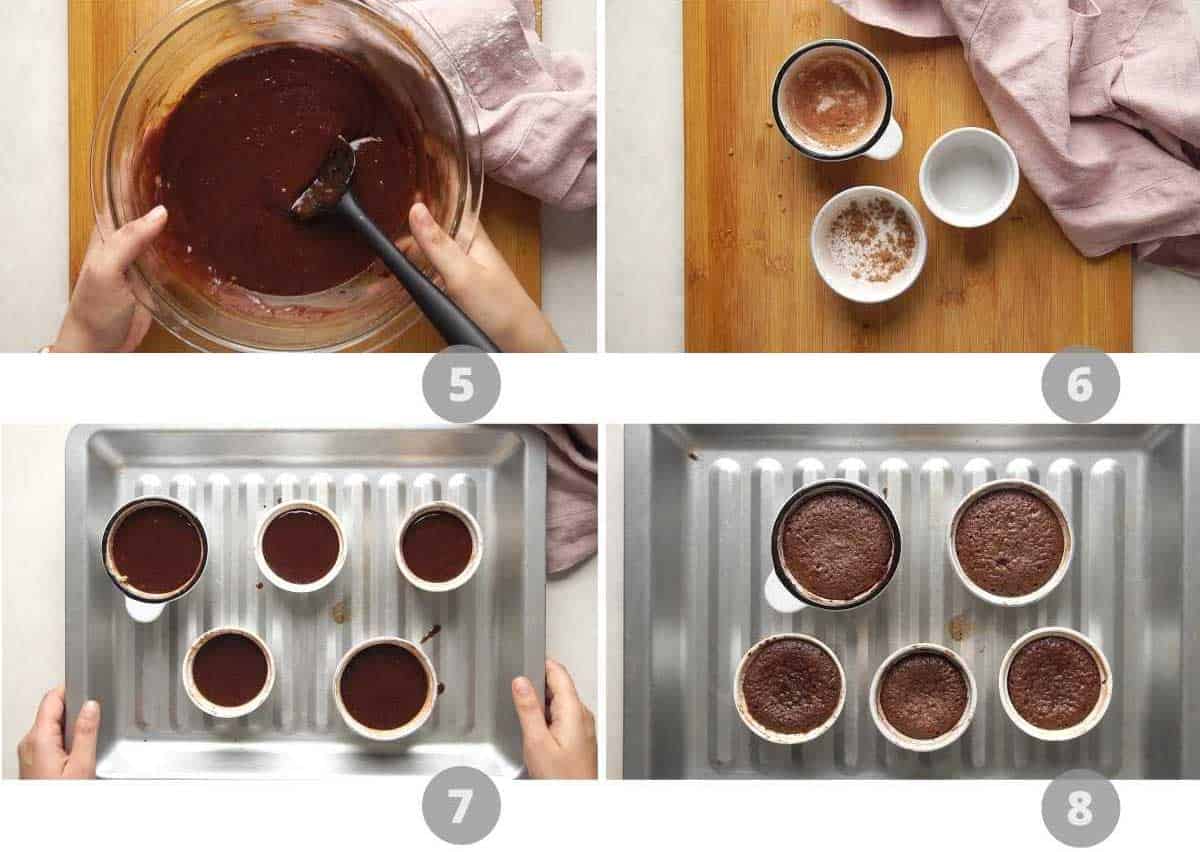
5. The batter will look thick and glossy when mixed
6. Grease ramekin molds with butter. Generously dust with cocoa powder on the base and sides. Turn the mould upside down and tap to remove any excess.
7. Pour batter into greased and dusted ramekin moulds and fill it only 3/4th of the way up because these will expand in the oven(approx 100 grams per mould)
8. Bake at 200C for 14-16 minutes. Do not use a toothpick or skewer to check if it has baked as the centre will be gooey. The top surface should be firm to touch and should not stick to your finger.
Richa’s top tips to make the yummiest Lava cake
- Melting Chocolate: While melting the chocolate and butter mixture in the microwave, do it in short bursts and stir in between to ensure it doesn’t burn.
- Make sure to properly preheat the oven for about 15-20 minutes. This helps the cake rise better, keeps it soft and prevents it from becoming hard and dry
- The cake rises quite a bit, so fill the ramekin bowls only 3/4th of the way to prevent spilling.
- Generously grease and dust the moulds with butter and cocoa powder before pouring in the batter. This will prevent the cake from sticking to the sides and will demould easily
- Demoulding Lava Cakes: Allow the cake to rest for a minute or two after removing it from the oven. Run a knife gently along the sides, tap it a few times and invert it into a plate to demould it with ease
- While this cake tastes amazing as is, you can totally take things up a notch by topping it with some vanilla ice cream and fresh strawberries.
Frequently Asked Questions
This is a question that a lot of you may have – Since lava cakes have a gooey centre that oozes out warm chocolate when cut, it is not wrong to assume that they might be raw and undercooked. However, that’s not the case. Baking this cake makes sure that it reaches the optimal cooked temperature, making the molten centre perfectly safe to eat.
In order to experience that gooey, runny chocolate centre, it is best to eat this cake hot or warm. Once it turns cold, the chocolate will set, which will alter the texture and experience of eating this cake.
While it is possible to make the cake batter ahead of time, I would recommend baking the cake right before serving. If you make it ahead, then the centre might not remain gooey, and that will sort of defeat the purpose of this cake.
Absolutely! You can totally freeze these cakes once they are fully baked and cooled down. Transfer them to an airtight container and stick it into the freezer for up to 3 months.
Although this cake tastes fantastic on its own, a scoop of vanilla ice cream that starts to melt on the sides instantly and the way cold ice cream tastes with warm bites – you get the picture! Cooking for your partner is a legit love language, and if you ask me, nothing spells love quite like whipping up this simple but utterly delicious coffee lava cake.
Watch the Recipe Video
LOVE THIS RECIPE? Subscribe to my newsletter and be the first to receive all new recipes!

Molten Mocha Lava Cake
Ingredients
- 125 Grams Milk Chocolate, chopped
- 45 Grams Dark Chocolate, chopped
- 1/2 Cup Butter, 115 Grams
- 1 ½ Tablespoons Instant Coffee Powder
- 1/4 Cup All-Purpose Flour, 30 Grams
- 1/2 Cup Caster Sugar, 60 Grams
- 1/8 Teaspoon Salt
- 2 Eggs
- 2 Egg Yolks
- 1-2 Tablespoons Cocoa Powder
- 1-2 Tablespoons Butter, for brushing
Instructions
- Preheat the oven to 200C/392F
- Grease ramekin molds with butter. Generously dust with cocoa powder on the base and sides. Turn the mould upside down and tap to remove any excess.
- Add milk chocolate, dark chocolate, butter and coffee to a microwave safe bowl. Microwave at 30 second intervals, stirring frequently in between, for 2-3 minutes or until fully melted. Set aside.
- Whisk together eggs, egg yolks, sugar and vanilla extract until light and frothy, about 2 minutes.
- Sieve all purpose flour and salt together into the egg mixture and whisk it in till all the flour is combined.
- Add the egg mixture to the chocolate mixture and fold gently to combine
- Pour batter into greased and dusted ramekin moulds and fill it up until 3/4th capacity (approx 100 grams per mould)
- Bake at 200C for 14-16 minutes. Do not use a toothpick or skewer to check if it has baked as the centre will be gooey. The top surface should be firm to touch and should not stick to your finger.
- Remove from the oven once baked and allow to cool for 1-2 minutes. Run a knife along the sides of the mould and invert onto a plate. Tap the top of the mould a few times to release the cake and lift the mould carefully. Serve hot!
Video
Notes
- Melting Chocolate: While melting the chocolate and butter mixture in the microwave, do it in short bursts and stir in between to ensure it doesn’t burn.
- Make sure to properly preheat the oven for about 15-20 minutes. This helps the cake rise better, keeps it soft and prevents it from becoming hard and dry
- The cake rises quite a bit, so fill the ramekin bowls only 3/4th of the way to prevent spilling.
- Generously grease and dust the moulds with butter and cocoa powder before pouring in the batter. This will prevent the cake from sticking to the sides and will demould easily
- Demoulding Lava Cakes: Allow the cake to rest for a minute or two after removing it from the oven. Run a knife gently along the sides, tap it a few times and invert it into a plate to demould it with ease
- While this cake tastes amazing as is, you can totally take things up a notch by topping it with some vanilla ice cream and fresh strawberries.
Nutrition
This article has been researched and written by Urvi Dalal


hey!
I was wondering if the eggs and egg yolks are separate things? It says four eggs and four egg yolks… so is that 8 egg yolks and 4 whites, or am I just overthinking????
Hey Rams, For this recipe quantity, you need to use 2 whole eggs (yolks & whites) plus 2 egg yolks only (without the whites)
Nice blog. you did very well. I really loved this blog.