The Khichdi Recipe that’s SO tasty!
on Sep 25, 2025
This post may contain affiliate links. Please read our disclosure policy.
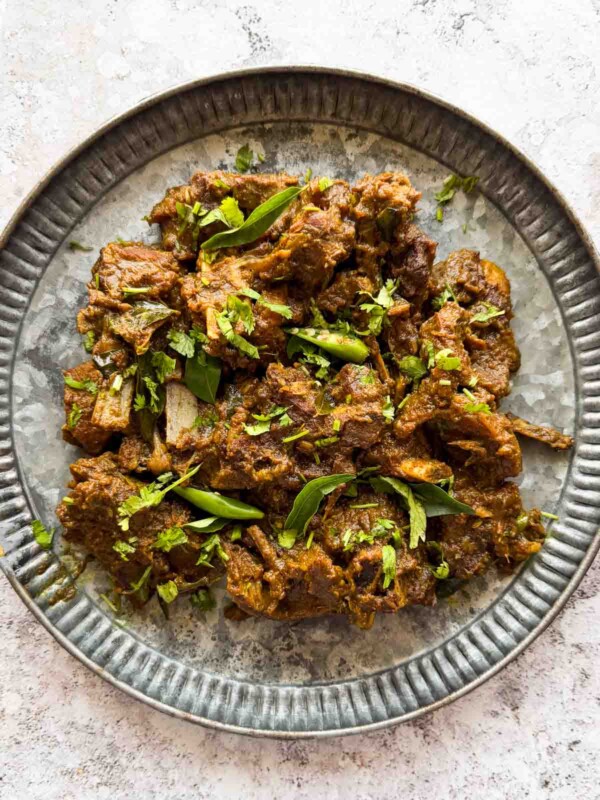
Khichdi or khichri or khichuri is pure comfort food. You either LOVE khichdi or hate it. If you are a hater, I’m here to change your mind! This version can be made in a traditional pressure cooker or an Instant Pot.
I swear there’s nothing more comforting than a piping hot bowl of khichdi topped with a big dollop of ghee. Feeling under the weather? A bowl of khichdi it is. Need something to cozy up with when it’s raining? A bowl of khichdi it is. No matter what you’re feeling, khichdi is always the answer!!
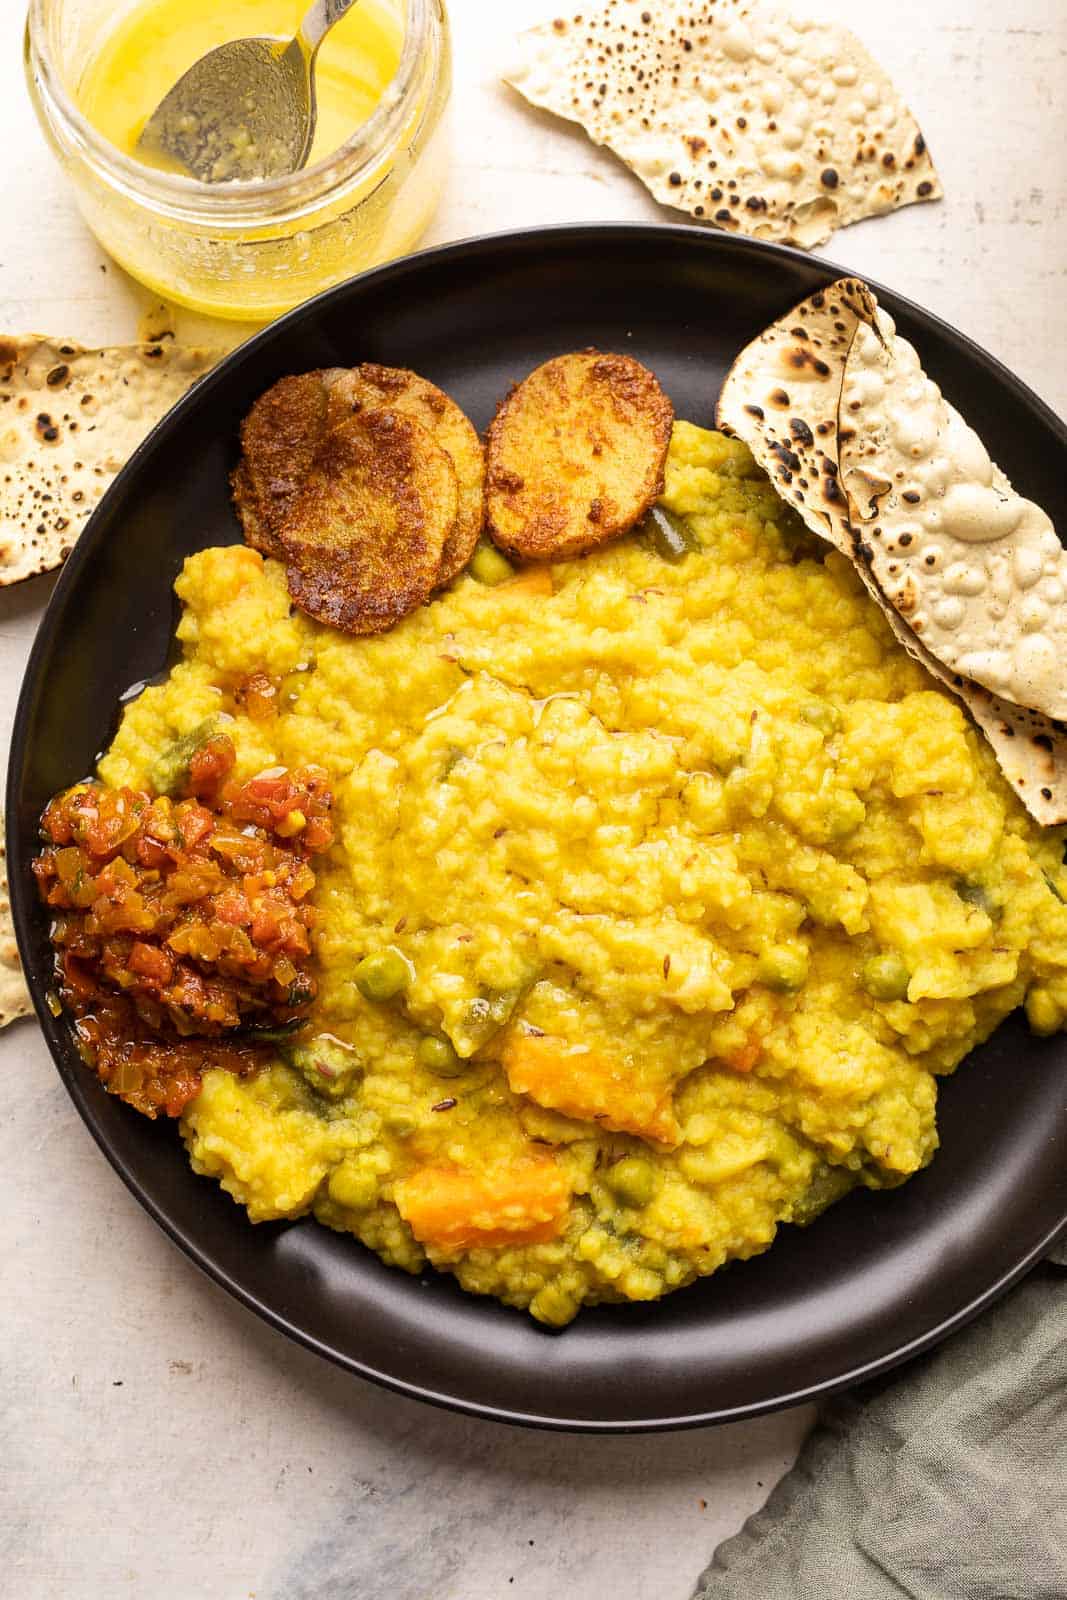
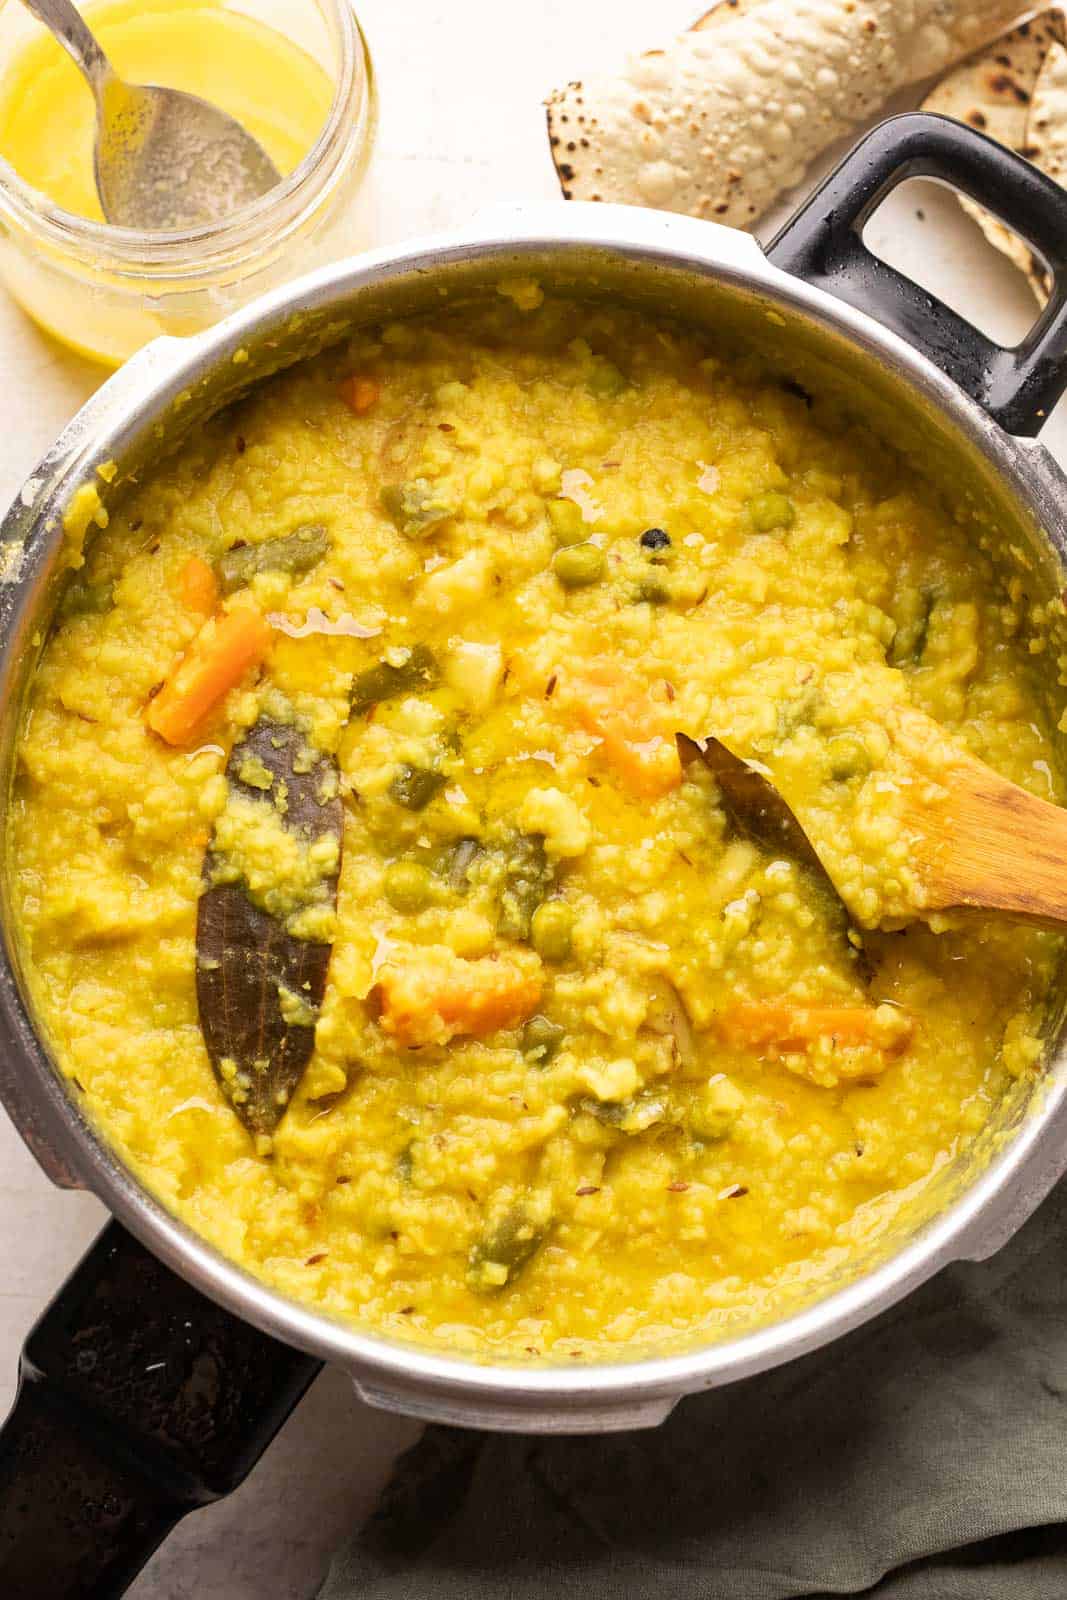
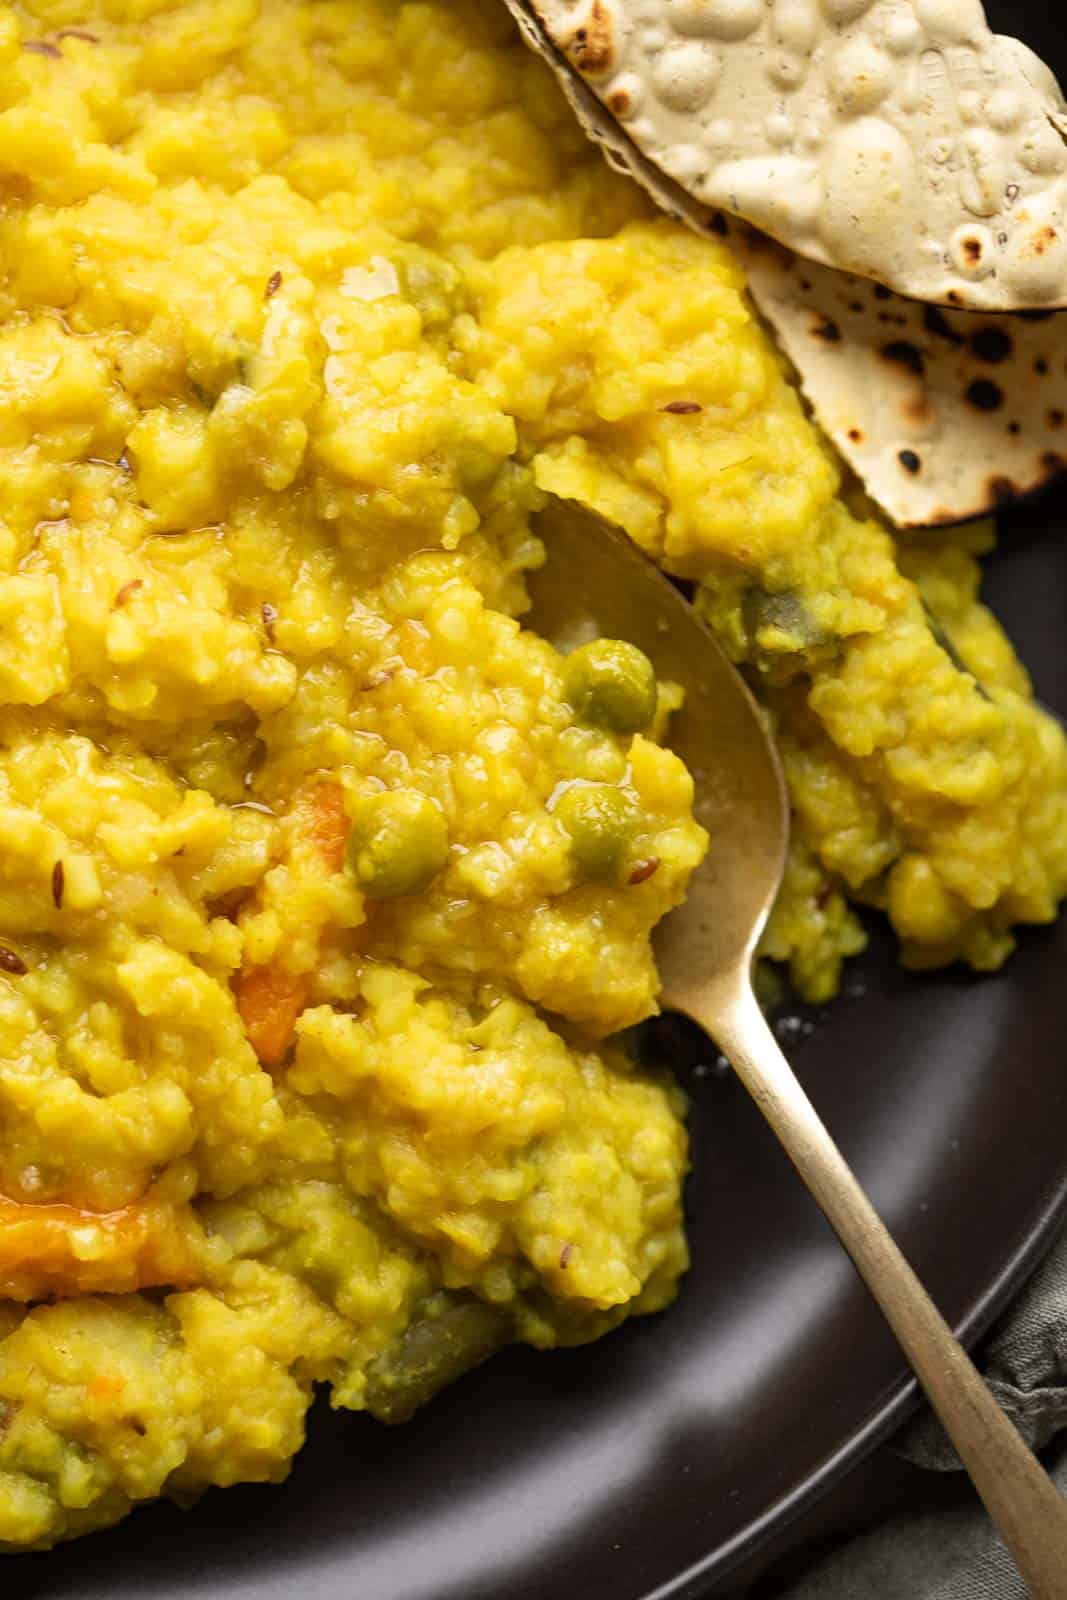
This recipe is inspired from my grandma’s kitchen, and it’s got whole spices and chunks of potato and other vegetables that just melt into the dish. The secret to all that flavor lies in roasting the rice and dal in ghee along with the whole spices before pressure cooking and that creates the most amazing nutty aroma and depth. Serve it up with yogurt, fried potatoes, or some tomato chutney and you’ve got yourself a bowl of goodness that’s trulyyy good for the soul 🥰
This khichdi is up there on my list of go-to comforting recipes along with my Dal Fry, Rice Bath, and Millet Bise Bele Bath.
Jump to Section: Khichdi Recipe
Khichdi Ingredients
- Rice: Small-grain rice works best for creamy texture
- Dal: A mix of toor dal + moong dal
- Ghee: For roasting + that richness of flavor. Don’t skip this!
- Whole spices: Cumin, peppercorns, bayleaf, cloves, cardamom
- Aromatics: Ginger and green chilli
- Veggies: Potato, carrot, beans, cauliflower, peas
- Spices: Turmeric, red chilli powder, salt
- Water: To cook it all down until creamy
Frequently Asked Questions
Khichdi is made from rice + dal cooked together with spices and vegetables. It’s a super comforting dish to make when you need some extra love!
It’s a one-pot meal that’s:
– High in protein (from dal)
– Easy to digest
– Full of fiber and vitamins (from veggies)
– Naturally gluten-free and nourishing
Moong dal: Light, easy to digest, great for kids or sick days
Toor dal: Adds body and flavor
Mix of dals (like this recipe): Best balance of taste + nutrition
Yes! Skip the veggies and keep it simple with just rice and dal — it’ll still be delicious.
Add a little more water or ghee while mixing, or stir in a spoonful of butter at the end.
Richa’s Top Tips
- Apart from the dals and rice, I love adding diced carrots, beans, potatoes, cauliflower and green peas to my khichdi for lots of extra texture and nutrition.
- Unless you’re vegan, don’t skimp on the ghee. It’ll melt all over and glisten and make every bite extra delicious.
- The water ratio is an important determinant to the final texture of this recipe. I like my khichdi to have a thick porridge-like consistency, for which I had 5 cups of water for for a total of 1 cup of rice and lentils. You can easily increase or decrease the amount of water based on your personal preference.
- If you notice that your khichdi looks too thick after cooking, simply add a little more water and cook for a few extra minutes to adjust the consistency.
- If you live outside India, both these lentils are easily available at Indian stores and sometimes even at large supermarkets.
Serving Ideas
- Add a drizzle of ghee on top (mandatory 😉)
- Serve with yogurt or raita on the side
- Pair with a fried potatoes for extra crunch
- Serve along with papad + pickle for tang and texture
- Have it along with some tomato chutney
- Eat it with some curd or plain unsweetened yogurt.
Storage Tips
- Refrigerate leftovers in an airtight container for 2 days
- Add a splash of water when reheating, khichdi thickens as it cools
- Reheat in a pan or microwave until steaming hot
This isn’t just khichdi — it’s a hug in a bowl. With the nutty ghee-roasted base, whole spices, and hearty veggies, this recipe turns a simple comfort dish into something extraordinary. Whether you’re under the weather, craving something cozy, or just want a quick, nourishing meal, this khichdi will always deliver. Try it and send me your recreations over on my IG @my_foodstory!
Watch Khichdi Recipe Video

The Khichdi Recipe that’s actually tasty!
Ingredients
- 1/2 cup Small grain Rice
- 1/4 cup Arhar Dal, Toor dal/ Split Pigeon Peas
- 1/4 cup Dhuli Moong Dal, skinless Petite Yellow Lentils
- 2 tablespoons Ghee
- 1 teaspoon Cumin Seeds
- 6-8 Whole Peppercorns
- 2 Bayleaves
- 4-5 Cloves
- 2 Cardamoms, whole
- 1 teaspoon Ginger, grated
- 1 Green Chilli / Serrano Chilli, split lengthwise
- 6-8 Cauliflower Florets
- 1 Potato, quartered
- 1 Carrot, peeled and cut into 1 inch pieces (large )
- 8-10 French Beans, cut into 1 inch pieces
- 1/2 cup Green Peas, frozen or fresh
- 1 teaspoon Turmeric
- 1/2 teaspoon Red Chilli Powder / Paprika Powder
- 1.5 teaspoons Salt
- 5 cups Water
Instructions
Traditional Pressure Cooker:
- Wash the rice and both the dals (lentils) well, and soak them in enough water to cover them for at least 30 minutes or up to two hours. This helps them cook faster.1/2 cup Small grain Rice, 1/4 cup Arhar Dal, 1/4 cup Dhuli Moong Dal
- Heat ghee in the pressure cooker and add cumin seeds, peppercorns, bayleaves, cloves, cardamoms, ginger and green chilli. Saute for two minutes on medium flame.2 tablespoons Ghee, 1 teaspoon Cumin Seeds, 6-8 Whole Peppercorns, 2 Bayleaves, 4-5 Cloves, 2 Cardamoms, 1 teaspoon Ginger, 1 Green Chilli / Serrano Chilli
- Drain all the water from the rice and lentils and add them to the cooker. Dry roast them for 4-5 minutes, till you can smell a nutty aroma. Don’t worry if some of the rice and lentils stick to the bottom of the pan, but be careful not to burn them.
- Add all the veggies, turmeric, chilli powder, salt and water to the cooker and pressure cook for 6-7 whistles. Let the pressure release naturally. Once all the pressure has released, open the pressure cooker and mix well. After mixing, the rice and dal should have broken down and should look slightly creamy. Check for salt, and serve hot with ghee, fried potatoes, tomato chutney or just yogurt.6-8 Cauliflower Florets, 1 Potato, 1 Carrot, 8-10 French Beans, 1/2 cup Green Peas, 1 teaspoon Turmeric, 1/2 teaspoon Red Chilli Powder / Paprika Powder, 1.5 teaspoons Salt, 5 cups Water
Instant Pot Version:
- Wash the rice and both the dals (lentils) well, and soak them in enough water to cover them for at least 30 minutes or up to two hours. This helps them cook faster.
- Turn on the saute function and heat ghee in the pot. Add cumin seeds, peppercorns, bayleaves, cloves, cardamoms, ginger and green chilli. Saute for two minutes or till you can smell the spices.
- Drain all the water from the rice and lentils and add them to the cooker. Dry roast them for 5-6 minutes, till you can smell a nutty aroma. Don’t worry if some of the rice and lentils stick to the bottom of the pan, but be careful not to burn them.
- Add all the veggies, turmeric, chilli powder, salt and water to the cooker and cook on high pressure for 30 minutes. I prefer using the manual pressure function. Let the pressure release naturally for at least 10 minutes, and then release pressure manually. Once all the pressure has released, open the pressure cooker and mix well. After mixing, the rice and dal should have broken down and should look slightly creamy. Check for salt, and serve hot with ghee, fried potatoes, tomato chutney or just yogurt.
Video
Notes
- Here’s a pretty cool article about dals (lentils) along with their images to help you identify them easily
- The consistency of a khichdi is a personal preference. We like ours on the mushier side, but if you prefer it less mushy, reduce the water by a cup. You can also add more water if you like and cook it further if you want your version mushier.
- To reheat, just add a little water and heat it over a low flame.
- Aloo Fry is amazing with khichdi. I do a slightly different version with skin on sliced potatoes and here’s what you’ll need for it. Follow the instructions in the video to make it.
- Potatoes 2 (skin on, thinly sliced)
- 1 tsp chilli powder
- 1 tsp Jeera Powder
- 1.5 tsp Coriander Powder
- 1/2 tsp Turmeric
- 1/2 tsp Salt
- 2 tbsp Mustard Oil
- You can also serve khichdi with raita, you can check out my raita recipe here – https://myfoodstory.com/indian-raita-recipe/
Nutrition
This article was researched and written by Navya Khetarpal.


Have tried other khichdi recipes but this the best of all.. thanks for such a wonderful recipe..
Sounds like a great recipe! But the sodium content is very high in this recipe. Which ingredients is it coming from?
I’m not sure. The only ingredient that can contribute to sodium in this case is salt. But let me check this and get back to you.
What kind of rice do you recommend using?
Any short grain rice will work here. I use ‘sona masoori’ which is available at most grocery stores
I saw the comment giving tomato chutney ingredients but I’m just not adept enough to guess at the amounts! Hope you are able to give the complete recipe soon. 😊
It’s on the list – I’ll add that recipe soon!
Thanks for this lovely recipe. My Tamil hubbs loved it, and I got hella credit!
Wohoooo! so glad you and your hubs loved it.
Loved this kichdi recipe. Made a big batch on Monday for lunch with fried potatoes, pickle and curd on the side. Second batch was an early dinner last night with spicy, fried Kerala style prawns 😋😋
The only things I did different were I used basmati rice (rozana) and I sautéed the veggies first coz I didn’t want them completely mushy, removed them from pan and followed the recipe as is, adding the veggies again with the water. Yummy, yum, yum 😁
Love the changes you made Seema, thanks so much for sharing!
Hi Richa,
I love your recipes and i have literally learnt how to cook with your recipes.
Regarding this post i had a few questions:
1) Can I use basmati rice as we buy only the one kind? Will this have a different result? Do i need to adjust my water ratio?
2) What is the tomato chutney recipe that you have used?
3) Is there any particular kind of potatoes or masala that you used to make the side of potatoes?
Again I wanted to tell you that i love your recipes! Keep em coming!
Hey there – if you are using basmati rice, you might have to cook it for an extra ten minutes to break down the long strands of the rice (unless you prefer it that way). You don’t need to add extra water if you use basmati rice. I don’t have proper recipes for the chutney and the potatoes yet, but here’s what I do – For the chutney – heat oil, add mustard seeds, minced ginger and garlic, green chillies and onions. Once onions are translucent, add at least double the amount of tomatoes or more with turmeric, little chilli powder (spice comes from green chillies) and coriander powder. Add a little water and let it simmer till tomatoes become super pasty, add jaggery (it should be sweet and spicy), salt, a few curry leaves and lots of coriander and finish. For the potatoes, I peeled and sliced them, rubbed mustard oil, turmeric, chilli powder, lots of coriander powder and raw mango powder and salt all over them. Add some oil to the pan and place them in a single layer. Just let them cook slowly, and turn once till they are cooked through. Takes about 15 minutes if you slice them 1/4 inch
This looks so comforting! I make a tangy version of this with Tamarind…Its called bisibela bhath in Karnataka…
I’m familiar with bisibele bath but in my opinion, this is a closer cousin of pongal. All of them are equally yummy!
Your khichri story brings to my mind my many travels to India prior to my retirement. Khichri was my first menu choice for my evening meal. As you say, it is a very comfortable food to eat. And, you are so correct in saying it has many different variations. My first experience was in Delhi and the dish had very distinctive flavours and not so spicy. My last memory of the dish in India was in Korba, Odisha state and it was extremely spicy and lacked flavour. Your recipe sounds wonderfully balanced and one to be cooked soon.
Thank you Ron!
Can this be made in a normal saucepan
Hey Ann, we usually cook this in a pressure cooker because it cuts down the cooking time. But yes, it can be made in a saucepan. Make sure you have a large pot because this recipe needs a lot of water. Just bring everything to a boil, after you’ve added the vegetables and water and then cover and cook on a medium low flame for 45 minutes-1 hour. You may need to add more water if necessary, and stir occasionally to make sure it doesn’t stick to the bottom of the pan.
Thank You!! Can’t wait to try this!! I was worried because I don’t have an instant pot but am excited to try on the stovetop. Thanks for posting!!
So glad! I hope you like it!
This recipe looks wonderful! I’ve made something similar that is just rice, lentils, and caramelized onion. Is there any way to make this recipe without a pressure cooker/instant pot?
Hey Nicole, we usually cook khichdi in a pressure cooker because it cuts down the cooking time. But yes, it can be made without one. Make sure you have a large pot because this recipe needs a lot of water. Just bring everything to a boil, after you’ve added the vegetables and water and then cover and cook on a medium low flame for 45 minutes-1 hour. You may need to add more water if necessary, and stir occasionally to make sure it doesn’t stick to the bottom of the pan.