Mughlai Chicken – Easy, Restaurant Style, North Indian Recipe
on Aug 10, 2021
This post may contain affiliate links. Please read our disclosure policy.
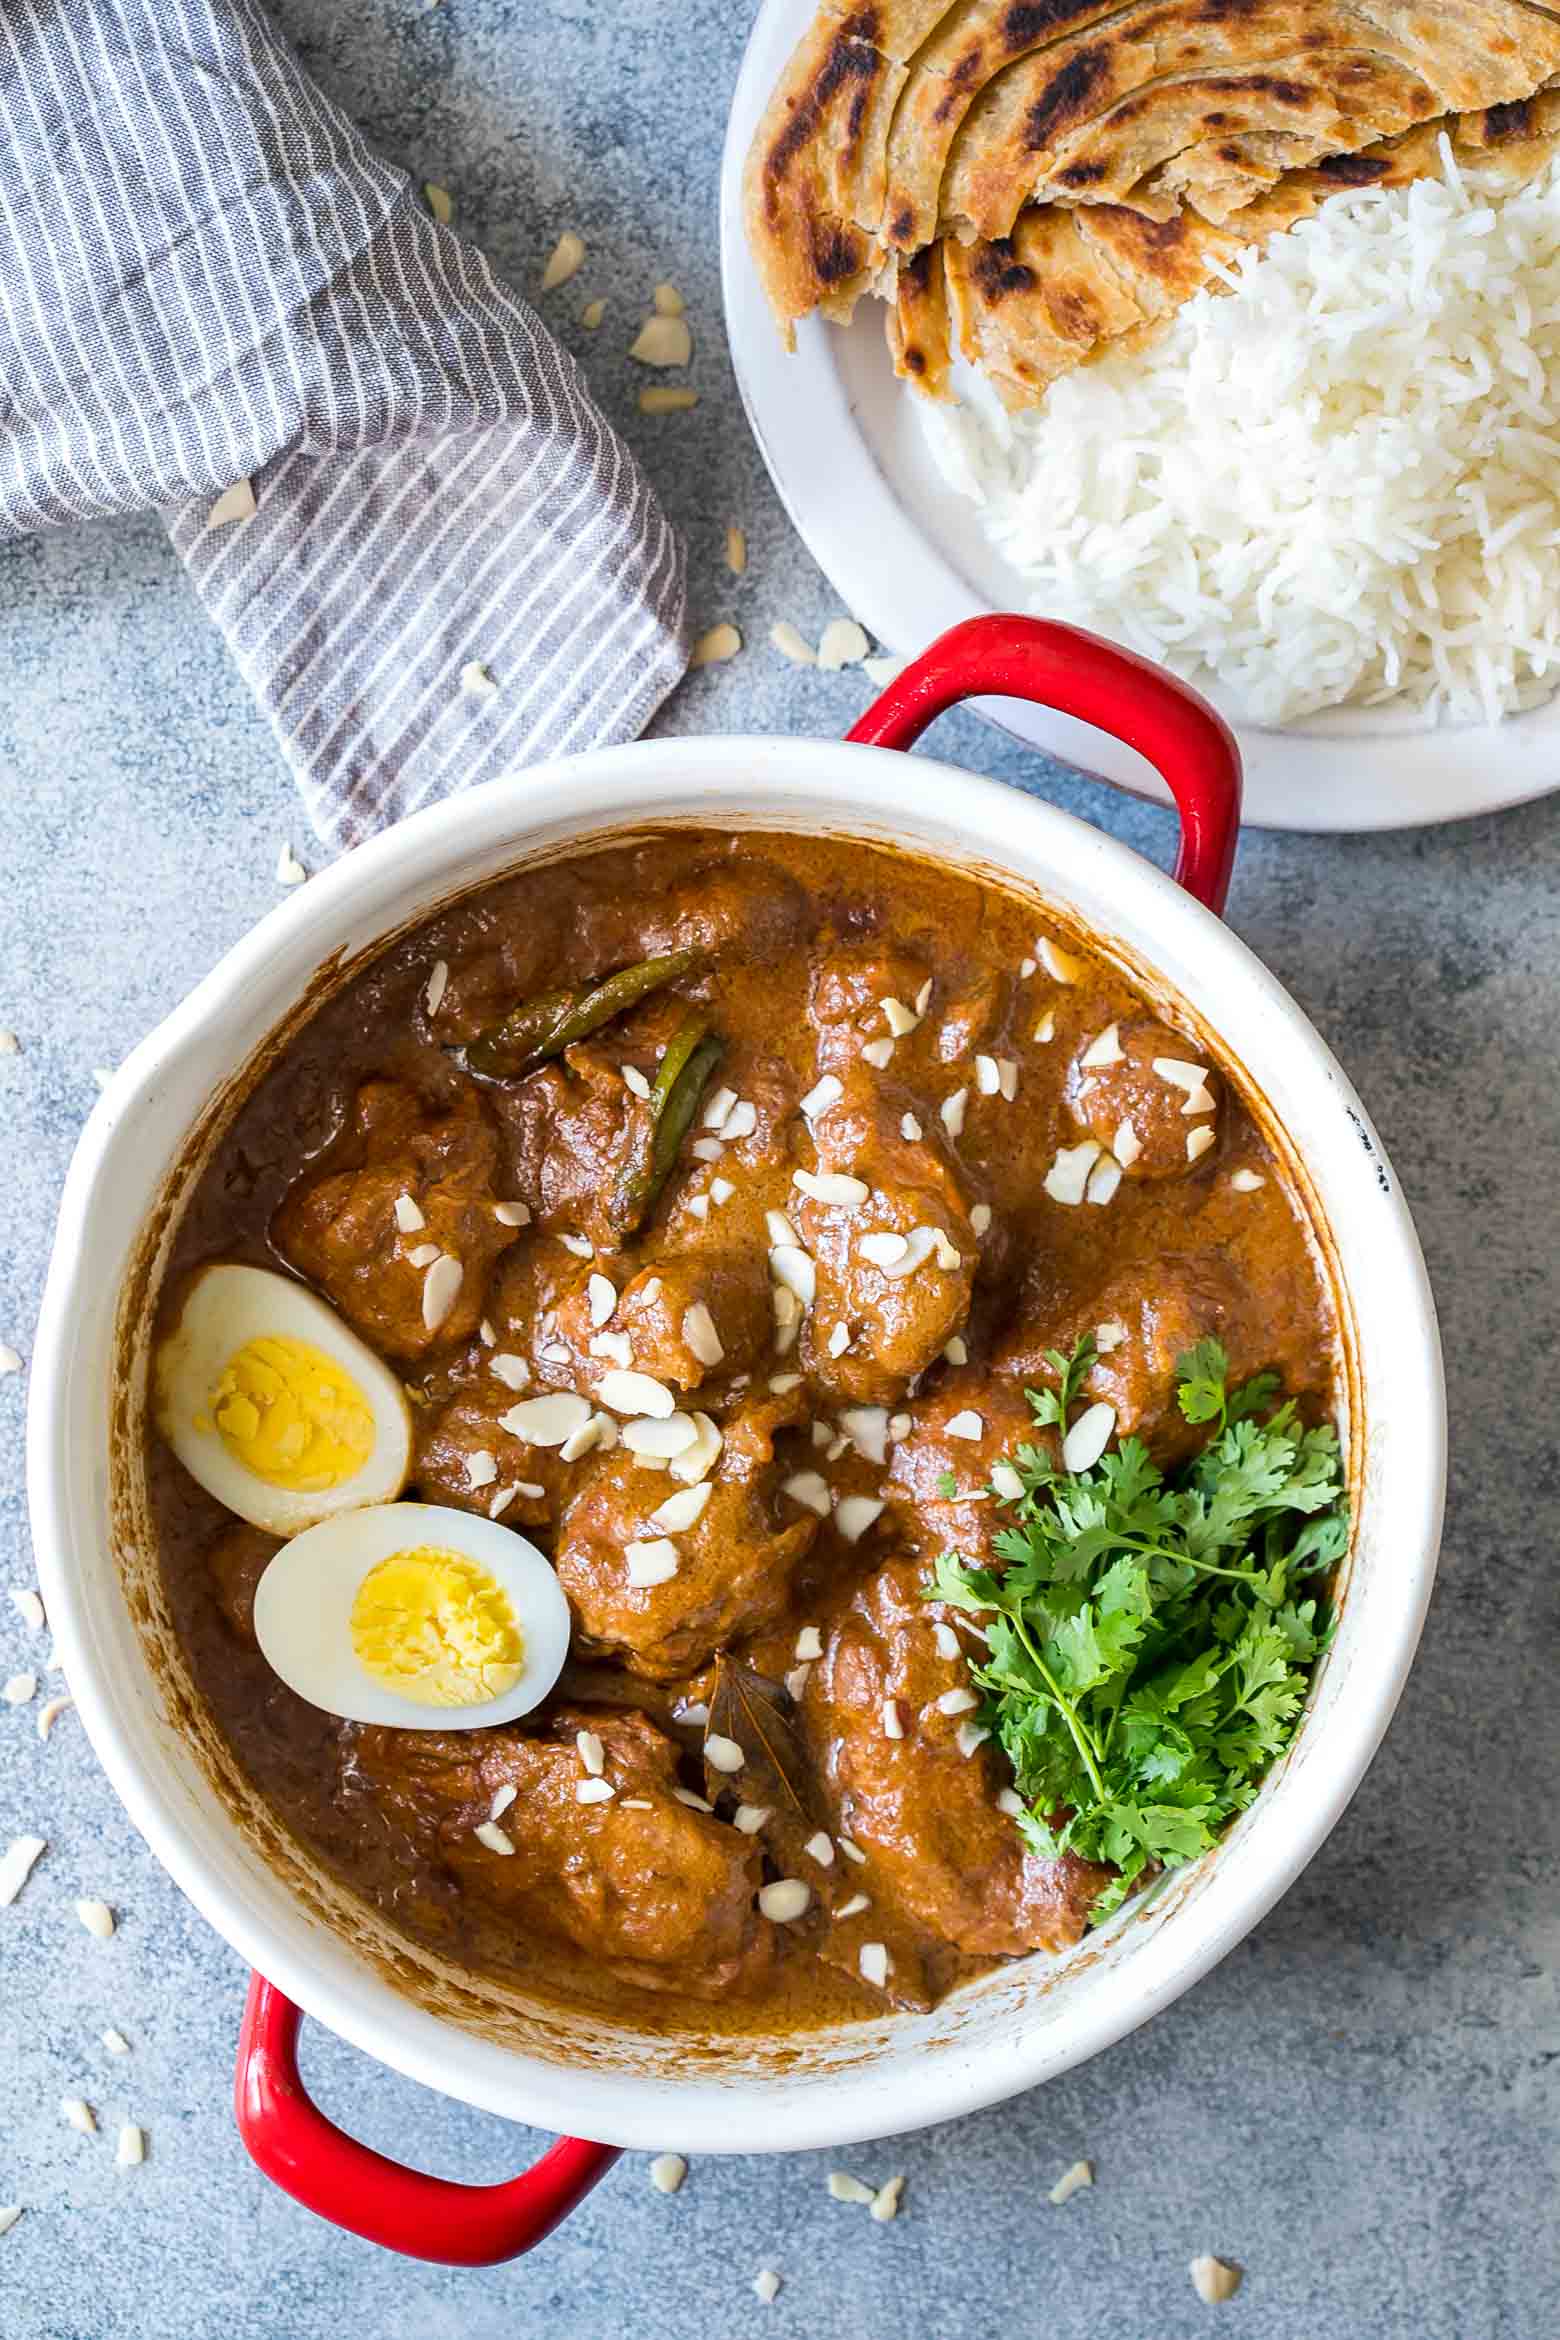
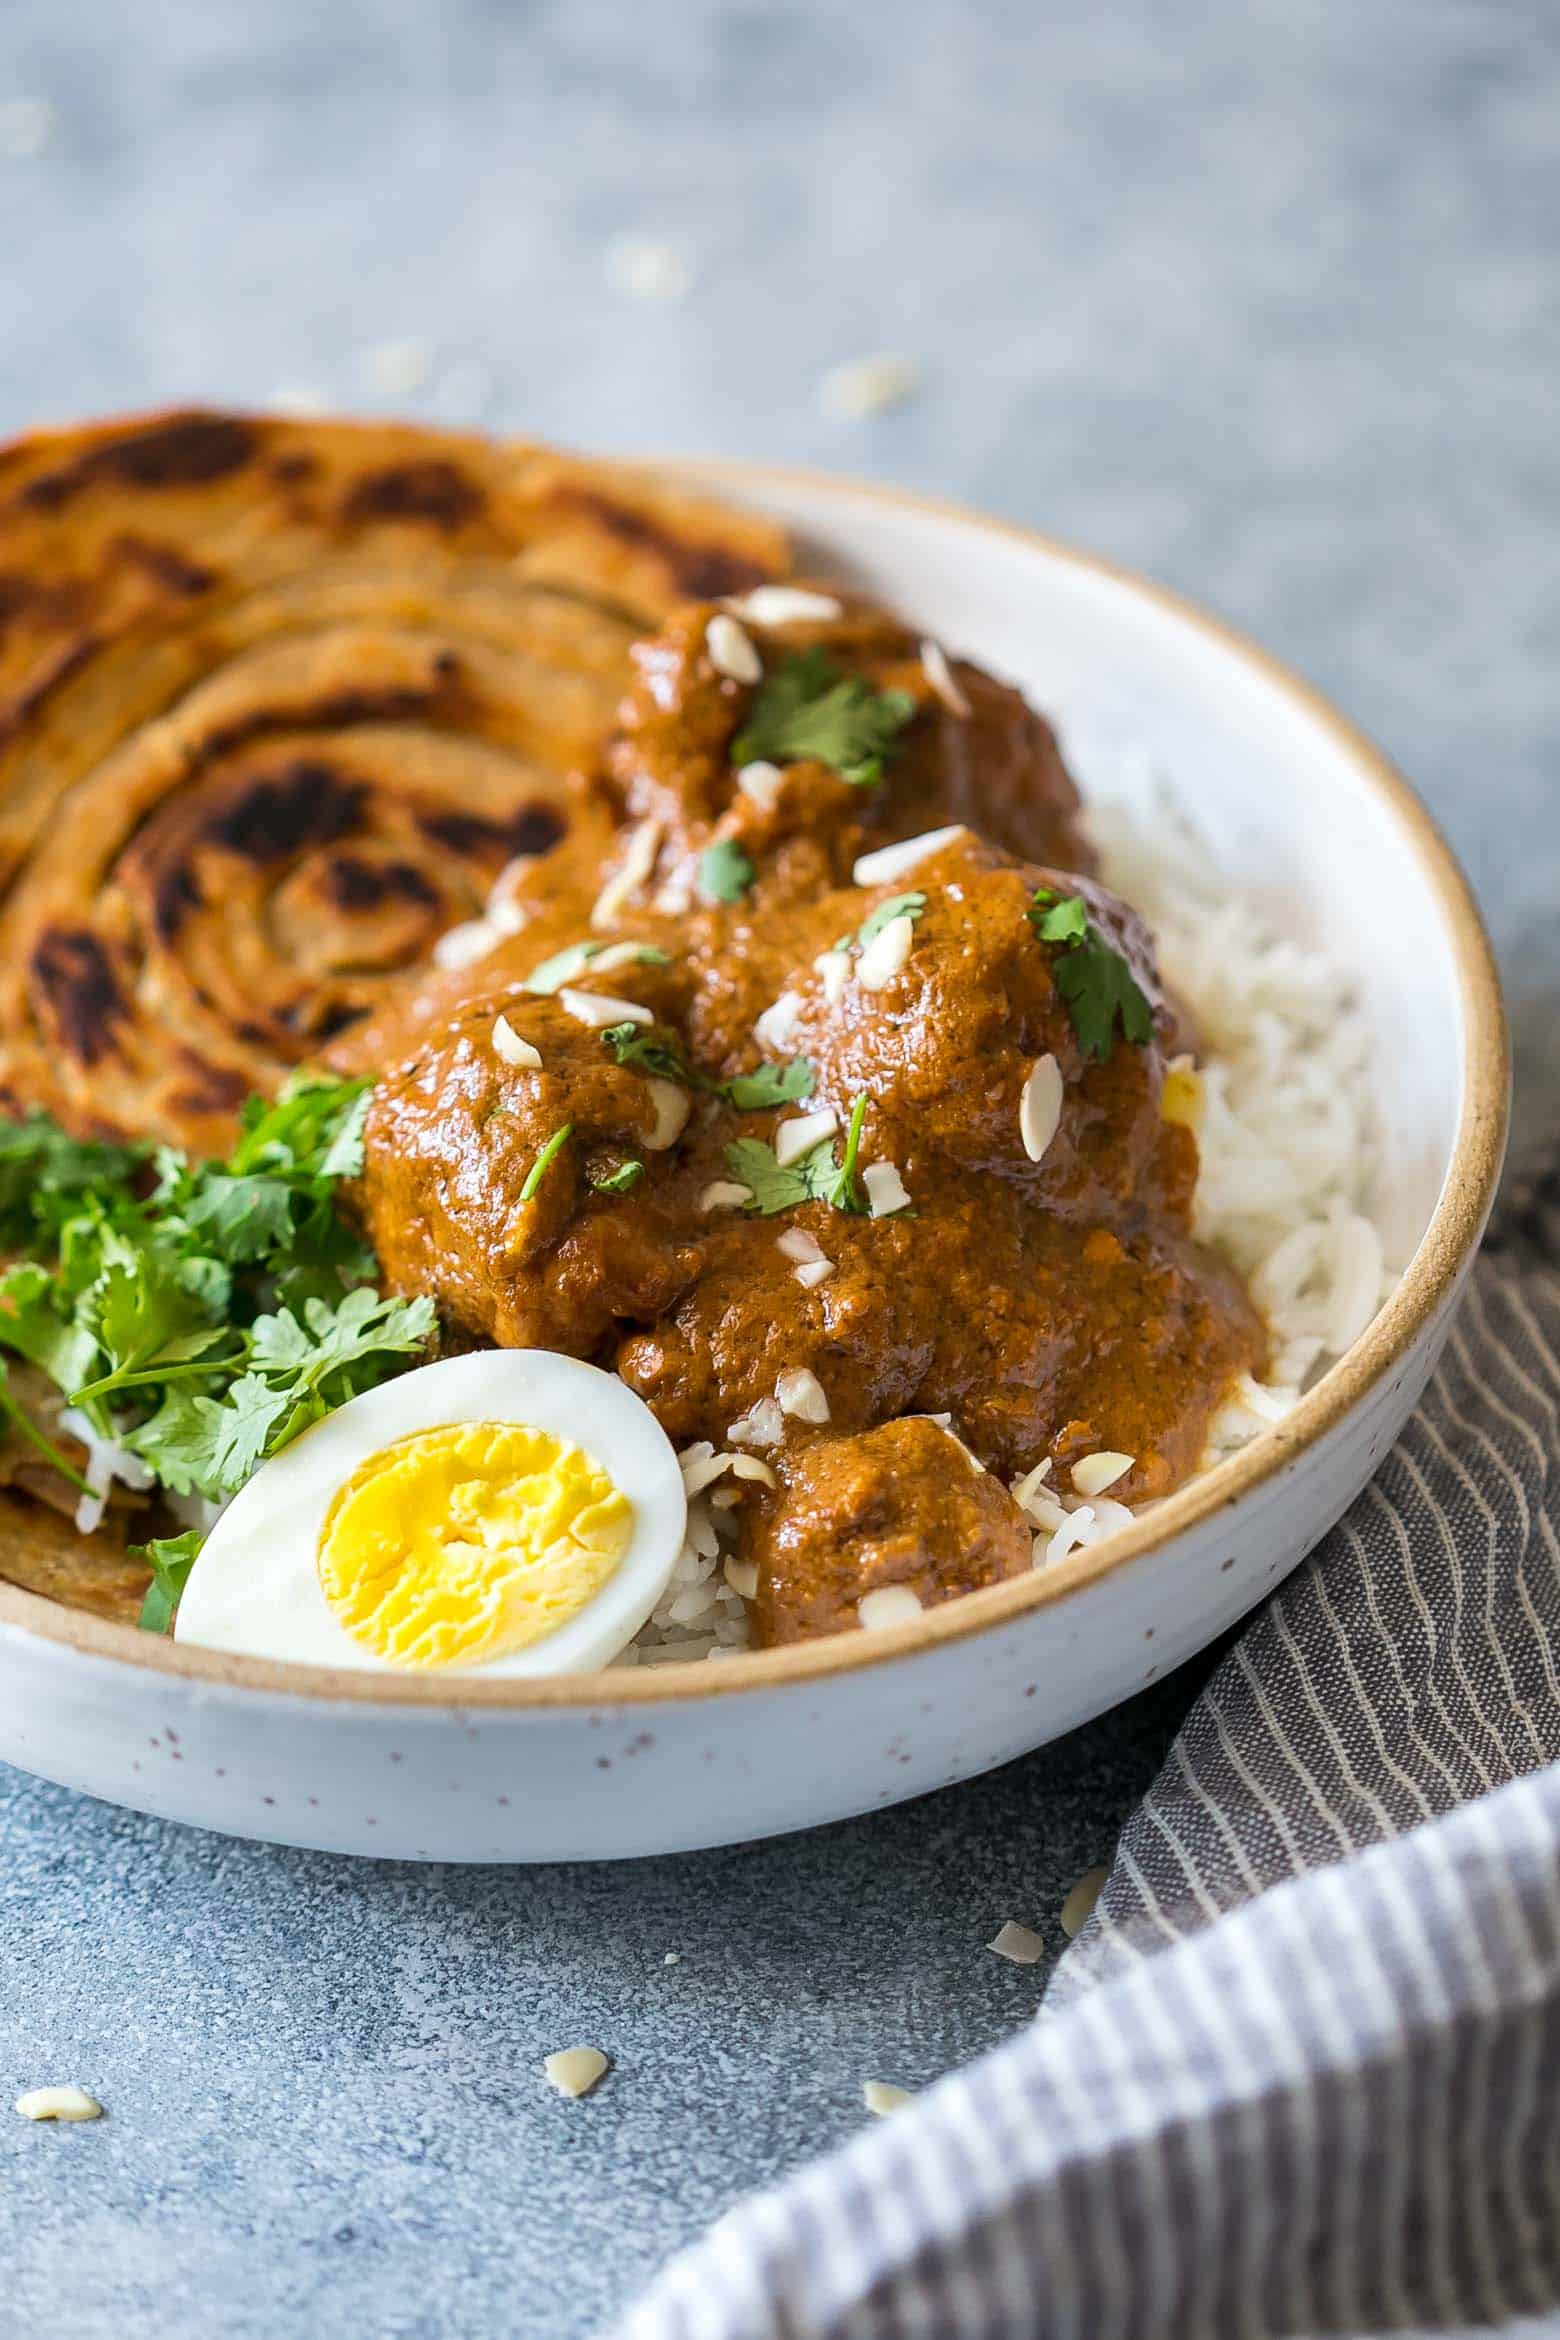
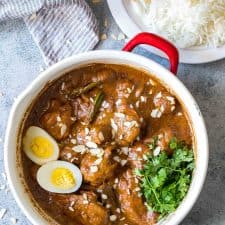
Mughlai Chicken is a restaurant style, north Indian recipe with a creamy, dark brown onion gravy that will have you licking the plate! Serve it with parathas, biryani or jeera rice, and feel free to substitute paneer if you are vegetarian.
I’m going to be honest with you. Just the term mughlai is enough to put me off because I’m imagining a heavy gravy that leaves you feeling full. And while I’m north Indian and paneer butter masala is in my blood, I don’t like feeling like I ate a whole chicken in one sitting.
But this mughlai chicken recipe changed everything. Because I could’ve never imagined the kind of magic that brown onions and creamy cashews can do with some simple spices.
Mughlai to me also meant hours in the kitchen sauteeing, grinding, and basically living there for five hours sweating my body weight out. But tada! I have something that’s ready in an hour and gives you so much satisfaction that you’ll be licking the pan clean. Like I did.
This mughlai chicken recipe is as easy as it gets. And it reminds me of something my mum used to make when I was a kiddo. You know, those warm, fuzzy, food memories that never really leave you even when you get older? That first bite of something delicious that doesn’t have a name but is almost ingrained in your memory. So that the day you taste it again, there is a light bulb moment. And you are like yesssss! Why didn’t this happen before!
Ingredients for Mughlai Chicken
This recipe has exactly 15 ingredients counting salt and all. And I know that seems like a lot, but the majority of them are just spices. Not the kinds you would have to make a grocery run for, but the kinds that you probably have lying around anyway. The rest are just ghee, onions (lots of them), cashew nuts, garlic, ginger, green chillies and chicken.

- Chicken: The chicken is curry cut which is common terminology in India when you buy chicken. When you buy chicken outside, you can use any cut that is skinless but bone in. If you are using chicken breast, buy bone-in and then cut it into 1-1.5 inch pieces
- Onions: You can either chop the onions or slice them. Browning them takes some time and patience, approx 12-15 minutes but its well worth the effort. Just make sure to cook them on a low flame.
- Ghee: Ghee is non negotiable for this recipe. If you really don’t have access to it, use butter. The flavours are infinitely better than if you use oil
- Whole Spices: Bayleaf, cinnamon, cloves and green cardamom
- Cashews: These should be soaked in hot water for 10-15 minutes before blending
- Green Chilli: Sub with serrano pepper. Use 1-2. This is not meant to be a spicy dish so the chilli is more for flavour than heat
- Ground Spices: Standard spices like coriander powder, turmeric, chilli powder and garam masala (I have a recipe for homemade garam masala that you can try)
How to make Mughlai Chicken
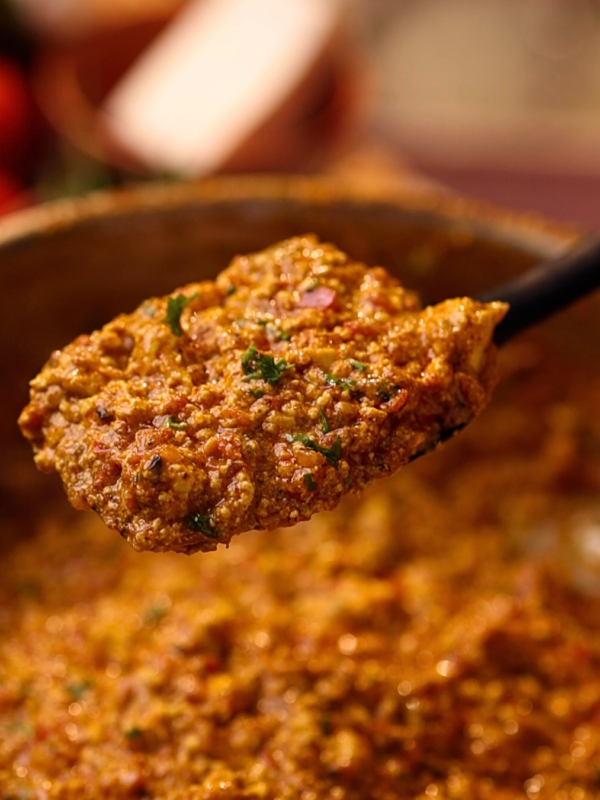
- Base Gravy: The gravy is made with soaked cashews, onions that have been slowly caramelised, ginger, garlic and green chillies. All of this is blended with some water to a smooth paste
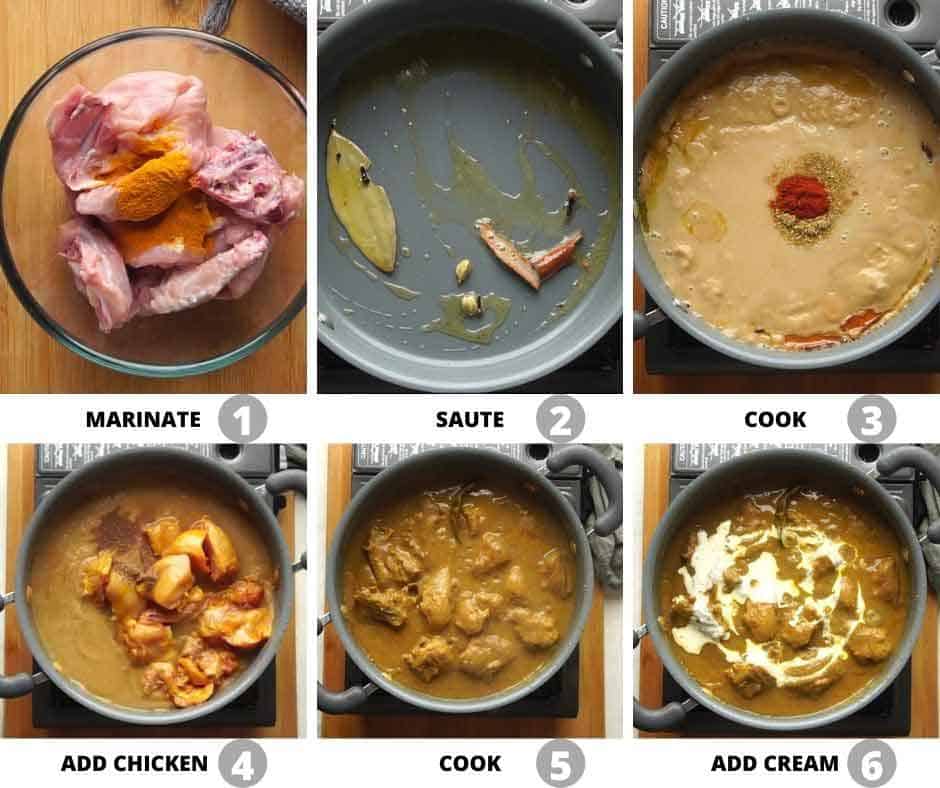
- Marinate Chicken: I like to marinate the chicken in some turmeric powder for 10-15 minutes while I prep everything else and cook the onions but you can easily skip this step
- Saute Whole Spices: Its important to lightly saute the whole spices in ghee to release their aroma and flavour
- Cook Gravy: While the onions have been browned and caramelised, it’s important to cook the gravy in ghee and with the whole spices further till it reduces and you start seeing a little ghee floating on top. If this is not done, the ginger and garlic will still taste raw
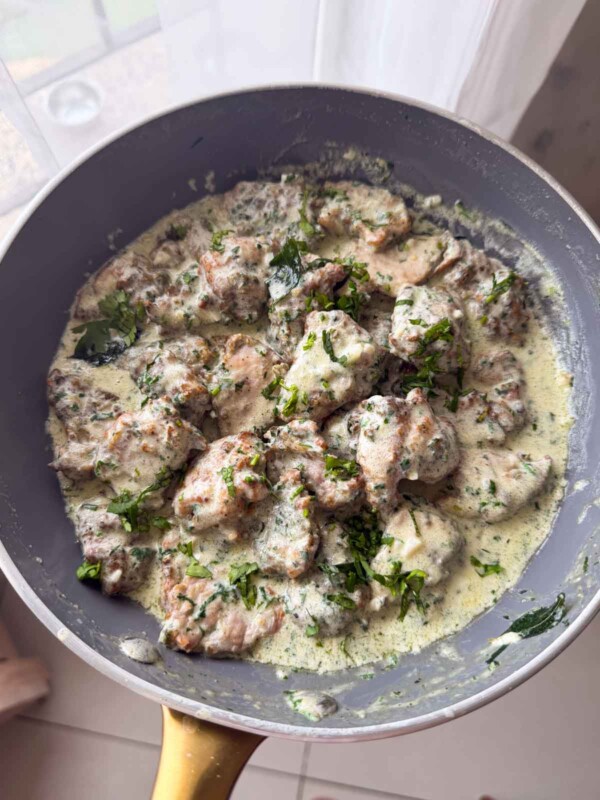
- Cook Chicken: Once the gravy is cooked, the chicken and the garam masala are added and then cooked for 20-25 minutes till the chicken is tender and cooked through
- Finish with cream: A dollop of cream on top right at the end really takes this to the next level!
Top tips for nailing Mughlai Chicken:
- Before you start, soak your cashew nuts in hot water. Using hot water, softens them faster so that when you grind them along with everything else, you’ll have a smooth, creamy curry without any stubborn cashew bits.
- Chop your onions for this recipe as fine as possible. I recommend using a food processor which will give you a nice fine chop without too much effort. This helps brown them faster and breaks them down quicker.
- Use bone-in chicken for this recipe. Bone-in chicken is more flavorful and definitely more juicy and has less chances of being overcooked.
- This mughlai chicken recipe tastes much better when it’s left to sit for a couple of hours or even overnight, which makes it perfect when you want to plan ahead for a party!
I’m hoping you’ll make this a regular Sunday afternoon affair because this mughlai chicken recipe will give you all kinds of soul satisfying, sleep inducing feels that all comfort food should have. If you do, here are my top tips for making this mughlai chicken recipe.
This has made me so very hungry! I have a hankering for mughlai chicken now, and lucky for me, I have some lying around in the fridge 🙂
Watch the Video
This recipe was first published on July 23, 2017 and updated on August 10, 2021 with a new recipe video. No changes to the original recipe were made.
Mughlai Chicken Recipe
Ingredients
- 3 tablespoons Ghee
- 10 Cashewnuts
- 4 Onions, finely chopped (large)
- 6 Garlic Cloves, peeled
- 1 inch Ginger, peeled
- 3 Green Chillies
- 2 Cardamom Pods
- 1 Bayleaf
- 3 Cloves
- 1 inch Cinnamon stick
- 1/2 kg Chicken, cut into medium sized pieces
- 1/2 teaspoon Turmeric Powder
- 1 teaspoon Coriander Powder
- 1/2 teaspoon Chilli Powder
- 1/2 teaspoon Garam Masala
- 2 tablespoons Cream
- Salt to taste
Instructions
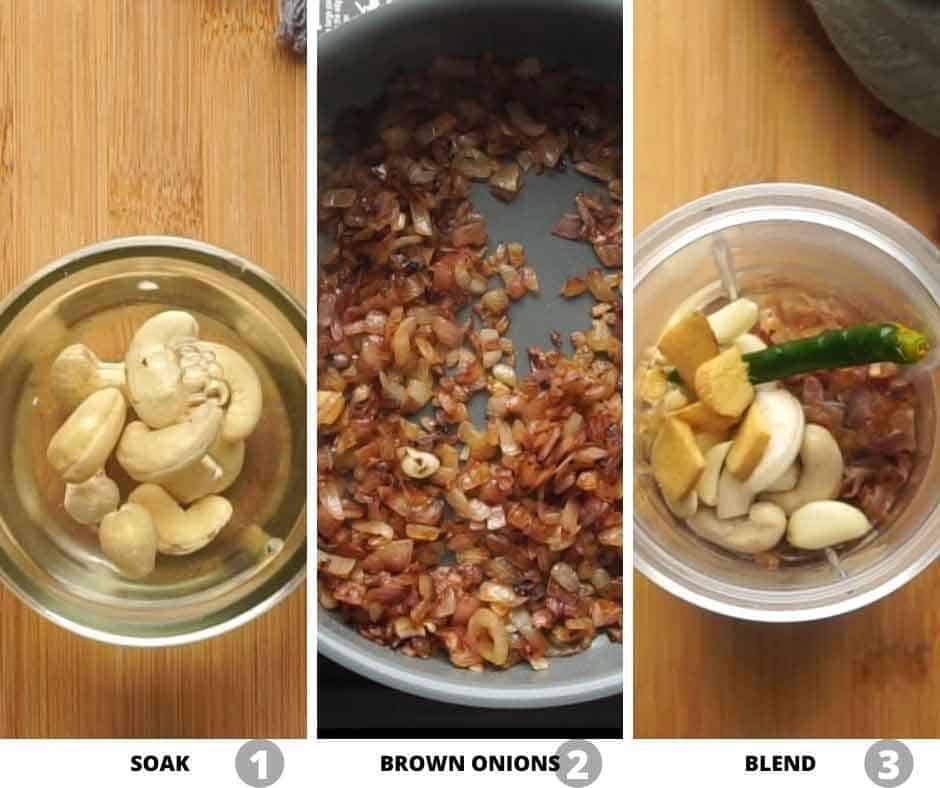
- To start with, soak cashewnuts in hot water for 10 minutes. Also rub turmeric powder all over the chicken. Set both things aside.
- Heat a tablespoon of ghee in a pan, and add the onions. Sprinkle 1/2 teaspoon salt over the onions and mix. Reduce the flame, cover and cook the onions till they are deep brown in color. During the process of browning the onions, stir them around every 5-6 minutes to prevent them from sticking to the bottom and burning. This whole process of caramelizing the onions should take about 20 minutes.
- Once the onions are brown, transfer them to a food processor along with the soaked cashew nuts, garlic cloves, ginger, green chilies and 1/4 cup water. Grind to a smooth paste.
- Heat the remaining ghee in the same pan, and add cardamom pods, bayleaf, cloves and cinnamon. Saute for a minute or two and add the onion paste. Cook the onion paste on medium high heat, while stirring occasionally for 4-5 minutes. Add coriander powder, chili powder, garam masala powder and salt and saute for another 2-3 minutes.
- Add chicken to the pan along with 1/4 cup water. Cover and cook the chicken for 20 minutes or till cooked through, while stirring the curry occasionally. This will be a thick gravy, but if you like your thinner, feel free to add a little water and bring the curry to a boil.
- Taste for seasoning, and finish it up by stirring in the cream. Switch off the flame. Let the curry sit for 10 minutes before serving with parathas and jeera rice.
Video
Notes
- Brown onions till they reach a deep brown colour. This caramelisation adds depth to the flavour so do not skip this step.
- Grind browned onions, ginger, garlic, cashew nuts and green chilli along with water to a smooth puree. Keep in mind that this forms the texture of the dish so keep it as smooth as possible.
- Cook the onion paste till it turns light brown in colour. Remember to stir frequently as it can easily stick to the bottom and burn. Once it turns light brown in colour, the raw aroma also goes away.
- Cook the paste until the oil separates i.e., there is a thin layer of oil on top. The oil separating is an indicator that the spices have combined and are cooked through. It also indicated that the excess moisture has evaporated.
- Before you start, soak your cashew nuts in hot water. Using hot water, softens them faster so that when you grind them along with everything else, you’ll have a smooth, creamy curry without any stubborn cashew bits.
- Use bone-in chicken for this recipe. Bone-in chicken is more flavorful and definitely more juicy and has less chances of being overcooked.
- This mughlai chicken recipe tastes much better when it’s left to sit for a couple of hours or even overnight, which makes it perfect when you want to plan ahead for a party!


Can I use creme fraiche instead of double cream in this recipe? Also, does it serve well with tenderstem brocolli on the side? In addition to rice of course! Thanks
Hey Claudia, creme fraiche cannot be used instead of cream, you may use fresh cream. it may be served with broccoli.
Amazing recipe, Richa. Do you have an Insta profile/page with more recipes that we can follow?
Hey Everton, my insta page – https://www.instagram.com/my_foodstory. Thanks
Such a delicious authentic restaurant style flavour and texture. Beautifully explained recipe. The only slight alteration, given that you might be making for the little ones, is a reduction in the green chilli amount. Otherwise superb, many thanks Richa!
Hey Chris, so so glad to know how you made it as per your kids’ taste.
Thanks. the chicken curry turned out very well and delicious.
I love cooking especially meat n chicken dishes.
Found this recipe very helpful and added to my reference cards.
Hey Vijay, that sounds fantastic, so so happy you liked the recipe.
This Chicken – Easy, Restaurant Style, North Indian Recipe brings authentic, rich flavors right to your kitchen with minimal effort!
Simple recipe and loved it. Very tasty
Hey Burzis, am so glad to hear that you loved the recipe. Thanks
I tried this recipe which turned out to be great taste, my family liked. Tips are very useful. Well explained recipe with tiny details
Thanks Noel
Thank you for sharing your passion for food with us. It’s such a joy to read your blog.
Very good and easy recipe. Everybody loved it. Will make again!
Thank you,lady with magical dishes for this out of the world experience, it was soooo yummy