Authentic Dhaba Style Dal Fry
on Mar 31, 2020, Updated Sep 11, 2023
This post may contain affiliate links. Please read our disclosure policy.
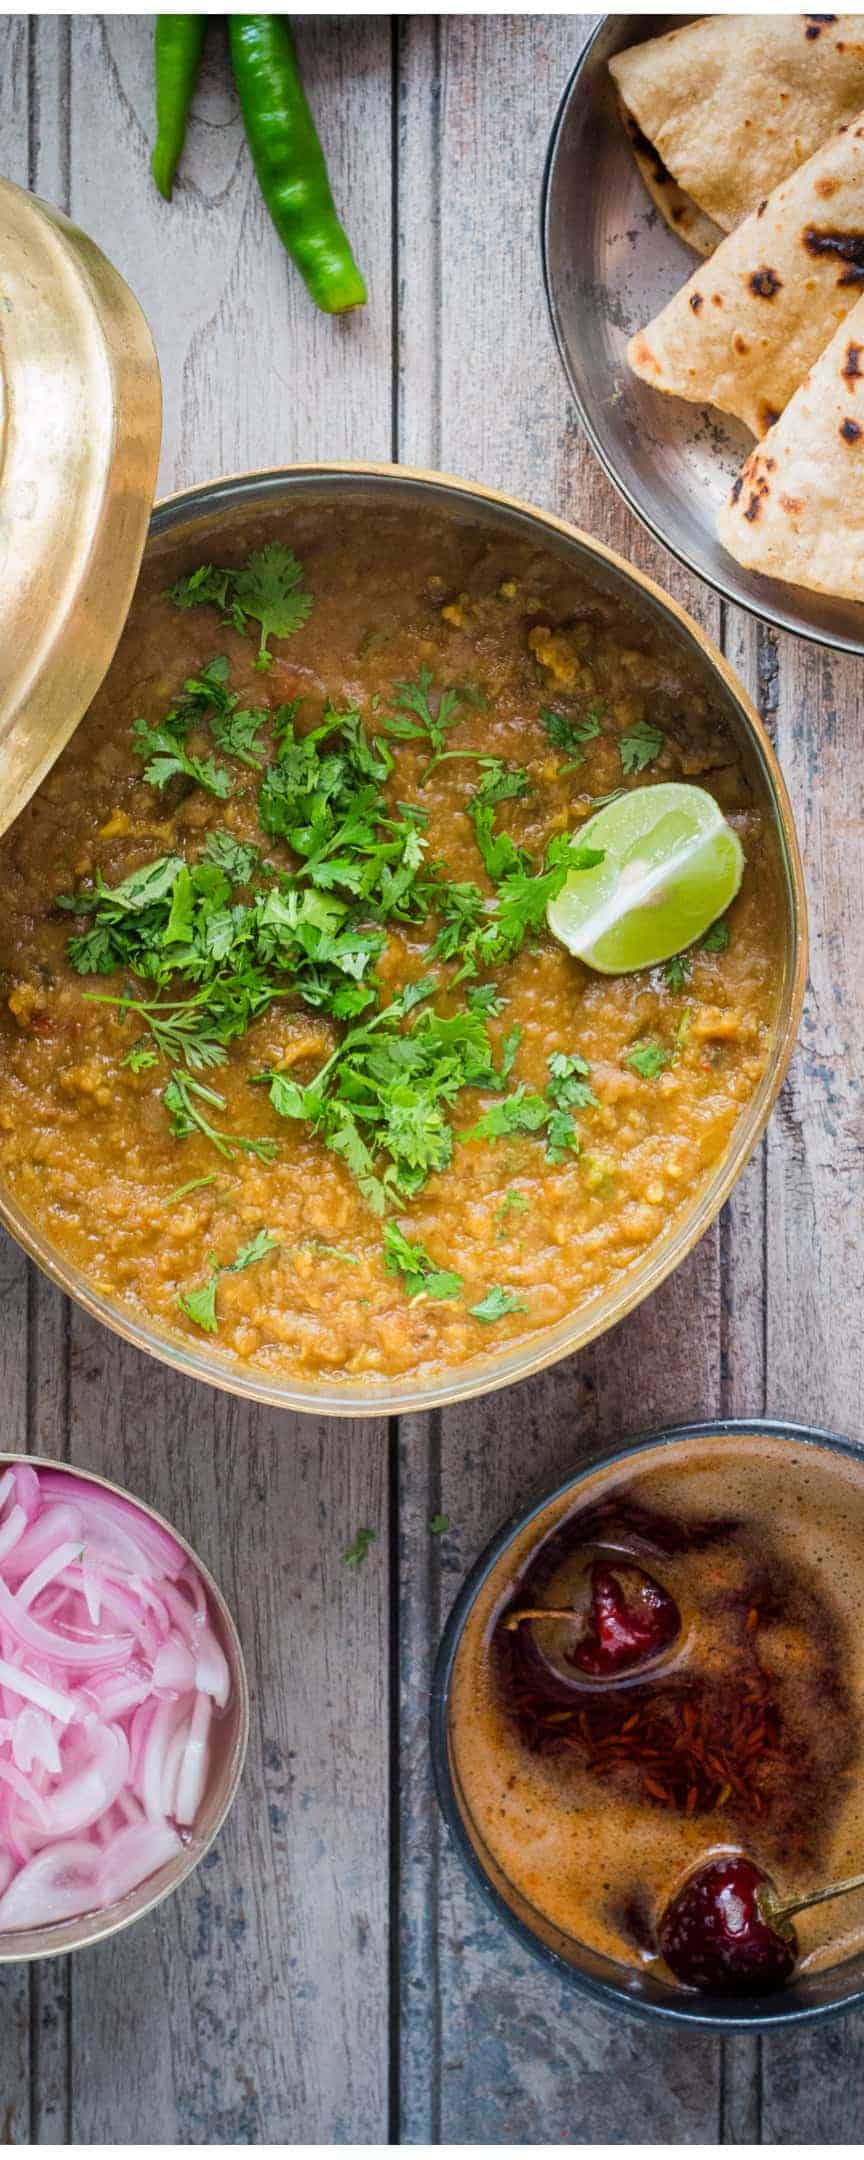
This Dhaba Style Dal Fry is an authentic Indian recipe! It’s not a regular dal and has some really bold flavors from tempering that complement its thick consistency. It’s really easy to make and can be put together on a weekday under 30 minutes!
For anyone who thinks dal is boring, I’m going to change your mind today. Just before I started writing this post, I posted a picture of the Dal on Instagram (are we friends yet?) and oh man! I was expecting a lot of meh’s but all I got were yay’s for this Dhaba Style Dal Fry. So now I’m thinking there are other people who might actually like dal. Hallelujah.
Dal or Dhal or Indian Lentil Soup as some like to call it is the kind of thing you take so much for granted. In fact growing up I hated dal, mainly because of my dad. No he didn’t force feed us dal, but he only eats yellow dal – arhar or toor and so we didn’t have too much of an option. Faced with yellow dal day after day, you can imagine our plight – and we still give him a hard time for that.
 But I guess once you start staying away from home, those very things end up becoming favorites. Everything except yellow dal. Am I confusing you, considering this post is about yellow dal?
So here’s the thing, I don’t like the regular pressure cooker with turmeric and salt only yellow dal. I want mine to have bold flavors, some tadka (tempering), some masala and only then I’m satisfied. Like this one.
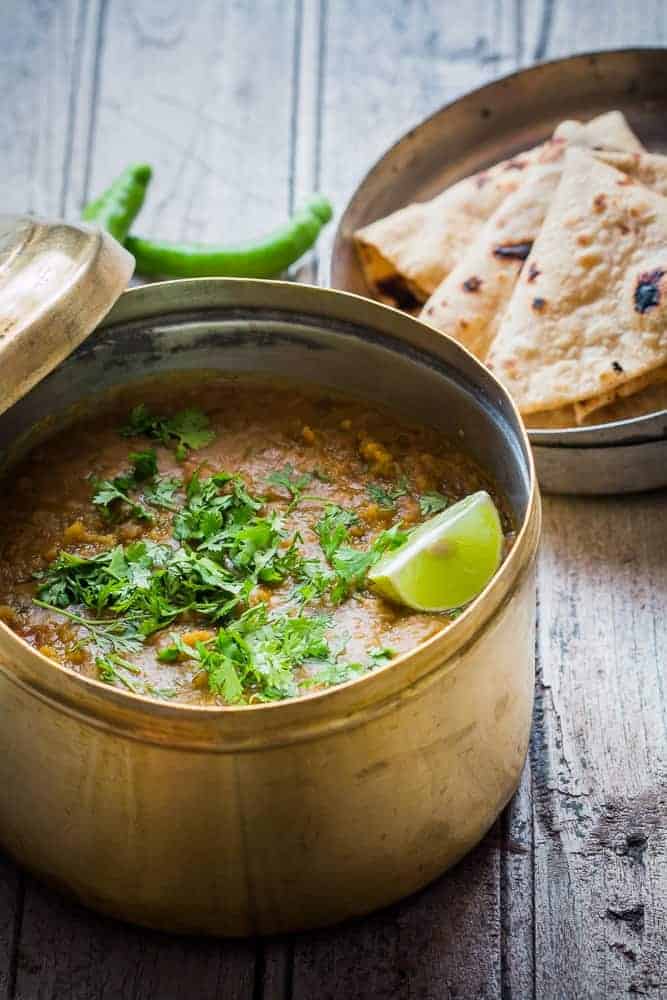
My dhaba visits are always a battle. Between deciding whether to order dal fry, dal tadka or dal makhani. Dal fry wins about 40% times. Because dhaba style dal fry is smoky and spicy and indulgent and perfect with crisp tandoori rotis. All you need is some sliced onions on the side and a squirt of lime juice. And you are set.
Secret to fantastic Dal Fry
The secret to this OMG dhaba dal fry is butter and tons of garlic. Trust me, those two just turn regular dal into awesome dal. I like pressure cooking the dal separately and then adding the dal to a tempering.
Use the right dal for Dal Fry
Arhar/Toor/Pigeon Peas is the best dal to use for dal fry. It has a mild taste, cooks fairly quickly, and breaks down so that the dal has a mushy consistency which is just right for dal fry.
The steps to making this recipe are pretty simple and totally doable on a weekday. So no extra prep needed, no last minute grocery trips because as long as you have the basic pantry staples, you should be good to go.
Plus it really doesn’t take too much time, and you will have finger licking goodness on the table in under half an hour. Dal Fry is usually a thick dal, unlike dal tadka but you are the boss of your dal so feel free to change things up slightly and just use this recipe as a guide.
Serve it with:
I changed this recipe when I updated it on March 31, 2020. But a lot of you asked for the older recipe which has been added in the notes section of the Recipe. Just scroll down to the notes section in the recipe box and you should be able to see it.
Watch how to make Dhaba Style Dal Fry Recipe Video

Dhaba Style Dal Fry
Ingredients
- 1 cup Tur Dal, Arhar Dal /Pigeon Peas spilt and skinned
- 3 Tomatoes, finely chopped
- 1/2 teaspoon Turmeric Powder
- 1 teaspoon Salt
- 2 tablespoons Butter
- 1 tablespoon Ghee
- 1 teaspoon Mustard Seeds
- 1 teaspoon Cumin Seeds
- 6 whole Garlic Cloves, smashed with the back of a knife
- 8-10 Curry Leaves
- 2 Green Chillies, slit lengthwise
- 2 Whole dried Red Chillies
- 1/2 teaspoon Chilli Powder / Cayenne Pepper
- Juice of 1 Lime, optional
- 2 tablespoons Chopped Coriander / Cilantro
Instructions
- Pressure cook the dal with tomatoes, turmeric, salt and 3 cups water till completely cooked through and can be mashed easily between two fingers. If using a traditional pressure cooker, cook for 4-5 whistles. In an Instant Pot, cook on manual for 30 minutes. Use a wire whisk or spoon to mash the dal further so it’s almost smooth.
- Heat ghee and butter in a pan and add the smashed garlic. Stir fry on high for a minute till the garlic is fragrant and starts turning golden brown. Reduce the heat and add mustard seeds, cumin seeds, curry leaves, green and red chillies and stir fry for another minute.
- Add red chilli powder and give it a quick stir and all the cooked dal along with 1/2 cup water. Bring this to a boil and simmer for five minutes.
- Switch off the flame and stir in chopped coriander and lime juice (if using). Serve hot with rice, pickle, sliced onions and rotis.
Video
Notes
- 3/4 Cup Tur or Arhar Dal (Pigeon peas spilt and skinned)
- 2 tablespoons Butter
- 1 tablespoon Oil
- 2 cloves Garlic (smashed)
- 1/2 teaspoon Garlic Paste
- 1/2 teaspoon Ginger Paste
- 2 Green Chilies (slit lengthwise)
- 1 Onion (finely chopped)
- 2 Tomatoes (finely chopped)
- ½ teaspoon Chili Powder
- 1 teaspoon Dhaniya (or Coriander Powder)
- ½ teaspoon Jeera (or Cumin Powder)
- ½ Turmeric Powder
- ½ Garam Masala (Powder)
- 1 tablespoon Kasuri Methi
- 1 Lemon
- 1 Teaspoon Salt
- Coriander (chopped, for garnish)
- Pressure cook the dal with 2 1/2 cups water till completely
cooked through and can be mashed easily between two
fingers. Use a wire whisk or spoon to mash the dal further
so it’s almost smooth. - Heat oil and butter in a pan and add smashed garlic. Fry the
garlic till light brown, without burning it and add the slit
green chilies, ginger and garlic paste. - Cook for 30 seconds and add onions. Stir fry the onions till
they are translucent and add tomatoes, whole spices and
salt. - Cook till the tomatoes completely break down and become
pasty. At this point, stir in the dal along with some water if
required. Bring this to a boil and simmer for 5-7 minutes. - Dry roast the kasuri methi in another pan for a minute or so.
Grind it to a powder and mix it in the dal along with juice
from the lemon. Switch off the flame and stir in chopped
coriander. - Serve hot with rice, pickle, sliced onions and rotis.
- Arhar/Toor/Pigeon Peas is the best dal to use for dal fry. It has a mild taste, cooks fairly quickly, and breaks down so that the dal has a mushy consistency which is just right for dal fry.
- Do not skimp on the butter and garlic, they are imperative the taste of this dish!
- Smashing the garlic with the back of a knife helps release it’s juices making the dish more flavourful and aromatic.
- Adjust the spice levels by controlling the amount of dry red chilli you add. You can even add in 1-2 slit green chillies while sautéing if you like it spicier.


Dhaba Style Dal recipe is indeed a tasty recipe. I will surely try making this and I reckon that putting that dhaba essence in that will be a difficult thing.
thank you so much for sharing this dear. Lots of love
Thanks Geet! I hope you like it!
What is the difference between dal fry, dal tadka and dal makhani?
Tried your spin on this today! ❤️
Yay! I hope you liked it 🙂
Delish delish! I tried this recipe and it came out beautifully well! Spot on! Perfect with plain basmati rice!
I’m so glad you liked it Pama!
Oh maaaan you totally nailed it with that dhungar process! We do it exactly the same way at home and it’s just plain bloody awesome 🙂
Hey Richa 🙂 I followed your recipe with a few small changes to the tadka, and followed the process with the dhungar method of smoking. I cannot tell you how much it tastes like authentic dhaba dal. You simply must try it! In case you haven’t tried it already, I’ll outline the process for you. All you need to do it place a small katori in the middle of the dal dish (making sure it doesn’t sink right in), place a small piece of red hot charcoal in the katori and then pour a teaspoon of ghee over the hot coal. As soon as it starts to smoke, seal the dal dish with a lid and let the smoke impart its flavor to the dal. After the smoke has settled, remove the lid, discard the coal, pour the ghee from the katori into the dal and mix well. You’re gonna love this!
Hey Meera, you can absolutely call me di 🙂 This is the cutest message I’ve ever received and I’m so glad you liked the dal! I miss dhaba food so much here in Bangalore that I keep trying to recreate the flavours at home. I hope you like the brownies too. Send me a picture when you make them <3
Richa di, can I call you Richa di?(I’m just 16) This dal was bomb! So true to the dhaba spirit. And I love your blog, going to try the eggless-boisterous-Karan brownies soon.
Thank you for your kind words Aparna 🙂
Hey Richa, I can so relate to your yellow dal story, it was a regular In our house too.. you also reminded of my college time , when dhaba trips were regular.. Thanks for the lovely post and pics.