Soft Rotis – How to make them at home
on Apr 07, 2020, Updated Sep 26, 2024
This post may contain affiliate links. Please read our disclosure policy.
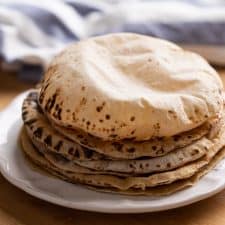
I’ve grown up eating soft rotis and here’s my guide to making them at home. Also called chapatis / phulkas / rotli, these two ingredients Indian flatbreads are magical because they are fast, easy and so satisfying.
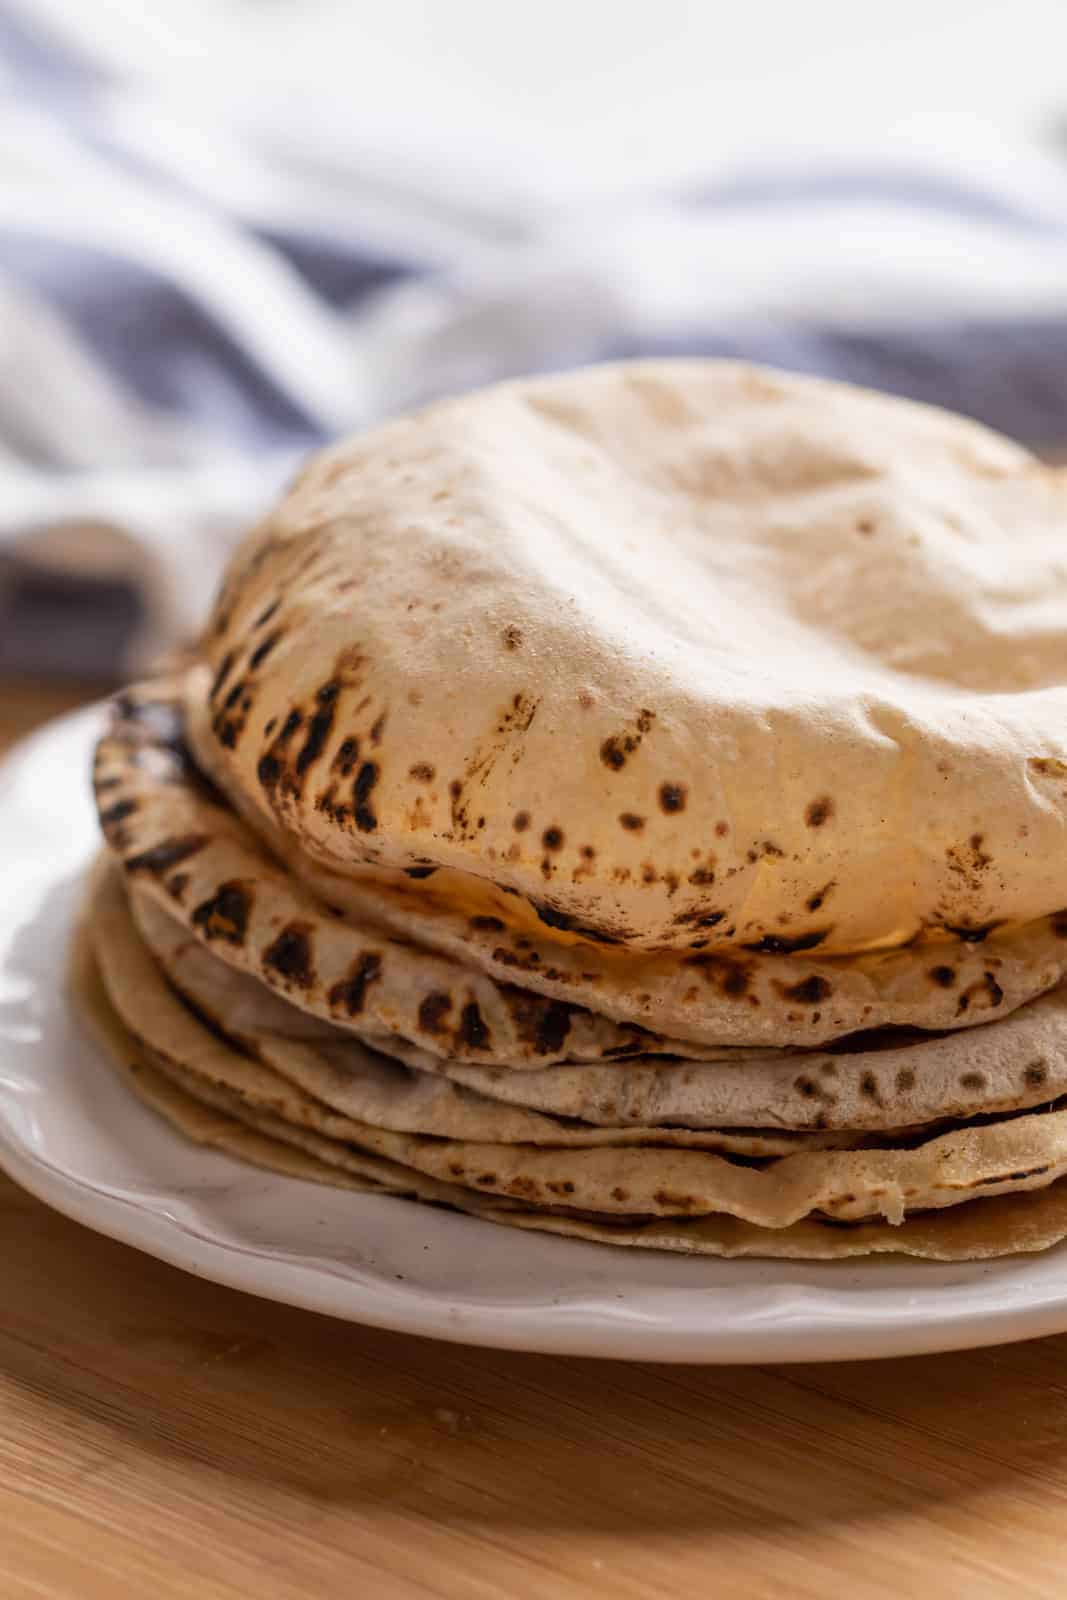
Yes, I said it. I think rotis are magical. Because they are made with one ingredient – wholemeal wheat flour (atta) and water if that counts as an ingredient. You don’t need any leavening agents like yeast or baking soda or even yogurt. All you need is some practice and patience.
Growing up, we had rotis every single day so I would like to think that I have a fair experience in everything rotis. And that’s what I’m sharing today – everything I know about making soft rotis at home. Lets go one by one.
jump to section: How to make Rotis
Steps For Roti Dough
Dough for Rotis
The dough for rotis or chapatis is made with two simple ingredients – wholemeal wheat flour or atta, and water. Some people add a pinch of salt (I do that sometimes), some add a little oil, but mostly, I prefer them without any of these. The rough estimates for flour to water is given in the recipe below.
Kneading the Dough
It’s important that the dough is smooth, soft and pliable. This means that when you press down on the dough, you don’t face too much resistance, and when you press it with your fingers, it should leave an indentation. The dough should not be sticky or too dry. It should feel smooth to touch. Once you mix the flour and water, knead using your knuckles and palm. Stretch the dough with your palms, bring it back with your fingers, knead with your knuckles and repeat till it feels soft.
Water in the dough
Water in this dough plays a really important role. It created steam when the rolled out rotis are placed on heat and that’s what makes them puff up. How cool is that. So I like to add a few extra drops of water as I knead and keep kneading for a while. The atta (flour) keeps absorbing the water. So the more water you can integrate into the dough without it becoming sticky, the better it is.
Resting the dough
Over time I’ve realised that while resting the dough is not critical to making good rotis, it’s definitely helpful. Resting the dough does just that – it helps the dough come together, smoothen out even further and helps the dough become more pliable, easier to roll, and produces softer rotis.
Rolling out rotis
This might be the tricky part and honestly this comes with practice and patience. In the beginning, don’t get hung up on the shape of the rotis. As long as they are somewhat circular, you are good to go. A small lime sized ball is enough, make sure its smooth and round as you start (watch the video for this), and then roll them out gently with a rolling pin. Too much pressure and your roti might tear and too little pressure and your roti might not flatten out evenly.
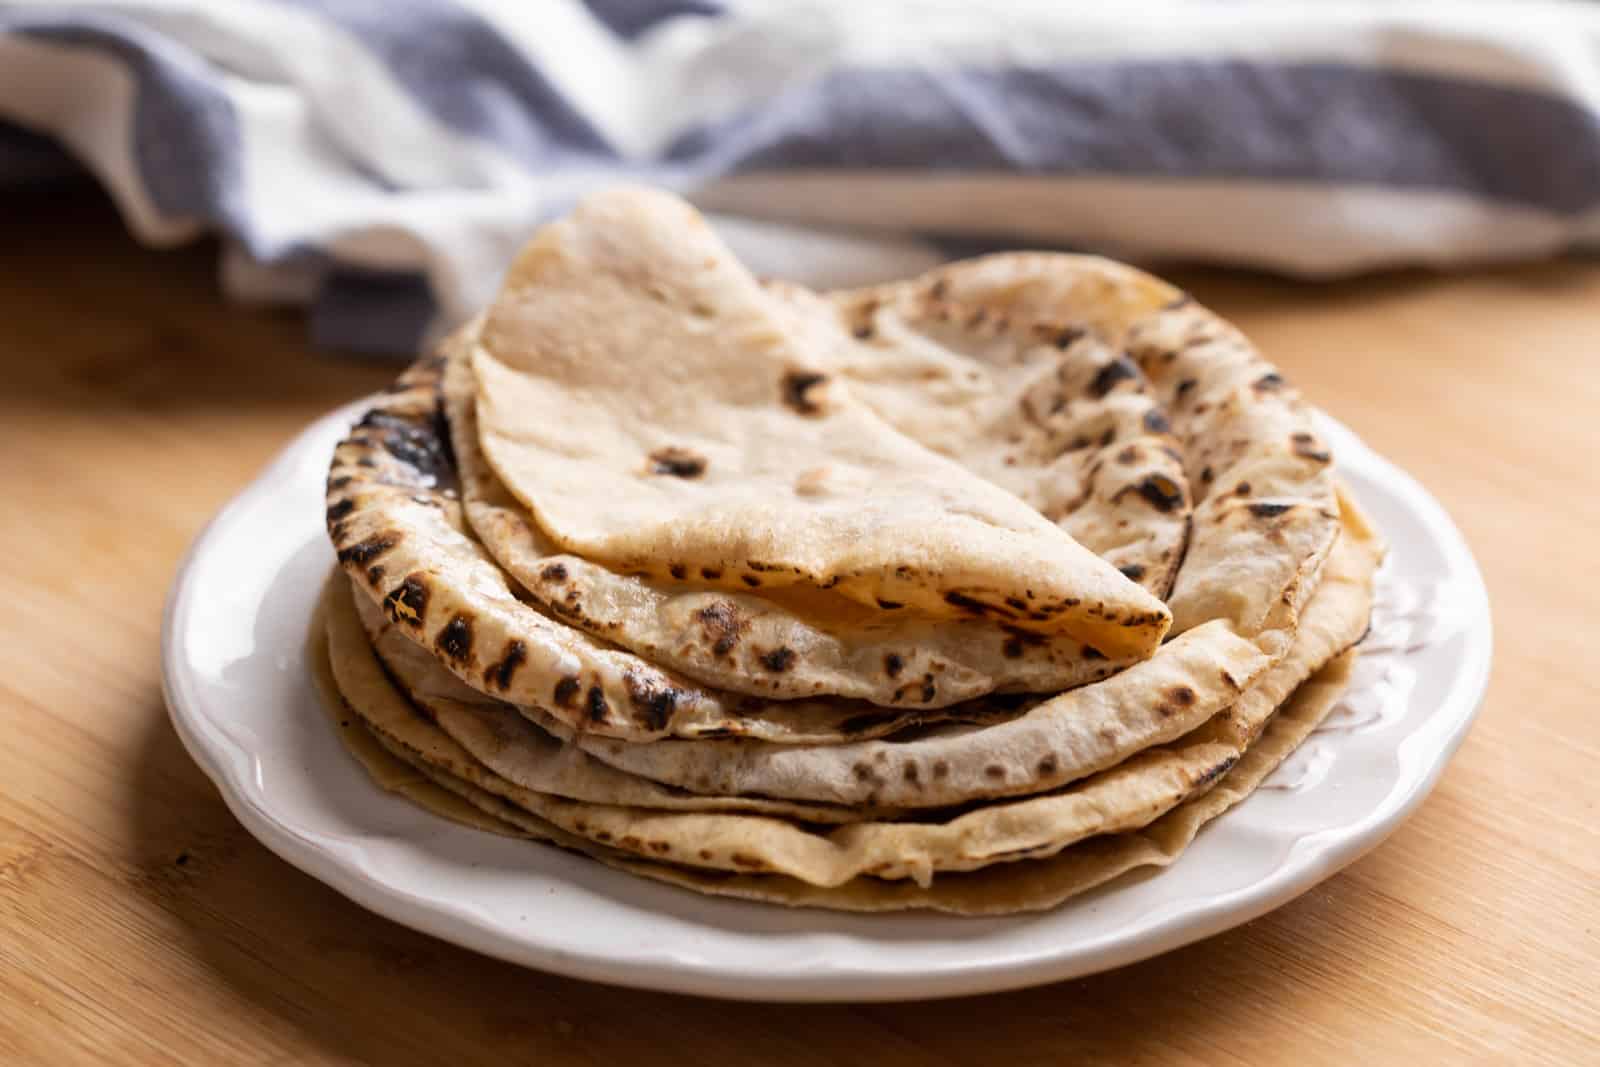
Cooking Soft Rotis
Start on a hot tawa or skillet when you cook them. If your skillet is not hot enough, the rotis will take too long to cook and this will dry them out. You start rotis on a tawa, and finish them on an open flame to puff them up. If you don’t have an open flame, you can press down gently with a cloth along the sides and they will start to puff up on the skillet.
I like to finish off hot rotis by smearing them with ghee. I can’t have rotis without it. If you don’t have ghee, you can make some at home with my homemade ghee recipe. And if that’s not possible, just smear them with some butter.

I have a FAQ below the recipe card that you can refer to, which has answers to more questions.
But most importantly, remember – making soft rotis at home takes some practice and patience. A few tries, and you’ll be making them like a pro!
Rotis are best enjoyed with
- Dhaba Style Dal Fry
- Veg Jalfrezi
- Potato Cabbage Fry
- Creamy Matar Paneer
- Bhindi Masala
- Aloo Gobi Masala
Watch How To Make Soft Rotis Video
Soft Rotis – How to make them at home
Ingredients
- 2 1/2 cups Atta / Wholemeal Wheat Flour, set aside 1/4 cup flour for dusting
- 3/4 cup Water, lukewarm (approx)
- 1-2 teaspoon Ghee , to smear on rotis
Instructions
- To make the dough, place the flour in the center of a wide mouthed bowl or a plate with a high rim. Make a well in the center and add 1/4 cup water. With your fingers, mix the water and flour together; add another 1/4 cup water and mix. Do the same thing again till the dough starts to roughly come together. If the dough is too dry, add a teaspoon of water at a time. Once the dough comes together, start kneading the dough, alternating between your palms and your knuckles. Press it down with your palm, pull it with your fingers and then pull it back. Use your knuckles to press down on the dough, making indentations and repeat till the dough is soft and pliable. This should take 3-4 minutes. I like adding a few drops of water and kneading and i repeat this process 2-3 times.
- Once the dough is ready, cover it with a barely damp cloth and rest it for 15-20 minutes.
- While you roll the dough, put a tava on the stove and let it pre-heat. To roll the dough, take a small lime sized piece of dough and smoothen it into a ball between your palms. Place it on a rolling board or the kitchen counter and gently press it down to flatten it. Now dust the dough gently with dry atta and start rolling it. Move the rolling pin along the length, pressing gently as you go. If your roti feels sticky at any point, dust it with some dry flour. Keep rotating the roti in a circular motion and rolling till its approx 5-5.5 inches in diameter and is evenly rolled out.
- Make sure the tawa or skillet has heated evenly before you start cooking rotis. It should be hot, but not smoking. Place the roti in the center of the tawa. Wait till you see bubbles on the surface. Once the bubbles form, flip the roti. Once you see bubbles on the other side, use a pair of tongs to flip again and transfer the roti to an open flame. In less than 5 seconds, you'll start to see the roti puff up. Flip again to cook the other side, and remove from the heat. If your roti doesn't puff up, don't worry, just cook it till you see brown spots.
- While they are still hot, smear the rotis with ghee so that it melts. Stack them one on top of the other. The residual heat, keeps them soft, and prevents them from drying out.
- Make sure the tawa or skillet has heated evenly before you start cooking rotis. It should be hot, but not smoking. Place the roti in the center of the tawa. Wait till you see bubbles on the surface. Once the bubbles form, flip the roti. Once the bubble form on this side, take a soft cloth or towel and start pressing down lightly on the roti, rotating it as you go. It will start puffing up as you press. Roti is cooked when you see light brown spots on both sides. Smear it with ghee or butter while it's still hot, and serve immediately.
Video
Notes
- Water: Different brands of water soak up different amounts of water. Increase or reduce the water by a tablespoon or two if required
- Storing the dough: The dough can be stored in an airtight container in the fridge for up to two days. The colour might darken slightly, but that doesn’t mean the dough is spoiled. Don’t use the dough if it starts to smell sour.
- Substitutes for water: The dough can also be kneaded with milk, whey or vegetable stock. Different people prefer different liquid for kneading.
- Multigrain Atta: Using multigrain atta might result in crisper, slightly denser rotis that may not be as soft. Plain, whole wheat flour produces the softest rotis
- Freezing rotis: Plain rotis (without ghee) can be frozen up to 3 months by stacking them on top of the other with a layer of parchment paper in between them. I’ve detailed this process below the recipe card.
- Storing cooked rotis: Cooked rotis, smeared with ghee, can be stored, wrapped in a soft cloth or aluminium foil outside for a day. I prefer storing them in an airtight container on the kitchen counter. We even snack on them during the day.
Nutrition
Frequently Asked Questions
These are mainly different names for the same thing. Up north these are called rotis, down south people prefer chapati, in Gujarat they are called phulkas or rotlis.
Rotis are a great source of fiber and when consumed with dal and sabzi, they make a wholesome meal
Rotis can become hard if they haven’t been kneaded with enough water, and the dough isn’t soft and pliable to start with. Another reason for them becoming hard is if the tava or skillet wasn’t hot enough to start with.
Puffed up rotis take practice and patience. A few reasons could be that the dough wasn’t soft, the tava wasn’t hot enough, or they weren’t rolled out evenly and had thick and thin spots. But seriously, keep trying and soon enough, you’ll be making beautiful rotis. Its a skill once learned, will last you a lifetime.
Rotis or chapatis can be easily frozen. Cook them, and then stack them one on top of the other with parchment paper between each roti – this helps them from sticking to each other. To freeze rotis, make sure to use rotis without ghee. I prefer making stacks of 6-8 so that they can be defrosted for a single meal. Once you have a stack, wrap it in a foil, place it in a ziplock and place it flat in the freezer. After a few hours, once the rotis are frozen you can move it around your freezer. To defrost, place the foil wrapped rotis in the fridge overnight and heat them on the tava. Or you could take them out of foil, and microwave them for a few minutes.


Lovely way you taught it
Thanks for leaving a comment! Soooo glad you liked it Dolly
Chapattis sound so basic in Indian households but it takes a lot of practise and can be quiet technical.
I love the way you have explained each technical aspect right from the role of water and touched on points that many you tube videos don’t explain! Really shows your passion for food.
Great video and you have such a sweet smile 🙂
Thank you so much Kim. I’m glad you found this helpful
2 1/2 cups Atta / Wholemeal Wheat Flour set aside 1/4 cup flour for dusting
Hi.You’re a breath of fresh air :). I have a question. The 1/4 cup flour for dusting is separate from the 2 1/2 cups of atta used for kneading right?
That’s right, Seema!
Hi Richa – Are Rotis like Naan? That is the only Indian bread I’m familiar with & I love it. This article is perfect timing for me. I’ve been wanting to try some Indian cooking, so am looking forward to your recipes!
Thank You
Hey Rebecca, that’s awesome to know. Rotis are not the same as naan. Rotis are thin & soft, Naan is thick & fluffy.
Roti is made of whole wheat flour & naan is usually made of all purpose flour. Do leave a comment when you try the recipe.
madam, Namasthe!
It is not the issue how you made chapathis as I see
but the way you explained how to make them with such
sweet way as though you are our family member it is worth
to put on the comment.
I wish you and your family a happy situations every moment
and pleasant life ever!
Thank you so much Jayaram!
I tried this method and my rotis came out so soft and perfect! I always struggled with making perfect, soft rotis. Thanks, Richa, for sharing this method.
Very nicely explained, thank you. Good job .☺
Simple easy to learn
Thank you Mahesh!
I enter your website regularly almost every day. You have some great articles. I Love Your Suggestions. Thanks.
Good to know that works too! I learn so much from you as well! Keep it up great post.