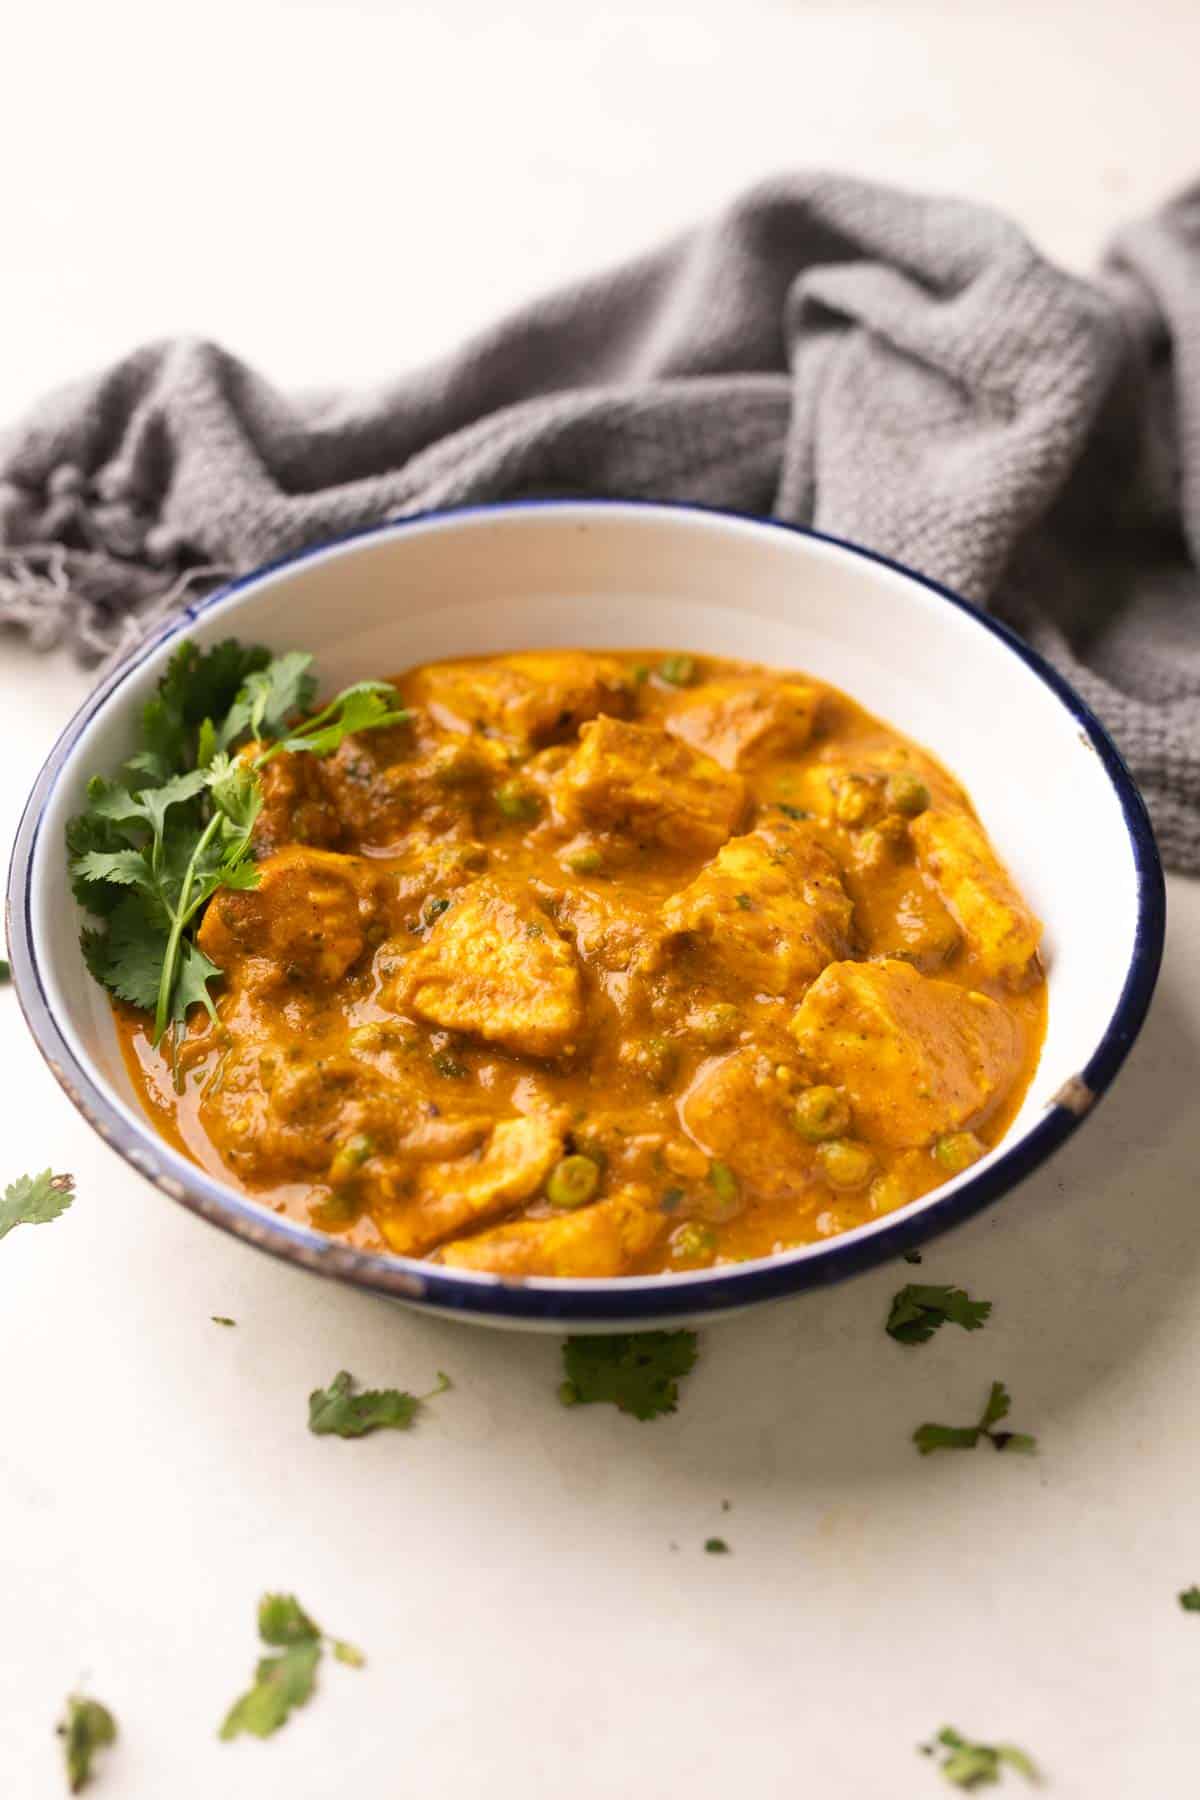
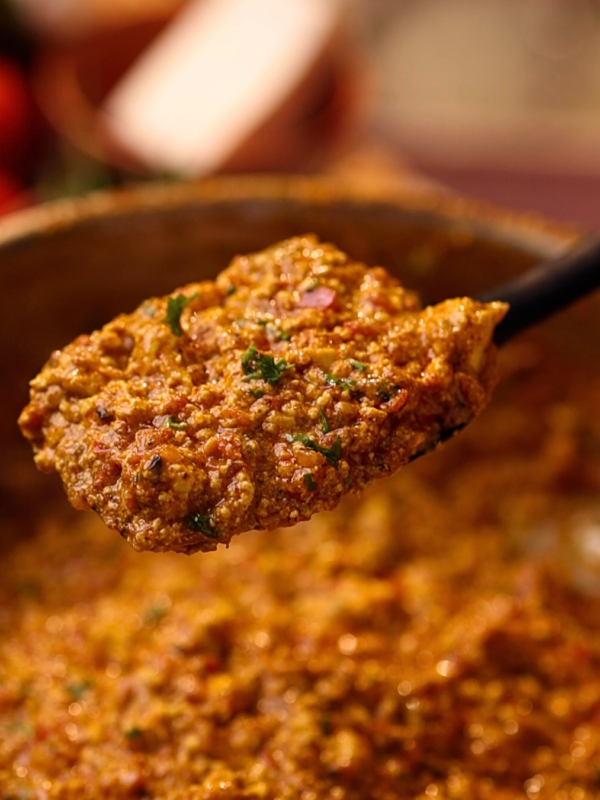
Creamy Matar Paneer Curry
on Mar 03, 2023, Updated Apr 12, 2023
This post may contain affiliate links. Please read our disclosure policy.
This Creamy Matar Paneer Curry is the kind of recipe that will save the day when those random paneer cravings strike! Its super quick, yummy and is gluten free! All you need is a handful of pantry staples and 30 minutes to put this dish together, making it a perfect dinner option! Nothing beats a creamy, comforting and luscious curry, isn’t it!?
Love Paneer? Try my Shaam Savera | Palak Paneer Kofta, Shahi Paneer, Paneer Lababdar – Creamy Paneer Curry or Authentic Saag Paneer Recipe!
Welcome to my second favorite way to eat paneer – creamy matar paneer curry. Because everyone needs an easy paneer recipe in their life and this one right here is everything that a good paneer curry should be – creamy, comforting, luscious.
Is it weird that I always have a block of paneer lying around in the fridge? Soft, delicious Homemade paneer for when I have the patience, but mostly store-bought because I’m a little lazy like that.
I’m not a big fan of green peas or matar as we call it in Hindi but in this curry, I kinda need them. It’s just how the world works for me. When you want a quick and easy way to cook paneer, it’s always matar paneer aka cottage cheese and green peas curry. I’ve tried this with potatoes (aloo matar paneer) and mushrooms (mushroom matar paneer) and those two rank a close second and third position but my first love – this matar paneer.
Here’s Why You Need To Make This Curry ASAP
- Has a luscious, creamy gravy that’s surprisingly light and delicious
- A super quick and yummy dish that comes together in a jiffy
- Makes for the perfect weeknight dinner or as a quick meal for unexpected guests
- Can be put together with just pantry staples
- It is a perfect way to include green peas in your family’s diet
- Since it doesn’t have any cashews or cream, this dish is not just light, but healthier too
- It’s a 100% vegetarian and gluten-free recipe, which can easily be made vegan by replacing paneer with tofu and curd with coconut milk
Quick Walk Through: Matar Paneer
Ingredients you’ll need to make Matar Paneer
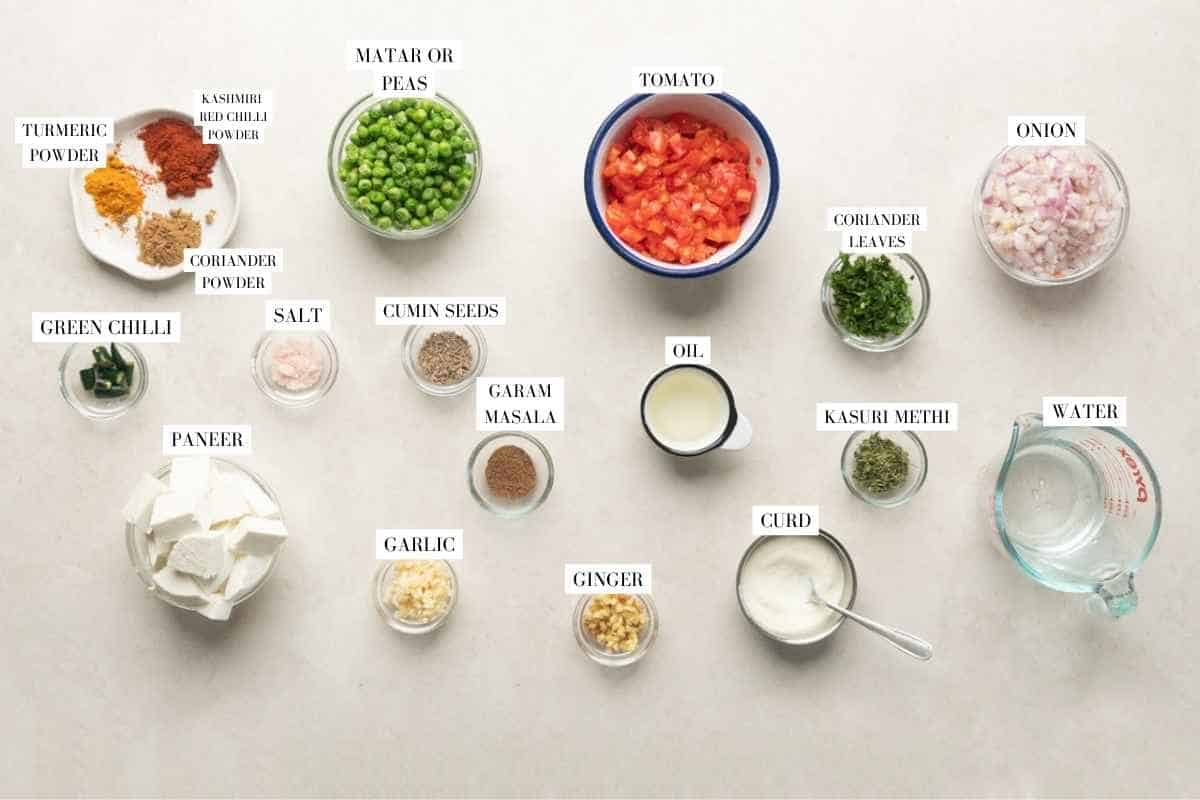
- Paneer: About 100 grams, cut into small cubes. I have used homemade paneer for this recipe, but a store-bought one works perfectly well too. Make sure to buy malai paneer though, as that will give you softer and creamier results.
- Green peas: Since green peas are in season right now, I have used fresh, par-boiled green peas for this recipe. But you can easily use frozen peas too. Simply thaw frozen peas and then boil as usual.
- Veggies: Onions and tomatoes, finely chopped, added in a 1:2 ratio.
- Spices: All you need is a handful of basic Indian spices for this recipe for flavour and spice. I have used turmeric, red chilli powder, jeera, coriander powder, chopped green chillies and garam masala.
- Yogurt: Plain Greek yogurt or hung curd works best as they are both thick and not very sour, making it ideal to achieve that luscious, creamy texture. I wouldn’t recommend subbing this with normal curd as that may make the gravy too sour and/or watery.
- Ginger and garlic: Both finely chopped for flavour and aroma.
- Oil: Any vegetable oil or neutral-flavoured oil like canola, sunflower, peanut will work for this recipe.
- Kasuri methi: Added towards the end for a beautiful, smokey flavour and enhances the taste of the entire dish. A little bit goes a way.
- Coriander leaves: Finely chopped and used as a garnishing. Adds a dash of earthy freshness to the whole dish and helps bring everything together.
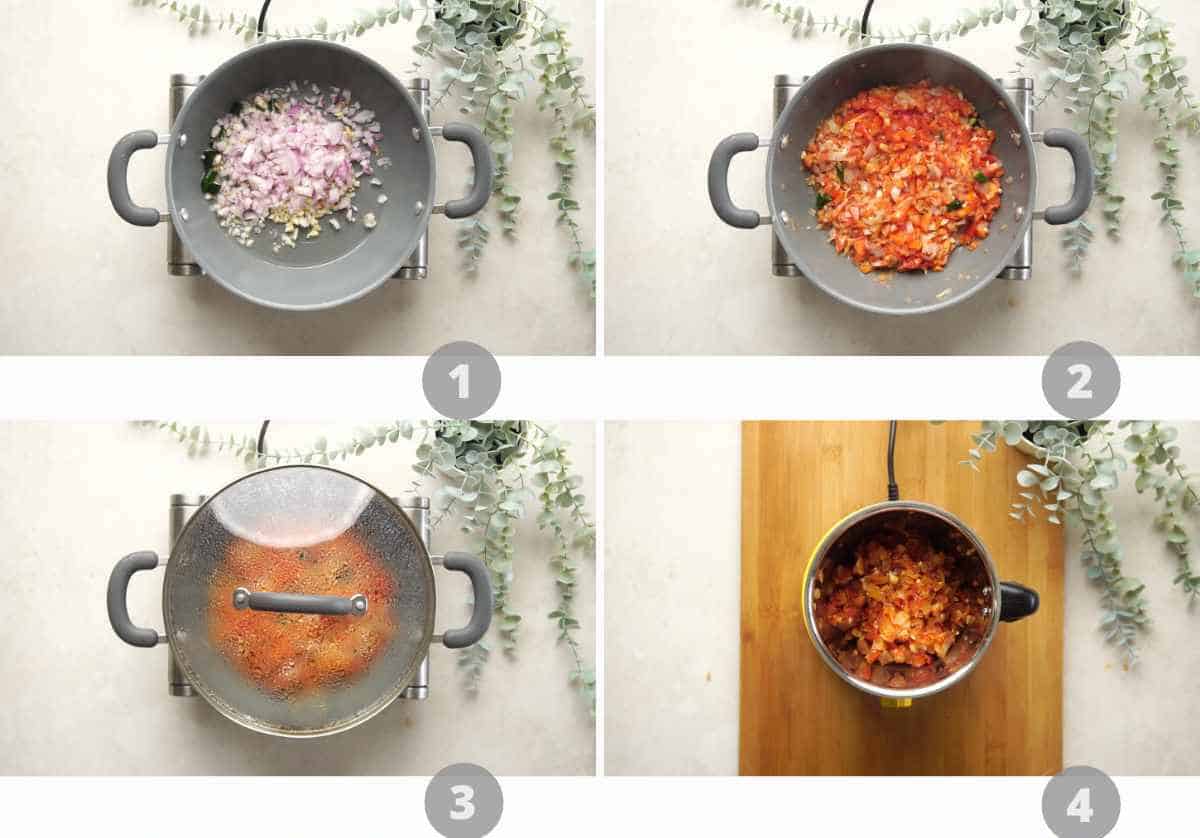
How To Make Creamy Matar Paneer Curry
Here’s a step-by-step collage showing you how to make matar paneer at home:
FAQs
I love making paneer at home whenever I can, because the result is always super soft and creamy paneer. Plus, I know exactly what’s going inside, which gives me so much peace of mind. And guess what? Making paneer at home is easier than you’d think. All you need is two ingredients, 15 minutes, and delicious, homemade paneer is ready! Here’s my easy homemade paneer recipe that I highly recommend you check out!
The main difference between kadai paneer and matar paneer is the spiciness of the gravy. Kadai paneer has a spicy gravy that’s made with frying whole and ground spices, while matar paneer is creamier with a gravy that’s made mainly with onions and tomatoes.
Absolutely! You can easily cook matar paneer ahead and store it in an airtight container in the refrigerator. But I would recommend consuming it within 2 days to make sure it retains the best flavor and texture.
However, a better to make matar paneer in advance is to make the base gravy and freeze it. On the day you’re ready to serve, simply thaw on the counter and add paneer, matar, and serve. The gravy stays well in the refrigerator for up to 3 months.
Overcooked paneer usually turns hard and rubbery. So make sure to cook the paneer for no more than 3-4 minutes at the end and then turn off the gas. Additionally, sometimes store-bought paneer can become a little hard and rubbery after cooking. But you can easily prevent this by soaking the paneer in warm water for about 15 minutes to soften it.
Top Tips To Make The Best Creamy Matar Paneer
- Avoid overcooking the paneer as it will become hard and chewy. Just a few minutes at the end should be enough.
- To make sure that the yogurt does not split while cooking, start with whisking it until it is smooth and has no lumps. Then gradually add the onion tomato mixture, one tablespoon at a time and mix it properly. After about 3-4 tablespoons, transfer this mixture to the pan to prevent it from curdling.
- Lightly rub kasuri methi in between in your palms before adding it to the pan to enhance the beautiful smokey flavour.
- Allow the onion, tomato and spices mixture to cool down completely before adding it to the mixture to avoid accidents.
- If you are in a rush, and want to make this dish even faster, you can use a hand blender to make the gravy directly in the pan. Although this may not give you the smoothest gravy, there will be no change in the taste.
Now I know everyones going to have their own secret way of making matar paneer and I’d love to know how you make yours (leave me a comment) but I prefer mine creamy and blended instead of super chunky with all the bits of onions and tomatoes separate. So I just use my hand blender to give it a quick whizz while it’s still in the pan. If you are the chunky matar paneer kinds, skip that step and you’ll be fine too.
And you know another thing that’s so great about this recipe? It’s naturally Gluten Free and you can totally make it vegan if you sub the paneer for tofu and the yogurt for coconut milk. I know there are a lot of you out there who are always looking for vegan alternatives and this one right here is a winner in that category!
That’s it! Who would have thought making delectable matar paneer would ever be this quick and easy! This dish is creamy, slightly tangy and fresh flavours are truly mouthwatering, and will even make non-paneer or matar fans fall in love! I serve my matar paneer with either hot rotis or plain rice. But this dish is super versatile and tastes amazing with naan, kulcha or even jeera rice.
Watch This Creamy Matar Paneer Curry Recipe Video

Creamy Matar Paneer Curry
Ingredients
- 3 Tablespoons Oil Vegetable Or Canola
- 2 Onion Finely Chopped
- 2 Teaspoons Ginger
- 1 Tablespoon Garlic
- 2 Green Chillies, Chopped
- 4 Tomatoes Finely Chopped
- 1 Teaspoon Jeera Or Cumin Seeds
- 1 Teaspoon Red Chilli Powder
- 1 Tablespoon Coriander Powder
- ½ Teaspoon Turmeric Powder
- 1/4 Cup Greek Yogurt Or Hung Curd
- ½ Cup Water
- 1 Teaspoon Salt, I used 1 ½ Teaspoon
- 1 Teaspoon Roasted Kasuri Methi Optional
- 1 Teaspoon Garam Masala Powder
- 250 Grams Paneer Or Indian Cottage Cheese, Cut Into 1 Inch Pieces
- ¾ Cup Par Boiled Green Peas Or Frozen Matar, Thawed And Boiled
- Salt To Taste
- 1 Tablespoon Coriander Leaves, chopped
Instructions
- Heat 2 tablespoons of oil in a pan and add onion, ginger, garlic, green chilli and saute for a 5-6 minutes till the onions are translucent.
- Add tomatoes and mix. Cover and cook for 5-7 minutes till the tomatoes are cooked through.
- Allow this to cool and transfer to a mixer. Puree this mixture into a smooth paste. Add 1-2 tablespoons of water if required.
- Heat a tablespoon of oil in the pan add cumin seeds. Once they start to splutter add red chilli powder, turmeric powder and coriander powder along with 2 tablespoons of water.
- Cook for 30 seconds and add the blended paste. Mix to combine and cook this for 7-8 minutes or till the oil starts to separate. Turn off the flame.
- Whisk yogurt in a bowl, and add the onion tomato mixture one tablespoon at a time to the bowl, mixing well after each time. After 3-4 tablespoons, transfer the yogurt mixture into the pan. This method helps avoid the yogurt curdling.
- Add ½ – 1 cup water and salt and bring this to a simmer. (I used ¾ cup of water)
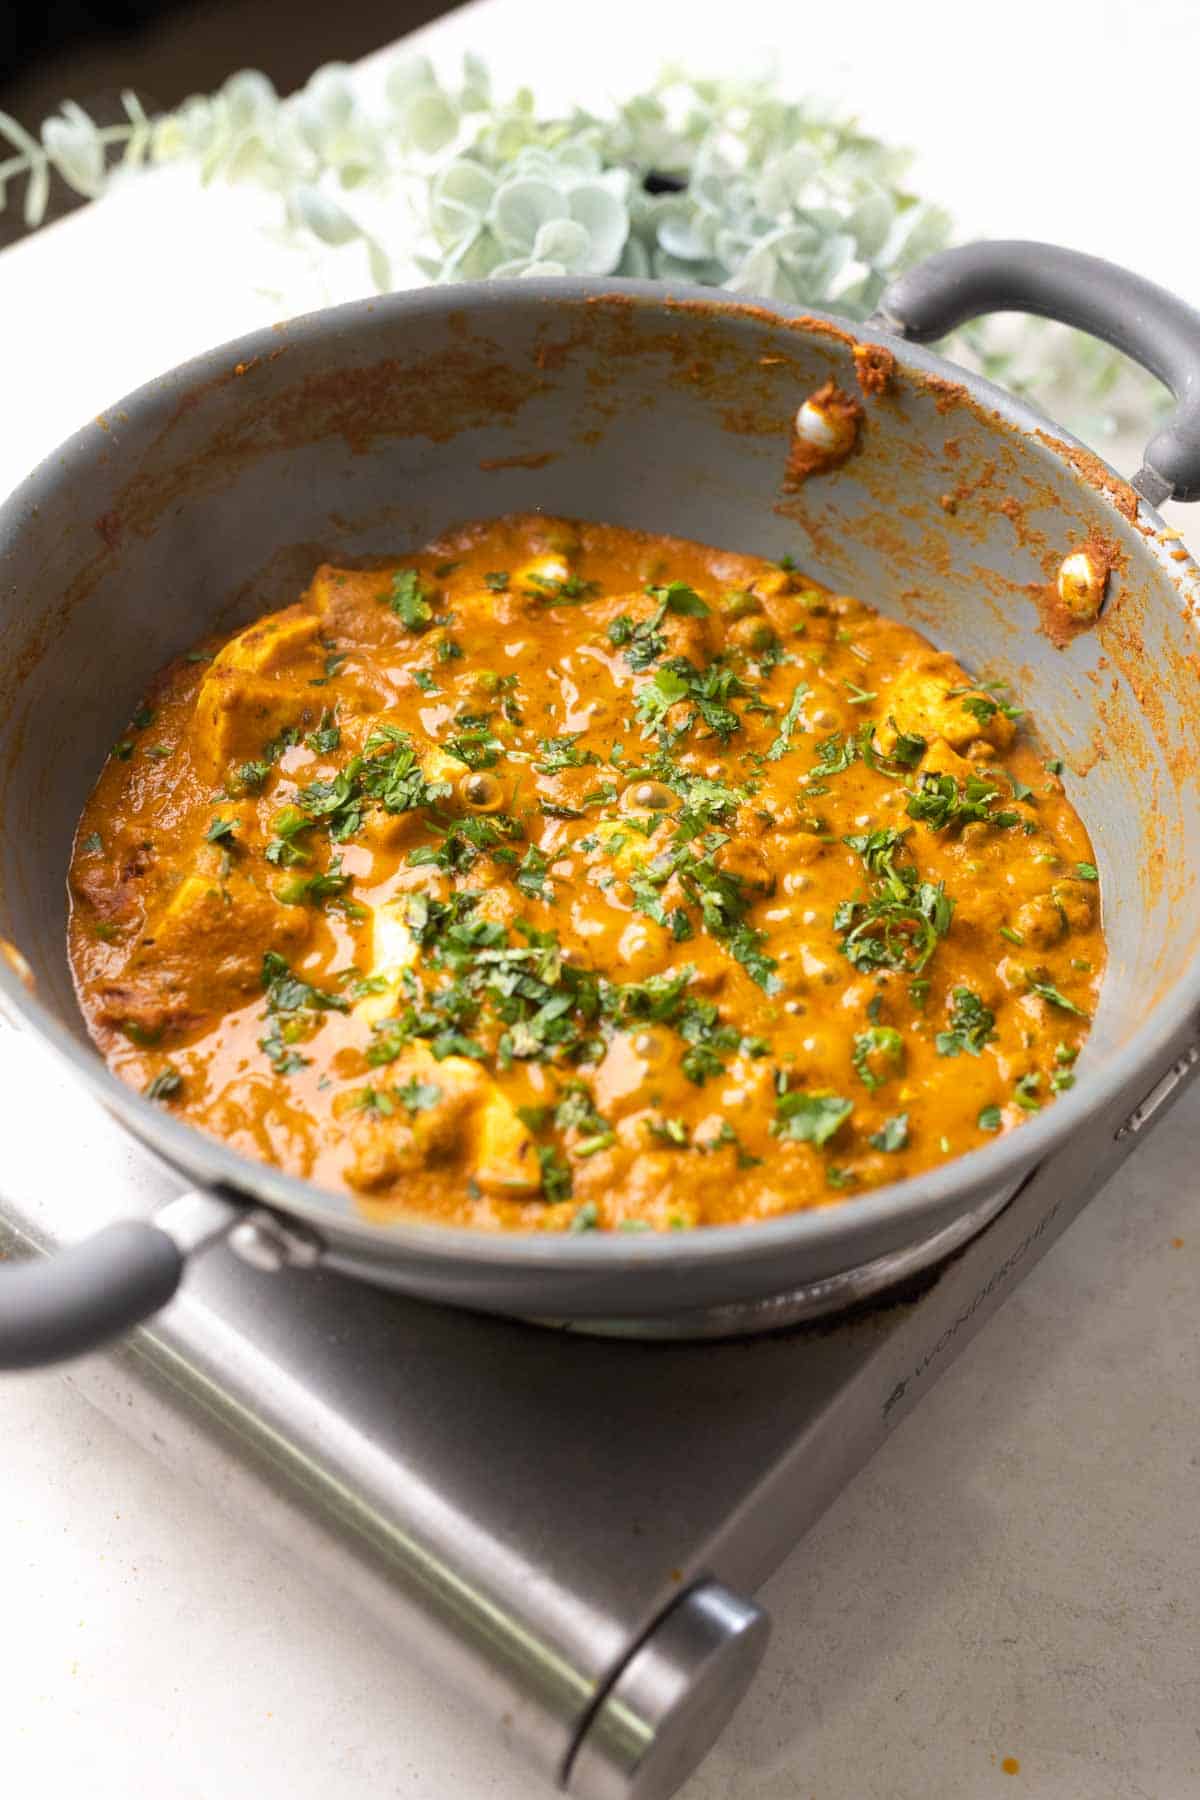
- Switch the flame back on and add peas. Mix and simmer for 5 minutes.
- Add garam masala, kasuri methi and paneer. Mix and simmer for 3 more minutes. Top with chopped coriander and serve hot.
Video
Notes
- Always combine some of the onion tomato mixture with whisked yogurt before adding it to the pan. This method helps avoid the yogurt curdling.
- Paneer: If you’d like to try and make paneer at home, you can check out this recipe. If you are using store bought paneer, submerge the packet in hot water for 10 minutes before using. This will soften the paneer.
- Garam Masala: I use homemade garam masala, but you can substitute it with any store bought garam masala. Please note that garam masala is different from curry powder

Loved this recipe. It was easy to make and absolutely delicious. The flavors took me back to the food I enjoyed while in India. I used ghee and a bit of coconut oil, tomatoes from a can (squeezed so they weren’t super wet), almost a cup of frozen peas, some extra spices to go with the garam masala, and heavy cream instead of yogurt (making it less tangy and more rich and sweet). Make sure you use enough salt so the flavors come fully out. My partner and I both agreed that the dish was restaurant quality if not better. Thank you so much for the recipe 🙂
Thanks for sharing Lauren!
Thanks for the recipe. It was easy to make and tasted great!
Thanks! Glad you liked it
What kind of tomatoes or what weight/volume of tomatoes are you using? 3 romas is a much smaller quantity than 3 beefsteak tomatoes.
Hey Kristin, I’m referring to 3 roma tomatoes, but if the ones you get there are small, increase the quantity to 4.
It came out really good. Thanks
easy but awesome
Thank you!
Can you give me a good source to get the spices for this dish. Thank you
Amazon or an Indian grocery store in your city would have these.
Great recipe! It’s simple and the flavor is really good.
Thanks so much Prakruti!
Made this last night. Your pictures look sooooo wonderfully creamy which prompted me to try it out. I was not disappointed at all. I also pan fried the paneer, reduced the yoghurt a little bit and added some heavy cream at the end. I did not have fresh peas so ended up using a frozen pea/carrot combo. Do fresh peas make it taste even better? It tasted absolutely divine and everyone loved it!!! I paired with Italian bread sliced, drizzled with butter, sprinkled with garlic powder (both sides) and pan toasted.
So so glad you liked it Fathimah! Pan Frying the paneer really takes it up a notch. And no, fresh or frozen peas taste almost the same – you wont be able to tell the difference.
Richa, for the jeera, did you use whole or powder? Trying to learn how to make more Indian dishes because of the super packed flavors they have. Had some mutter paneer at a local Indian restaurant and was like, I’m going to make this as fresh as possible. So i plan to make some fresh paneer for it as well, so if you have any tips or tricks for that I’d apreciate it. Also for the kasoori methi, would that be whole or smaller pieces as well? This would be my first step in to Indian cooking and thought it would be a good first recipe, so thank you for the recipe and help.
Hey Matthew, I just whole jeera (cumin seeds) here. I also have a recipe to make paneer at home on the blog – just search for paneer in the search bar on the site. As for kasuri methi, it’s dried fenugreek leaves. You can crush them a bit in your palm or in a food processor and add them. Let me know if you have any other questions.
Hi! For the “ginger garlic paste” can I just make a paste out of equal parts of fresh ginger and garlic or is it a specific ingredient I should look for? Thank you! I can’t wait to make this recipe!
Yes that’s basically what it is. Equal parts ginger and garlic made into a paste.
Matar paneer is one of my fave dishes to order when we go out for Indian. I have always been reluctant to make it at home in fear that it wouldn’t live up to the restaurant taste. I was drawn to this recipe because it seemed simple enough and looked oh so creamy. This recipe was easy to follow and the end result was absolutely superb! This recipe is such a keeper- I may never have to eat this out again. I pan fried the cubed paneer prior to adding it in the final step. Thanks so much for this awesome recipe.
Comments like these make my day Shereen! Glad you found a matar paneer recipe you like so much, and pan frying the paneer takes it to another level. Thanks for letting me know 🙂
What a great recipe! Fast, delicious, and easy–I’ve been looking for one this good. Thank you so much!!!
Thank you so much Anne!